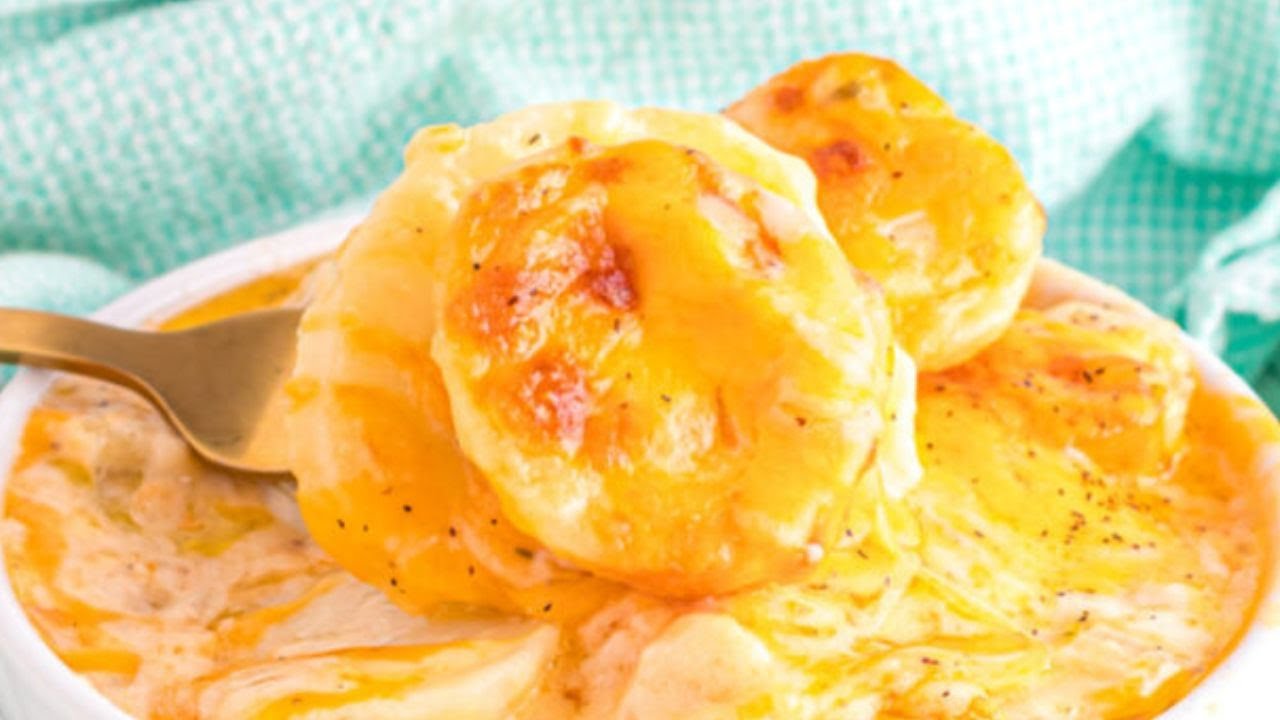
Cheesy Scalloped Potatoes Recipe: There’s just something magical about cheesy scalloped potatoes. Maybe it’s the way the creamy, bubbling cheese sauce hugs every slice of potato like a warm blanket. Or maybe it’s the golden, crusty top that practically begs for a fork dive. Either way, scalloped potatoes have earned their place at the dinner table—especially during cozy family meals, festive holidays, and potlucks where everyone’s looking for a second helping.
What makes them so special? It’s the perfect balance of creamy, cheesy, and hearty. Unlike mashed or roasted potatoes, scalloped potatoes offer layers of texture and flavor. Each bite delivers thinly sliced potatoes enveloped in a rich cheese sauce, baked until bubbly and golden. It’s indulgence in every mouthful.
What Makes This Recipe Stand Out
This isn’t just your average scalloped potatoes recipe. This one dials up the comfort factor with a homemade cheese sauce that’s smooth and packed with flavor. We’re talking about real butter, fresh garlic, a mix of cheeses, and a creamy base that pulls everything together. It’s easy enough for weeknight dinners but impressive enough for your next holiday spread.
We also include tips to avoid the common pitfalls—like watery sauce or undercooked spuds—so you can achieve restaurant-quality results right at home. And we’ll even cover make-ahead tricks, storage tips, and reheating strategies to make your life easier.
Ingredients You’ll Need
Main Ingredients for Scalloped Potatoes
Let’s break down what you’ll need to make this cheesy dream come true:
- Potatoes (preferably Yukon Gold or Russet): 4–5 medium-sized, peeled and thinly sliced
- Butter: 4 tablespoons, for the roux and richness
- Garlic: 2 cloves, minced (for extra depth of flavor)
- All-Purpose Flour: 3 tablespoons, to thicken the sauce
- Milk: 2 cups (whole milk works best for creaminess)
- Heavy Cream: 1 cup, for a luscious sauce
- Cheddar Cheese: 2 cups, shredded (sharp cheddar adds a punch)
- Parmesan Cheese: ½ cup, for saltiness and extra richness
- Salt and Pepper: To taste
- Paprika (optional): For a bit of color and kick
These basic ingredients come together to create a dish that’s both simple and luxurious. Don’t skimp on the quality of your cheese—it makes a world of difference.
Optional Add-ins for Extra Flavor
Want to level it up? Here are some tasty add-ins:
- Cooked Bacon Crumbles: For a smoky, salty twist
- Sautéed Onions or Leeks: Adds sweetness and flavor complexity
- Fresh Herbs: Thyme or rosemary can really brighten things up
- Gruyère or Fontina Cheese: Mix with cheddar for a gourmet upgrade
- Dijon Mustard: Just a teaspoon in the sauce enhances depth
These are optional, but they give you room to experiment based on your tastes or what’s already in your kitchen.
Kitchen Tools and Equipment
Essentials for Prepping and Baking
Having the right tools makes all the difference. Here’s what you’ll need to make this recipe a breeze:
- 9×13-inch Baking Dish: To layer and bake everything evenly
- Medium Saucepan: For preparing the cheese sauce
- Mandoline or Sharp Knife: For slicing potatoes thinly and evenly
- Whisk: To stir the sauce and avoid lumps
- Mixing Spoon or Spatula: For assembling your layers
- Foil: To cover during the first part of baking and prevent burning
These essentials are probably already in your kitchen, making this a low-fuss recipe with a big flavor payoff.
Optional Tools That Make Cooking Easier
Want to take it up a notch? Here are some helpful extras:
- Cheese Grater: Freshly grated cheese melts smoother and tastes better
- Cooking Thermometer: For checking doneness, especially if you’re new to baking
- Oven-safe Trivet or Cooling Rack: To safely rest your hot baking dish
These tools aren’t mandatory, but they’ll make your cooking smoother and your cleanup faster.
Step-by-Step Instructions
Step 1: Preheat and Prepare
Start by preheating your oven to 375°F (190°C). Grease your baking dish with butter or non-stick spray to prevent sticking and make serving easier. While your oven’s heating, you can gather all your ingredients and tools.
Set your butter, cream, and milk out ahead of time so they come to room temperature—they’ll blend better into your sauce. Also, make sure your potatoes are peeled and ready for slicing. Using a mandoline is a game-changer here—it ensures each slice is even, which helps them cook uniformly.
Step 2: Slice the Potatoes Perfectly
The key to getting perfectly cooked scalloped potatoes is uniform slicing. Aim for slices about ⅛-inch thick—thin enough to cook through evenly, but thick enough to hold their shape during baking. If they’re too thick, they might still be raw in the center when the top is already browned. Too thin, and they might turn into mush.
Use a mandoline slicer if you have one—it saves time and ensures precision. If not, a sharp knife will do the trick, just be patient and consistent. Once sliced, place the potatoes in a large bowl of cold water to remove excess starch. This step helps prevent sticking and gives a cleaner texture once baked. Let them sit while you make the sauce, then drain and pat them dry before layering.
Step 3: Make the Creamy Cheese Sauce
This is the heart of the dish—the cheesy, luscious sauce that transforms humble potatoes into something extraordinary.
- Melt butter in a medium saucepan over medium heat.
- Add garlic and sauté for 30 seconds until fragrant.
- Whisk in flour, forming a roux. Cook for about 1 minute, stirring constantly to avoid burning.
- Gradually whisk in milk and cream—slowly is key to prevent lumps. Stir continuously until the mixture thickens, about 5–7 minutes.
- Stir in the cheeses: Add cheddar and Parmesan in batches, letting each portion melt before adding more. Save a bit of cheese for topping later.
- Season with salt, pepper, and a pinch of paprika if you like a bit of color and spice.
The sauce should be velvety smooth and thick enough to coat the back of a spoon. If it feels too thick, add a splash of milk. Too thin? Let it simmer a bit longer to reduce.
Step 4: Layering the Ingredients
Now comes the fun part—assembling your masterpiece.
- Start with a thin layer of sauce on the bottom of your greased baking dish. This keeps the bottom layer of potatoes from sticking.
- Add a layer of potato slices, slightly overlapping, covering the whole base.
- Spoon some cheese sauce over the potatoes, spreading it evenly.
- Repeat the layers—potatoes, sauce, potatoes, sauce—until you’ve used everything up.
- Top with reserved cheese, creating that irresistible bubbly crust.
You should end up with around 3–4 layers. Press the top gently with a spatula to compress the layers slightly—this helps it bake more evenly.
Step 5: Bake to Golden Perfection
Cover the dish with foil and place it in your preheated oven. Bake for 45 minutes covered, which allows the potatoes to steam and soften without over-browning the top.
After 45 minutes, remove the foil and bake for another 20–25 minutes uncovered. This is where the magic happens—bubbling cheese, crispy edges, and that beautiful golden-brown top.
Check doneness by piercing the center with a knife—it should slide in easily. If not, cover loosely and bake for another 10 minutes. Once done, remove from the oven and let it rest for 10–15 minutes. This helps the sauce thicken and makes slicing much easier.
Tips for the Best Scalloped Potatoes
Cheese Selection and Flavor Boosts
Choosing the right cheese makes all the difference. Sharp cheddar is a classic, but mixing cheeses gives you a more complex flavor:
- Gruyère: Melts beautifully and adds nutty flavor
- Fontina: Super creamy with a mild taste
- Mozzarella: Adds stretchiness (great for texture)
- Smoked Gouda: Introduces a smoky twist
Always shred your cheese from a block. Pre-shredded cheese contains anti-caking agents that can make your sauce grainy.
To elevate the dish even more, try adding a teaspoon of Dijon mustard or a pinch of nutmeg to your sauce. These little touches add depth without overpowering the cheesy goodness.
Avoiding a Watery Sauce
One of the biggest scalloped potato mishaps is a runny, soupy bottom. Here’s how to prevent that:
- Drain and dry potatoes well after slicing.
- Cook the roux properly—this thickens the sauce and helps it bind.
- Don’t use low-fat dairy—whole milk and cream are best.
- Bake uncovered for long enough to reduce excess moisture and get that golden top.
If you still end up with some liquid, let the dish sit after baking. As it cools slightly, the sauce thickens up beautifully.
Common Mistakes to Avoid
Undercooked Potatoes
There’s nothing worse than cutting into a gorgeous scalloped potato dish only to find the center still crunchy. Undercooked potatoes are a common issue, and it often stems from slicing them too thick or not baking long enough.
To avoid this:
- Use a mandoline slicer to ensure your slices are thin and uniform.
- Pre-soak your sliced potatoes in cold water for about 20 minutes to help soften them slightly and remove some starch.
- Make sure to bake covered for the initial 45 minutes, which traps steam and helps cook the potatoes evenly.
You can always test a few slices in the center with a knife. If it slides through without resistance, you’re good to go. If you feel resistance, give it another 10–15 minutes.
Overcooked or Burnt Edges
While the top golden crust is one of the best parts, there’s a fine line between browned and burnt. If the edges start crisping up too much before the inside is cooked, it can ruin the entire presentation (and taste).
Here’s how to fix that:
- Cover the dish with foil during the first half of baking. This keeps everything moist and prevents the top from burning.
- If the top is browning too quickly even after removing the foil, tent it loosely with foil for the remainder of the baking time.
- Use a glass or ceramic baking dish, which distributes heat more evenly than metal pans.
You want a creamy center and crisp edges—not dried-out corners or raw middles.
Serving Suggestions
Perfect Pairings with Scalloped Potatoes
Scalloped potatoes are hearty, rich, and indulgent, so pairing them with the right mains and sides is key. Here are some winning combinations:
- Roast meats: Prime rib, baked ham, roast chicken, or turkey are all natural companions.
- Grilled vegetables: Think green beans, asparagus, or brussels sprouts to balance the richness.
- Salads: A fresh garden salad or tangy slaw adds a crisp, refreshing contrast.
- Light soups: Serve with a broth-based soup to make it a complete meal.
For a vegetarian twist, pair with sautéed mushrooms, grilled tofu, or a hearty lentil loaf.
Serving for Holidays and Gatherings
Scalloped potatoes shine on special occasions. They’re a staple on holiday tables—Christmas, Thanksgiving, and Easter wouldn’t be complete without them.
Tips for large gatherings:
- Double the recipe and use a larger baking dish or two 9×13 pans.
- Make ahead and reheat just before serving (more on this next).
- Garnish with fresh herbs like parsley or chives for a pop of color and freshness.
They also travel well, making them a great option to bring to potlucks or family dinners.
How to Store and Reheat
Keeping Leftovers Fresh
Leftover scalloped potatoes? Lucky you! These reheat beautifully if stored properly.
Here’s how:
- Cool completely before refrigerating.
- Store in an airtight container or cover your baking dish tightly with foil or plastic wrap.
- Refrigerate for up to 4 days.
Avoid leaving them out too long after serving—cool and store within 2 hours to keep them safe and fresh.
Reheating Without Drying Out
The key to good reheating is moisture retention. Here’s how to do it:
- Oven method (best): Preheat to 350°F. Cover with foil and heat for 20–25 minutes until warmed through. Add a splash of milk or cream if the sauce looks too thick.
- Microwave method (quicker): Transfer a portion to a microwave-safe dish, cover loosely with a microwave-safe lid or paper towel, and heat on medium for 2–3 minutes. Stir halfway for even heating.
Avoid over-microwaving, which can turn the edges rubbery and dry.
Make-Ahead Tips
Freezing Before or After Baking
Yes, scalloped potatoes freeze well! This is great for meal planning or prepping for a big event.
Here’s how:
- Before baking: Assemble the dish, cover tightly with foil and plastic wrap, and freeze for up to 2 months. Thaw in the fridge overnight, then bake as usual.
- After baking: Let cool completely, then wrap well and freeze. Reheat in the oven at 350°F for 30–40 minutes, covered.
Always label your containers with the date and contents to avoid freezer mysteries!
Prepping a Day in Advance
Short on time the day of your event? No problem.
- Fully assemble your scalloped potatoes the night before.
- Cover and refrigerate overnight.
- The next day, let it sit at room temperature for 30 minutes, then bake as directed.
This not only saves time but can also enhance the flavor as the ingredients meld together.
FAQs about Cheesy Scalloped Potatoes Recipe
Can I use different types of cheese?
Absolutely! Cheddar is classic, but Gruyère, Fontina, Mozzarella, or even Smoked Gouda work great. Mix and match for deeper flavor.
Can I make scalloped potatoes without cream?
Yes. Substitute with all milk, or use a mix of milk and evaporated milk. It’ll still be rich but slightly lighter.
How do I fix a runny sauce?
Let the dish rest after baking to thicken up. If it’s still too thin, next time make sure your roux is properly cooked and use full-fat dairy.
Are scalloped potatoes gluten-free?
Not by default due to the flour in the roux. To make them gluten-free, use a gluten-free flour blend or cornstarch.
How long can I store leftovers?
Store in the fridge for up to 4 days in an airtight container. For longer storage, freeze for up to 2 months.
Conclusion
Cheesy scalloped potatoes are the ultimate side dish—creamy, cheesy, and comfort food at its finest. Whether you’re cooking for a holiday crowd or just spicing up a weeknight dinner, this recipe never fails to impress. By following each step, avoiding common mistakes, and using the tips provided, you’ll serve up golden, bubbly perfection every time.
It’s more than just potatoes and cheese—it’s a warm hug in casserole form. So go ahead, grab that baking dish, and let the cheesy goodness begin.