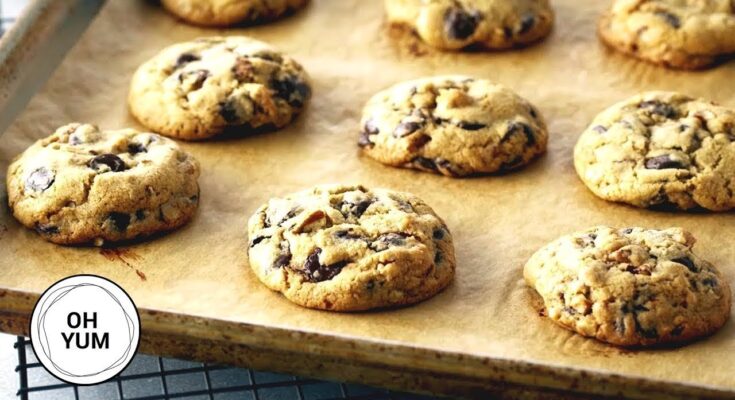
Brown Butter Chocolate Chip Cookie Recipe: If you’re a chocolate chip cookie lover, prepare yourself for a flavor revelation. Brown butter chocolate chip cookies take the classic treat and elevate it into something rich, nutty, and utterly irresistible. Brown butter, or beurre noisette as the French call it, is simply butter that’s been gently cooked until the milk solids turn golden brown and release a deeply aromatic, nutty smell. This simple tweak does wonders for your cookies—it infuses them with a complexity that regular melted butter just can’t achieve.
But don’t worry—if you’ve never browned butter before, this guide will walk you through each step like a pro. We’ll cover everything from selecting ingredients to baking the perfect batch. So grab your mixing bowls, and let’s get baking!
Why Brown Butter?
Deeper Flavor Profile
Regular butter brings richness, but brown butter offers layers of flavor. When butter is browned, it undergoes the Maillard reaction, a chemical process that develops a roasted, almost caramel-like flavor. It adds a toffee-like depth that’s the secret behind those gourmet bakery-style cookies.
What’s great about this trick is that it amplifies sweetness and balances it with a mild, savory edge. It complements the gooey chocolate chips like nothing else. If you’ve ever bitten into a cookie and wondered how they made it taste “next-level,” brown butter might be the answer.
Enhanced Aroma and Texture
You’ll notice the difference as soon as the butter hits the pan. That nutty aroma? It’s pure gold. And when baked, the result is a chewy, slightly crisp-edged cookie with a soft, tender center. Brown butter also helps cookies hold their shape better while giving them a rustic, golden hue.
It’s the kind of upgrade that requires no fancy equipment, just a bit of time and patience.
Ingredients You’ll Need
Making brown butter chocolate chip cookies requires a few pantry staples, but the quality of each ingredient can really affect the final result. Here’s what you’ll need:
Dry Ingredients:
- 2 ¼ cups all-purpose flour
- 1 tsp baking soda
- 1 tsp sea salt (or kosher salt for balance)
- Optional: ½ tsp cinnamon for added warmth
Wet Ingredients:
- 1 cup (2 sticks) unsalted butter (for browning)
- 1 cup packed brown sugar
- ½ cup granulated white sugar
- 2 large eggs (room temperature)
- 2 tsp pure vanilla extract
- 2 cups semi-sweet or dark chocolate chips (or chunks)
You can also add mix-ins like chopped walnuts or pecans if you like a nutty bite.
Tools You’ll Need
Before diving into the baking process, get your tools ready:
- Medium saucepan (for browning butter)
- Mixing bowls (one large, one medium)
- Whisk and spatula
- Electric hand mixer or stand mixer (optional but helpful)
- Baking sheets
- Parchment paper or silicone baking mat
- Cooling rack
- Cookie scoop (for even portioning)
Having everything on hand will streamline your process and ensure nothing gets forgotten in the middle of mixing.
Step-by-Step Brown Butter Preparation
This is where the magic starts—browning the butter perfectly. Here’s how:
Melting the Butter
Start by cutting your unsalted butter into even chunks so it melts uniformly. Place it in a light-colored saucepan (so you can monitor the color change easily) over medium heat. Stir frequently to prevent burning.
Watching for the Browning Point
As the butter melts, it will foam up, and then the foam will subside. Keep stirring—this is where the milk solids begin to toast. You’ll notice brown flecks forming at the bottom, and the aroma will shift from creamy to nutty and fragrant. Once it reaches a golden brown color and smells like toasted hazelnuts, remove it immediately from the heat. This usually takes about 5–7 minutes.
Be vigilant—brown butter can go from perfect to burnt in seconds.
Cooling It Down
Pour the brown butter (including the brown bits—that’s the flavor!) into a heatproof bowl and let it cool for 10–15 minutes. You don’t want to mix it with eggs while it’s hot, or it could cook them. Cooling also helps you control the dough consistency better.
Mixing the Dough
Once your brown butter is cool and ready, it’s time to start assembling your cookie dough. This step determines the texture, flavor distribution, and overall success of your cookies.
Combining Dry and Wet Ingredients
In a medium bowl, whisk together the dry ingredients—flour, baking soda, and salt. If you’re adding cinnamon, mix it in here as well.
In a separate large mixing bowl, combine the cooled brown butter with the brown sugar and granulated sugar. Use a whisk or an electric mixer to beat the mixture until it becomes light and slightly fluffy—about 2–3 minutes. This aeration adds chewiness and helps the sugar dissolve properly.
Next, add the eggs one at a time. Beat each one in fully before adding the next. Then stir in the vanilla extract. The mixture should now be creamy and golden.
Gradually add the dry ingredients to the wet mixture, a little at a time. Stir gently to avoid over-mixing. Overworking the dough can lead to tough cookies. Once the flour is just incorporated, stop mixing.
Folding in the Chocolate Chips
Now the fun part—folding in the chocolate chips! You can use a mix of semi-sweet and dark chocolate for a more complex flavor, or even chopped chocolate bars if you like pools of gooey chocolate. Use a spatula to fold them in gently, making sure they’re evenly distributed throughout the dough.
At this point, you’ll have a thick, rich dough speckled with chocolate and full of promise. But don’t bake them just yet—we’re chilling next.
Chilling the Dough
This step is the secret weapon for bakery-style cookies. It might be tempting to skip it, but trust me—it’s worth the wait.
Why It Matters
Chilling the dough does several magical things. First, it allows the flavors to develop and intensify. The brown butter infuses the flour and sugars with its nutty richness, and the dry ingredients fully hydrate, leading to a more cohesive cookie.
Second, chilling firms up the fat (butter), which means your cookies won’t spread too thin while baking. This results in a thicker, chewier texture with those perfect golden edges.
Best Chilling Practices
Scoop the dough into balls before chilling—this makes it easier to bake later. Place them on a parchment-lined tray and cover with plastic wrap. Chill in the refrigerator for at least 2 hours, but overnight is ideal.
If you’re in a hurry, you can freeze the dough balls for 30–45 minutes. It’s not as effective as a long chill, but it’s better than nothing and will still improve the texture significantly.
Baking the Cookies
Now that your dough is perfectly chilled and ready to go, it’s baking time! Let’s transform all that prep work into golden, gooey goodness.
Setting the Oven Right
Preheat your oven to 350°F (175°C). Make sure it’s fully preheated before putting any cookies in—temperature consistency is crucial for even baking.
Line your baking sheets with parchment paper or silicone mats. This helps prevent sticking and encourages even browning.
Cookie Tray Spacing
Place the chilled dough balls about 2 inches apart on the tray. These cookies will spread slightly, and you don’t want them merging into a mega-cookie (unless that’s your plan!).
Bake for 10–12 minutes, or until the edges are golden brown but the centers still look slightly underdone. That soft center will firm up as they cool, giving you that chewy, melt-in-your-mouth texture.
For extra flair, sprinkle a bit of flaky sea salt on top as soon as they come out of the oven. It enhances the sweetness and adds a gourmet touch.
Letting Them Cool
You’ve waited this long—don’t rush the final step.
Rest Time and Final Texture
Let the cookies rest on the baking sheet for about 5 minutes after removing them from the oven. This allows them to finish baking from residual heat without drying out.
Then transfer them to a wire rack to cool completely. This keeps the bottoms crisp and the centers soft. If you dive in too soon, they might fall apart (though I won’t judge if you sneak one while it’s still warm!).
Once cooled, your cookies will have the perfect chewy texture with crispy edges and gooey centers—pure cookie bliss.
Tips for the Perfect Cookie Every Time
Getting consistent results every time you bake cookies takes a bit of know-how. Here are some pro tips to ensure your brown butter chocolate chip cookies turn out amazing:
- Use quality ingredients: Don’t skimp on chocolate. Higher cocoa content makes a big difference in taste. Use real vanilla extract, not imitation.
- Don’t overmix: Once the flour is added, mix just until incorporated. Overmixing can develop gluten, making your cookies tough.
- Always chill your dough: This step really can’t be overstated. It improves texture, flavor, and baking consistency.
- Test bake: If you’re unsure of your oven, bake one or two cookies first to check spread and doneness. Adjust baking time as needed.
- Room temperature eggs: Cold eggs can cause the butter to seize. Let them sit out for 30 minutes before baking.
- Scoop evenly: Use a cookie scoop to portion your dough so the cookies bake evenly. No more one burnt and one undercooked cookie on the same tray!
- Rotate trays: If you’re baking more than one sheet at a time, rotate them halfway through baking to ensure even heat distribution.
Variations to Try
Want to give your brown butter chocolate chip cookies a twist? Here are a few creative add-ins and variations to try:
Sea Salt Topping
This one’s simple but game-changing. Just sprinkle a pinch of flaky sea salt on top of each cookie right after baking. It enhances the chocolate flavor and adds a sophisticated edge.
Nutty Twists
Add ½ to 1 cup of chopped nuts to the dough. Walnuts, pecans, or macadamias work wonderfully. Toast the nuts beforehand for an even richer flavor.
Other tasty ideas include:
- White chocolate chips and dried cranberries
- Mini marshmallows and crushed graham crackers (for s’mores flavor)
- Espresso powder (1 tsp) to bring out the chocolate’s depth
Storing Your Cookies
Once baked and cooled, your cookies can stay fresh for up to a week—if they last that long!
- Room temperature: Store in an airtight container with a slice of bread (it keeps cookies soft by absorbing moisture).
- Freezing baked cookies: Freeze in a single layer, then transfer to a freezer bag. Reheat in the microwave for that fresh-baked feel.
- Freezing dough: You can also freeze dough balls and bake directly from frozen. Just add an extra 1–2 minutes to the baking time.
Serving Suggestions
These cookies are perfection on their own, but you can elevate them even further:
- With milk: The classic duo never fails.
- Ice cream sandwiches: Place a scoop of vanilla ice cream between two cookies.
- Dessert board: Pair cookies with fruit, cheeses, and nuts for a gourmet treat platter.
- Crumbled over sundaes: Add a chewy, nutty crunch to your favorite ice cream dessert.
FAQs about Brown Butter Chocolate Chip Cookie Recipe
1. Can I use salted butter instead of unsalted?
Yes, but reduce or omit the added salt in the recipe to balance flavors. Unsalted butter gives you more control.
2. How long can I chill the dough?
You can chill it for up to 48 hours. In fact, longer chilling enhances flavor even more.
3. Can I use this recipe for cookie bars instead?
Absolutely! Press the dough into a greased baking dish and bake at 350°F for 20–25 minutes.
4. My cookies came out too flat. What went wrong?
Possible culprits: butter was too warm, not enough flour, or dough wasn’t chilled long enough.
5. How can I make the cookies softer?
Add an extra egg yolk or a tablespoon of cornstarch to the dough for a softer, puffier cookie.
Conclusion
Brown butter chocolate chip cookies are more than just a twist on a classic—they’re a delicious upgrade that delivers gourmet flavor from your own kitchen. With rich, nutty butter, gooey chocolate, and perfectly chewy centers, this recipe will become your go-to for impressing guests or satisfying your own sweet tooth.
Every step, from browning the butter to chilling the dough, makes a big difference. Don’t rush the process. Enjoy it. Because baking is just as much about the experience as it is about the end result.
So go ahead—pour yourself a glass of milk, grab a warm cookie, and savor the magic of brown butter.


