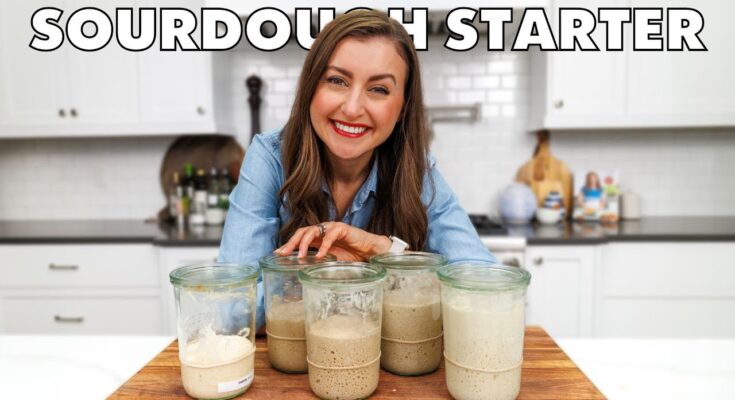
Best Sourdough Starter Recipe: There’s nothing quite like the smell of fresh, homemade sourdough bread wafting through your kitchen. But before you can get to baking that perfect loaf, it all starts with a strong and healthy sourdough starter.
This step-by-step guide will walk you through how to create your very own bubbly, active starter from scratch. Whether you’re a seasoned baker or just starting out, this recipe is simple, natural, and highly rewarding.
Introduction to Sourdough Starter
A sourdough starter is essentially a living culture of flour and water that ferments over time, cultivating wild yeast and beneficial bacteria from the environment. Unlike commercial yeast, which is a single strain, sourdough starters are teeming with microbial diversity, giving your bread its signature tangy flavor and crusty texture.
Why should you care about sourdough? Because it’s not just about flavor. Sourdough is easier to digest, often more nutritious, and can even be more shelf-stable than breads made with instant yeast. Plus, nurturing a sourdough starter can feel like having a tiny, bubbling pet on your counter—it’s alive, it’s active, and it needs a little TLC.
A lot of people assume sourdough is complicated, but here’s the truth: all you need is flour, water, patience, and a bit of consistency. The magic comes from the air around you and the natural microbes in the flour.
Ingredients You’ll Need
One of the most beautiful aspects of sourdough baking is its simplicity. To start your sourdough journey, you only need two ingredients:
- Flour
- Water
That’s it. No fancy additives or commercial yeast. But the type of flour you use does matter. Whole wheat flour is ideal for starting a new culture because it contains more nutrients and natural microbes than white flour, which helps kickstart the fermentation process. You can switch to all-purpose flour once your starter is established, but beginning with whole wheat gives you a better head start.
When it comes to water, avoid anything chlorinated, as chlorine can kill the wild yeast. If your tap water is treated, let it sit out overnight or use filtered water.
Here’s a quick tip: Keep your flour in a cool, dry place and measure your ingredients using a kitchen scale for precision. Ratios matter a lot when building a consistent and stable starter.
Tools and Equipment Required
Although you don’t need much to make a sourdough starter, having the right tools can make the process smoother and more consistent. Here’s what you’ll need:
Must-Have Kitchen Tools:
- A digital kitchen scale (for accurate measurements)
- Two clean glass jars or containers (16 oz or more)
- A spoon or spatula for stirring
- A clean cloth or coffee filter with a rubber band (to cover your jar)
Optional but Useful Tools:
- A rubber band or marker to track the rise
- A thermometer to monitor room temperature
- A silicone spatula (easy for scraping down jars)
Your jars should be clear, so you can observe bubbles and growth each day. Avoid metal containers, as the acidic environment of the starter can react with metal. Use glass or food-safe plastic instead.
Keeping things clean is essential. Wash your containers thoroughly between feedings or use a new jar to avoid contamination.
Step-by-Step Guide to Making a Sourdough Starter
Day 1: The Initial Mix
To get started:
- Mix 100 grams of whole wheat flour with 100 grams of lukewarm water in a glass jar.
- Stir until well combined and no dry flour remains.
- Scrape down the sides and loosely cover with a cloth or coffee filter secured with a rubber band.
- Leave it at room temperature (ideally 70–75°F / 21–24°C) for 24 hours.
During this first day, you won’t see much happening—but under the surface, natural fermentation is beginning. The mixture may look like a boring blob, but trust the process. You’re creating a home for wild yeast and beneficial bacteria.
Day 2: First Signs of Life
Check your jar. You might notice a few bubbles or a faint sour smell. That’s a good sign!
Here’s what to do:
- Discard about half of the starter (around 100 grams).
- Add 50 grams of whole wheat flour and 50 grams of water to the remaining mixture.
- Stir well and mark the level with a rubber band.
This process of discarding and feeding is essential. It removes excess acid and old flour while giving fresh nutrients to the yeast and bacteria.
The mixture should be slightly more active than yesterday. You might see a few more bubbles, and it might start rising and falling slightly between feedings.
Day 3 to 5: Building Strength
By Day 3, things should really start moving. If you’ve been consistent with feeding and using the right temperature, you’ll likely see more bubbles, a rise in volume, and a stronger sour smell.
Here’s your routine for the next few days:
- Discard half of your starter every 24 hours.
- Feed it with 50g flour and 50g water.
- Stir, scrape down the sides, and loosely cover.
- Keep it in a warm spot (around 70-75°F / 21-24°C).
At this point, you can switch to all-purpose flour if you’d like, or continue with whole wheat. Many bakers prefer to use a mix—half whole wheat, half all-purpose—for better balance and flavor development.
During this stage, you’re building your starter’s “muscles.” The yeast and bacteria will start forming a symbiotic relationship. You should notice that it’s doubling in size between feedings, which is a good indicator of activity and readiness.
Don’t worry if it smells strong, like vinegar or nail polish remover. That’s normal and part of the process. If there’s any mold or discoloration, start over. A healthy starter should be bubbly, elastic, and have a pleasantly tangy smell by the end of Day 5.
Day 6 to 7: Ready for Baking
On Day 6 or 7, your sourdough starter should be bubbly, doubling in volume within 4 to 6 hours after feeding, and smell slightly sweet and tangy.
To test if it’s ready for baking, do the float test:
- Drop a spoonful of the starter into a glass of water.
- If it floats, it’s airy and active—ready to bake.
- If it sinks, give it another day or two of consistent feedings.
From here on, you can switch to a twice-a-day feeding schedule (every 12 hours) to keep your starter very active, or maintain it with daily feedings if you’re not baking daily. If you’re not using it often, you can store it in the fridge and feed it once a week.
Congratulations—you now have your own homemade sourdough starter, the foundation for rustic loaves, pancakes, pizza crusts, and more. It’s alive, and with proper care, it can last for years—even decades!
Tips for a Healthy and Active Starter
Creating a sourdough starter is simple, but keeping it happy takes some practice and consistency. Here are some essential tips to keep it thriving:
Feeding Schedule and Ratios
- Feed your starter at least once a day at room temperature.
- Use a 1:1:1 ratio (starter:flour:water by weight) for regular feedings.
- If you’re baking often, consider feeding it twice a day for better performance.
If storing in the fridge:
- Feed once a week and let it sit at room temp for a few hours before refrigerating.
- Always bring it back to room temp and feed it a couple of times before baking.
Understanding the Smell and Appearance
Your starter should smell pleasantly tangy or fruity. Here’s a breakdown of common scents and what they mean:
- Sweet, fruity, or tangy – Healthy
- Vinegar-like – Slightly hungry, but still okay
- Nail polish remover or alcohol – Overfermented, needs a feeding
- Rotten or moldy – Toss it out and start over
The appearance should be creamy, with bubbles throughout. A bit of brownish liquid (called “hooch”) on top is normal when it’s hungry—just stir it back in or pour it off before feeding.
Keep your containers clean, stick to your routine, and give your starter a name—it’s practically part of the family now!
Common Mistakes to Avoid
Even though making a sourdough starter is simple, there are a few pitfalls that can derail your progress. Let’s go over the most common mistakes so you can sidestep them and keep your starter happy.
1. Using Chlorinated Water
Chlorine in tap water can kill the very microorganisms you’re trying to cultivate. If you’re using tap water, make sure to let it sit uncovered for 24 hours to allow the chlorine to evaporate, or just use filtered water.
2. Inconsistent Feeding
Starters are living things—they need regular feeding to stay healthy. Skipping a day or two, or feeding erratically, will weaken the colony of wild yeast and bacteria. Set reminders if needed and stick to a schedule.
3. Not Discarding Before Feeding
This might feel wasteful at first, but discarding part of the starter before feeding ensures the microbial balance stays in check and prevents overgrowth. It also keeps the acidity levels balanced, which is crucial for good fermentation.
4. Storing in a Too-Cold or Too-Hot Environment
Too cold and the yeast goes dormant. Too hot and you risk killing the good bacteria or encouraging harmful microbes. Aim for that sweet spot—between 70-75°F (21-24°C).
5. Overfeeding or Underfeeding
Feeding too often or too little affects the starter’s health. Watch how quickly it rises and falls—this tells you when it’s hungry again. You’ll get a feel for its “appetite” with practice.
Avoiding these common blunders will keep your sourdough starter robust and reliable for years to come. Remember, consistency is key.
Storing Your Sourdough Starter Long-Term
Once your starter is active and bubbly, you might wonder—how do I keep this thing alive without baking every day? Good news: you can store it long-term in several ways.
Refrigeration
This is the most common method for casual bakers:
- Feed your starter, let it sit out for an hour, then refrigerate.
- Feed it once a week to keep it alive.
- Before baking, take it out, bring it to room temp, feed it once or twice to reactivate.
Freezing
If you’re not planning to bake for weeks or months:
- Feed and let it bubble.
- Transfer to a clean container, label with the date, and freeze.
- To revive, thaw, then feed it daily for a few days to get it bubbly again.
Drying (Dehydrating)
For ultimate long-term storage:
- Spread a thin layer on parchment paper.
- Let it air dry completely (or use a dehydrator).
- Break into flakes and store in an airtight container.
- To reactivate, rehydrate in water and feed for a week.
Having a backup means you never lose your starter—even if you forget to feed it or go on vacation. Think of it like a little sourdough insurance policy.
How to Know If Your Starter Has Gone Bad
A sourdough starter is generally resilient, but things can go south. So how can you tell when it’s time to throw it out?
Warning Signs:
- Pink, orange, or red tint – this indicates mold or bad bacteria. Toss it.
- Fuzzy mold growth – especially colored or hairy mold, is a no-go.
- Rancid or rotten smell – a strong, offensive odor is not normal.
- No activity after multiple feedings – if there’s no bubbling or rise after a week of care, it’s likely dead.
Healthy starters might develop “hooch” (a grayish liquid on top)—this isn’t dangerous, just a sign it’s hungry. Stir it in or pour it off before feeding.
Always trust your senses. If it looks, smells, or feels off—better to start fresh than risk your health.
Using Your Starter in Recipes
Now that you’ve built a thriving starter, it’s time to bake! But before diving in, here’s how to prep your starter for recipes.
Getting It Ready
- Feed your starter 4-6 hours before baking to make sure it’s at its peak (doubled in volume and bubbly).
- Use only the amount needed for your recipe, and save the rest for future feedings.
Types of Recipes to Try:
- Classic sourdough bread
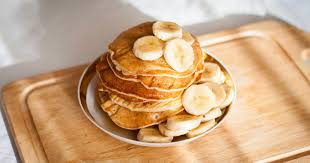
- Sourdough pancakes or waffles
- Crackers made from discard
- Sourdough pizza dough
- Soft sourdough sandwich bread
Once you get the hang of it, you’ll be using sourdough in everything from muffins to cinnamon rolls. It’s endlessly versatile.
FAQs about Sourdough Starter Recipe
1. How long does it take to make a sourdough starter from scratch?
Typically, 5 to 7 days. Some starters may take longer depending on the environment and ingredients used.
2. Can I use different flours in my sourdough starter?
Yes! Whole wheat, rye, or all-purpose are all great options. Mixing flours can also create unique flavor profiles.
3. Do I always have to discard part of the starter?
Yes, unless you’re baking. Discarding ensures the starter doesn’t grow too large and maintains a healthy microbial balance.
4. What do I do with the discard?
Make pancakes, waffles, muffins, crackers, or even compost it if you’re not using it.
5. My starter smells weird. Is that normal?
Some strong smells are part of the process. However, if it smells rotten or moldy, it’s best to start over.
Conclusion
Creating your own sourdough starter from scratch is more than just a recipe—it’s an experience. It teaches patience, consistency, and the beauty of fermentation. You’ll bond with your starter, learn its rhythms, and discover the incredible satisfaction of baking bread with your own living culture.
So go ahead, start that jar today. Your future loaves—and your taste buds—will thank you.


