Best Fudge Recipe: There’s something magical about biting into a piece of rich, creamy fudge. It’s dense but soft, firm but melt-in-your-mouth. That smooth texture combined with a deep chocolate flavor makes fudge an all-time favorite for dessert lovers. It’s like the perfect balance between a brownie and a truffle—intensely chocolatey without being cakey. Whether you’re making it for a holiday treat, gifting it in a cute box, or just craving a chocolate fix, fudge has a way of making any moment feel special.
The allure of fudge comes from both its taste and texture. When made correctly, it’s velvety smooth with just a little firmness. And unlike other candies that require a candy thermometer and complex chemistry, fudge can be surprisingly easy to make at home. It also carries a nostalgic charm—many of us have fond memories of moms, grandmas, or even scout camps where fudge was a go-to treat.
Why Make Fudge at Home?
Why go to the store when you can whip up a batch of fudge in your kitchen in under 30 minutes? Homemade fudge not only tastes better, but it also gives you full control over the ingredients. No preservatives, no weird aftertastes—just pure, delicious chocolate. Plus, making fudge is a fun and rewarding process. Watching simple ingredients transform into a luxurious sweet is as satisfying as the treat itself.
Another great reason to make your own fudge is customization. Want to add a swirl of peanut butter or some crushed peppermint on top? You can. Prefer white chocolate to milk chocolate? Go for it. When you’re the chef, the possibilities are endless. You can even experiment with vegan or sugar-free alternatives to suit your dietary needs. Homemade fudge is not just a treat—it’s a canvas for your creativity.
Ingredients You’ll Need
Classic Ingredients for Traditional Fudge
Let’s talk ingredients. A classic fudge recipe typically includes:
- Sweetened condensed milk: This is the magic ingredient that makes the fudge silky and rich.
- Semi-sweet chocolate chips or chopped chocolate: You can also use milk or dark chocolate based on preference.
- Butter: Just a bit helps smooth out the texture and adds flavor.
- Vanilla extract: Adds depth and a lovely aroma.
- Salt: A pinch to balance out the sweetness.
These five ingredients are all you need for the traditional version, and they can be found in nearly every kitchen or grocery store. The result is a dense, chocolatey treat that’s just sweet enough without being overpowering.
Optional Add-Ins and Variations
Once you’ve mastered the base recipe, it’s time to get creative. Here are some fun and delicious additions:
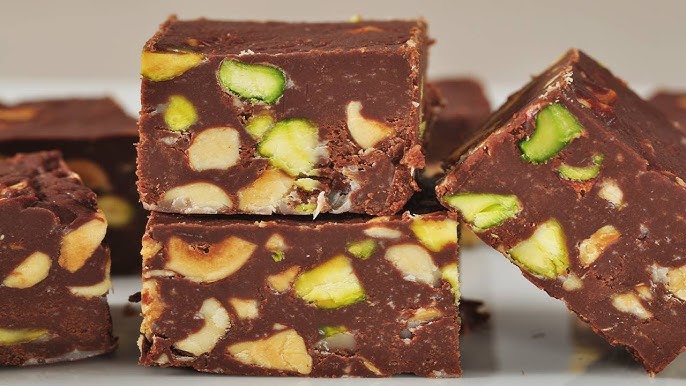
- Nuts: Walnuts, pecans, or almonds for crunch and contrast.
- Marshmallows: For a rocky road twist.
- Caramel swirls: A sweet-salty combo that takes fudge to the next level.
- Peppermint extract or crushed candy canes: Perfect for the holidays.
- Peanut butter: Swirl in some creamy peanut butter for a classic combo.
- Dried fruits: Like cranberries or raisins for a chewy surprise.
You can also experiment with different chocolates like white or dark, and even add flavored extracts like orange or coconut. These additions can elevate your fudge from simple to spectacular without much extra effort.
Tools and Equipment
Essential Kitchen Tools for Fudge Making
You don’t need fancy equipment to make fudge, but having the right tools makes the process smoother:
- Saucepan: Medium-sized with a heavy bottom to prevent scorching.
- Wooden spoon or silicone spatula: For stirring your mixture without scratching your pan.
- Candy thermometer (optional): If you’re going for precision, especially with more advanced recipes.
- 8×8 or 9×9 baking pan: The classic size for fudge, which helps it set into perfect squares.
- Parchment paper or foil: Makes removing and slicing the fudge much easier.
These tools are likely already in your kitchen, and if not, they’re inexpensive investments that will help with lots of other recipes too.
Tips for Prepping Your Workspace
Before you dive into cooking, it’s smart to have everything ready to go. Here’s what to do:
- Measure your ingredients ahead of time. Once the fudge mixture starts heating, things move quickly.
- Line your pan with parchment or foil. This will make cleanup easier and ensure your fudge doesn’t stick.
- Clear your workspace. Fudge-making requires focus and swift action once things start boiling.
- Keep a timer nearby. Timing is crucial, especially when it comes to heating and cooling the mixture.
Having a well-organized workspace will not only make the process easier but also increase your chances of ending up with perfect fudge every time.
Step-by-Step Fudge Recipe Instructions
Step 1: Prepping Your Pan
Start by lining your pan with parchment paper or aluminum foil. Leave a bit of overhang so you can easily lift the fudge out later. Grease the paper lightly with butter or a non-stick spray. This ensures the fudge won’t stick and allows for easy removal and cutting. Skipping this step might leave you with a mess that breaks your beautiful squares when trying to remove them.
This step only takes a minute but makes all the difference. Think of it as setting the stage before the main performance begins. When your fudge is ready to pour, you’ll be glad everything is prepped and waiting.
Step 2: Combining Ingredients
Now it’s time to get cooking! In a medium-sized saucepan over low to medium heat, combine the sweetened condensed milk, chocolate chips, butter, and a pinch of salt. Stir constantly with a silicone spatula or wooden spoon to avoid burning. The key here is gentle heat and constant stirring. The chocolate will slowly melt and blend into the milk and butter, forming a thick, smooth, glossy mixture.
This part of the process can take about 5 to 7 minutes. You want everything to melt evenly, without clumping or separating. Don’t rush it with high heat—it’ll scorch the chocolate or make the fudge grainy. Patience pays off here.
Once fully melted, take the saucepan off the heat and stir in the vanilla extract. This final addition lifts the flavor, giving the fudge a warm, aromatic finish that enhances the richness of the chocolate.
Step 3: Heating to the Right Temperature
While some simple fudge recipes skip this, if you’re aiming for that classic texture, getting the temperature right is crucial. If you’re using a candy thermometer, you want the mixture to reach 234°F to 240°F (112°C to 115°C)—the soft-ball stage.
Why does this matter? Because this is when the sugar structure starts to form just enough crystals to give fudge its iconic firm yet creamy texture. Go below this, and your fudge may turn out too soft or sticky. Go above, and it may become crumbly.
If you don’t have a thermometer, you can still estimate the soft-ball stage by dropping a small amount of the hot fudge mixture into cold water. If it forms a soft, pliable ball that you can flatten with your fingers, it’s ready. This might sound old-school, but it works!
Once the target temperature is reached, remove the pan from heat immediately. Don’t let it boil further—overcooking will ruin the texture.
Step 4: Cooling and Beating the Mixture
Now comes one of the most underrated yet critical steps in fudge making—cooling and beating.
Let your fudge mixture cool undisturbed for about 10 to 15 minutes, or until it reaches about 110°F. This allows the mixture to become just cool enough to start setting. If you beat it while it’s still too hot, you’ll end up with oily or gritty fudge. Too cold, and it’ll be too hard to mix.
Once cooled, use a wooden spoon or electric mixer to beat the fudge vigorously. This incorporates air, helping to create a silky-smooth texture. You’ll notice the gloss start to fade and the mixture becoming thicker—this means it’s almost ready.
Beat until the mixture becomes matte and starts to hold its shape. If you’re adding nuts, dried fruit, or other mix-ins, now is the time to gently fold them in.
Step 5: Pouring and Setting the Fudge
The final step! Quickly pour the beaten fudge into your prepared pan. Spread it evenly using a spatula. You can tap the pan gently on the counter to eliminate air bubbles and level the surface.
If you’re adding toppings—like a sprinkle of sea salt, crushed peppermint, or extra chocolate chips—now’s the time to do it before the top sets. Gently press the toppings into the surface so they stick.
Let the fudge set at room temperature for at least 3 to 4 hours, or place it in the refrigerator to speed things up. Resist the urge to cut it too soon. Good fudge needs time to firm up properly.
Once set, lift it out using the parchment paper overhang and cut into small squares with a sharp knife. And there you have it—perfect, homemade fudge!
Tips for Perfect Fudge Every Time
Avoiding Common Mistakes
Even the best recipes can go sideways if a few small details are missed. Here are the most common mistakes to avoid:
- Overheating: Cooking the mixture at too high a temperature can burn the chocolate and ruin the flavor.
- Skipping the thermometer: Especially for traditional recipes, knowing the exact temperature ensures consistent texture.
- Not beating long enough: This is where the texture magic happens. If it’s under-beaten, the fudge will be too soft and won’t set.
- Using cheap chocolate: The flavor of your fudge depends heavily on the quality of chocolate used. Go for premium brands.
- Stirring too much during cooling: Once it starts cooling, avoid stirring until it’s time to beat—otherwise, crystals form too early and turn it grainy.
How to Fix Grainy or Too-Soft Fudge
Fudge isn’t always perfect, especially on the first try. Here’s how to fix common texture issues:
- Grainy Fudge: This means the sugar crystallized too quickly. You can try remelting the fudge with a little bit of cream or condensed milk, bring it back to the soft-ball stage, then cool and beat again.
- Too Soft: Didn’t set? You may not have heated it enough. Reheat, and bring it to temperature before re-setting.
- Too Hard or Crumbly: This usually means it was cooked too long or beaten too much. Next time, reduce cooking time or stop beating sooner.
FAQs about Fudge Recipe
Q1: Can I use evaporated milk instead of sweetened condensed milk?
No, evaporated milk lacks the sugar and consistency that sweetened condensed milk provides. Stick to the recipe for the best texture and flavor.
Q2: How long does homemade fudge last?
Stored in an airtight container at room temperature, fudge can last up to two weeks. For longer storage, keep it in the fridge or freeze it for up to 3 months.
Q3: Why did my fudge turn out grainy?
Graininess often happens when the sugar crystallizes too quickly. Use a thermometer to ensure proper temperature and avoid stirring during the cooling stage.
Q4: Can I make vegan fudge?
Absolutely! Use dairy-free chocolate, plant-based butter, and coconut condensed milk to make a delicious vegan version.
Q5: What’s the best way to cut fudge into neat squares?
Use a sharp knife warmed under hot water and wiped dry. Cut in straight, swift motions to avoid cracking or crumbling the fudge.
Conclusion
This guide has walked you through each critical step—prepping, melting, heating, cooling, and setting—making the entire process foolproof. Whether you’re making fudge as a holiday gift, a party treat, or just because you’re craving something sweet and chocolatey, you now have the confidence and the know-how to get it just right every single time.
And the best part? Fudge is totally customizable. Once you’ve nailed the basic method, you can let your imagination run wild—try swirling in caramel, adding espresso powder for a mocha kick, or even making it spicy with a dash of cayenne. The sky’s the limit!
So go ahead—put on your apron, gather your ingredients, and get ready to impress your friends, family, or just yourself with a batch of irresistible homemade fudge. You’ll be amazed at how easy it is to create something so decadent, and you might just start a new sweet-making tradition of your own.


