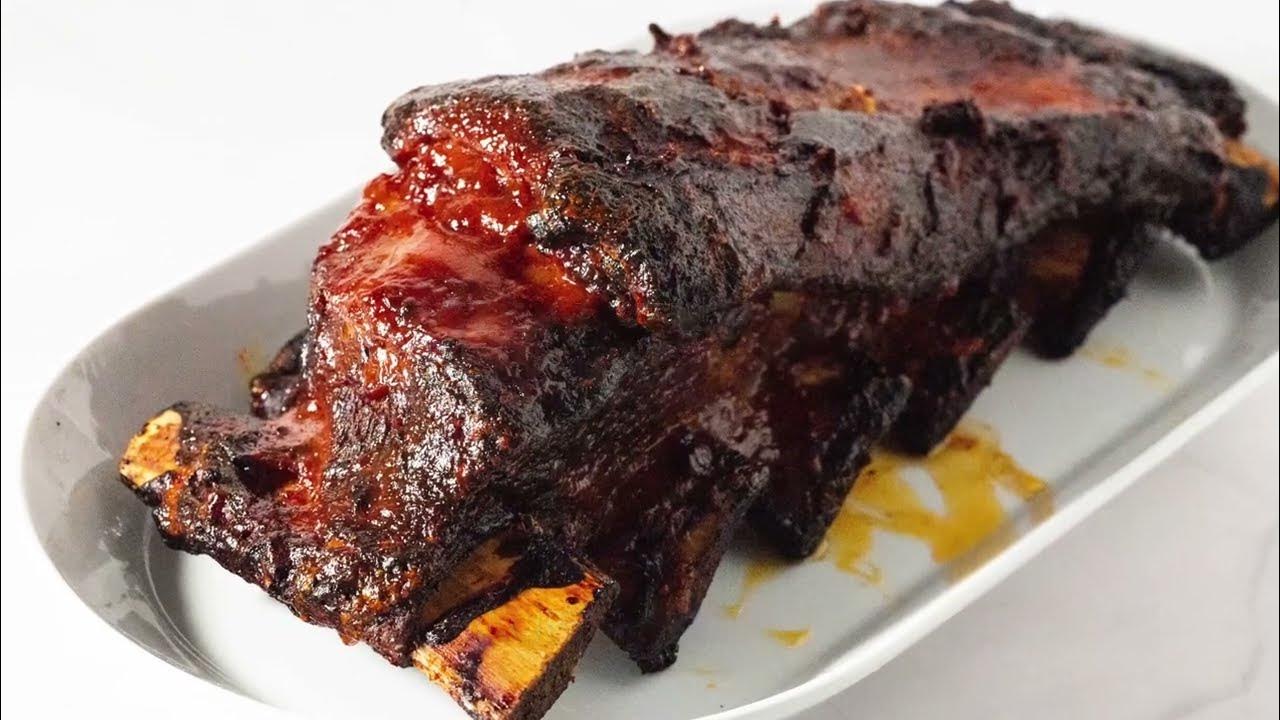
Beef Back Ribs Recipe: Beef back ribs are the long bones cut from the cow’s rib section, typically left behind after the ribeye steaks are removed. These bones still pack plenty of flavor and meat in between, making them perfect for slow-cooking methods that allow the fat to render and the flavors to deepen. Unlike pork ribs, beef back ribs offer a meatier bite and a bolder flavor profile, making them a favorite among BBQ lovers and beef enthusiasts.
You might find beef back ribs less expensive compared to other premium cuts like short ribs or brisket, but don’t let that fool you. When prepared the right way, they can easily become the star of any cookout or dinner table. They’re also incredibly versatile — you can bake, grill, or smoke them, each method unlocking a unique layer of taste.
Why Choose Beef Back Ribs?
So, why should you opt for beef back ribs over other kinds of ribs? First, they offer a fantastic meat-to-bone ratio that results in rich, beefy flavors when cooked properly. Second, they’re ideal for long, slow cooking techniques that turn the meat tender and juicy. And finally, they’re a great choice for beginners and experts alike, as they’re relatively forgiving and easy to cook with just a few basic techniques.
Whether you’re hosting a backyard BBQ, preparing a weeknight family meal, or simply indulging in some smoky goodness, beef back ribs won’t disappoint. Their bold taste and satisfying texture make them the ultimate comfort food for meat lovers.
Ingredients You’ll Need
Essential Ingredients
To make mouthwatering beef back ribs, you’ll need a combination of basic pantry staples and quality beef. Here’s your must-have list:
- 2-3 pounds of beef back ribs
- 2 tablespoons olive oil
- Salt (preferably kosher)
- Black pepper (freshly cracked)
- Garlic powder
- Onion powder
- Smoked paprika
- Brown sugar (for a sweet-savory balance)
These core ingredients create a robust dry rub that enhances the natural flavor of the ribs. The olive oil helps the rub stick to the meat and also assists in browning if you’re using a high-heat method like grilling.
Optional Add-Ons for Extra Flavor
If you want to take things to the next level, consider adding these optional ingredients:
- Cayenne pepper (for heat)
- Mustard (as a marinade base)
- Worcestershire sauce (for umami depth)
- Apple cider vinegar (helps tenderize the meat)
- BBQ sauce (store-bought or homemade for glazing)
These additions can infuse the ribs with even more character, depending on the flavor profile you’re going for. Sweet, spicy, tangy — you name it, you can achieve it with the right add-ons.
Preparing the Beef Back Ribs
Trimming and Cleaning the Ribs
The prep work you put in at the beginning makes all the difference. Start by rinsing the ribs under cold water and patting them dry with paper towels. Next, flip the ribs bone-side up. You’ll see a silvery membrane — that’s the tough layer of connective tissue you’ll want to remove.
To do this, slide a butter knife under the membrane at one end of the rack, then grab it with a paper towel and peel it off. This step isn’t just for texture; removing the membrane helps your rub or marinade penetrate the meat better, giving you a more flavorful final product.
Inspect the ribs for any excess fat or bone fragments and trim as needed. You’re now ready to move on to seasoning or marinating.
Marinating for Maximum Flavor
While you can go straight to seasoning, marinating adds an extra layer of flavor and tenderness. For a basic marinade, mix olive oil, Worcestershire sauce, minced garlic, black pepper, and apple cider vinegar. Place the ribs in a zip-top bag or a covered dish and let them marinate in the fridge for at least 4 hours — overnight is best.
Marination allows the acid (vinegar) to break down muscle fibers, resulting in a more tender bite. Plus, ingredients like garlic and Worcestershire soak deep into the meat, ensuring each bite is bursting with flavor.
Cooking Methods Explained
Oven-Baked Beef Back Ribs
This is perhaps the most foolproof method, especially for beginners. Preheat your oven to 275°F (135°C). Line a baking sheet with foil, place the ribs bone-side down, and cover them tightly with more foil to trap moisture.
Bake for about 3 hours, then remove the foil and crank up the heat to 400°F (205°C) for an additional 20 minutes to caramelize the outer layer. You can brush on BBQ sauce during the last 10 minutes for a sticky, sweet finish.
This method guarantees tender, juicy ribs with minimal effort. Plus, you can make them year-round without needing a grill or smoker.
Grilling to Perfection
Grilling adds a smoky char that oven-baking can’t replicate. Use indirect heat — place the ribs on the cooler side of the grill and let them cook slowly with the lid closed. Keep the temperature around 275°F.
Flip occasionally and baste with BBQ sauce or melted butter to keep them moist. After 2–3 hours, move the ribs to the direct heat side for a few minutes to get that perfect crispy edge.
Smoking for a Deeper Flavor
If you have a smoker, you’re in for a treat. Set the smoker to 225°F and use woods like hickory, oak, or mesquite for a rich, deep flavor. Smoke the ribs for 5–6 hours, wrapping them in foil for the last 2 hours to retain moisture.
Smoking requires patience, but the reward is a complex flavor and fall-off-the-bone tenderness that’s hard to beat.
Step-by-Step Guide to Cooking Beef Back Ribs
Step 1: Prepping the Ribs
Prepping is everything when it comes to beef back ribs. After trimming and removing the membrane, lay the ribs out on a clean surface and pat them dry one more time. Moisture is the enemy of a good sear or bark, so ensure they’re bone-dry before seasoning.
Next, rub a light layer of olive oil all over the ribs. This acts as a binder for your seasoning. Then generously apply your dry rub — a mix of salt, pepper, garlic powder, onion powder, smoked paprika, and brown sugar. Massage it in, making sure every inch of meat is coated. Don’t be shy with the seasoning; these ribs can take a lot of flavor.
Let the seasoned ribs sit at room temperature for 30 minutes. This allows the meat to relax and the rub to penetrate a bit before hitting the heat.
Step 2: Applying the Dry Rub or Marinade
Depending on your choice, you can use a dry rub or a marinade. A dry rub gives the ribs a textured, bark-like crust while a marinade infuses the meat with moisture and flavor.
For a marinade, combine olive oil, Worcestershire sauce, minced garlic, mustard, apple cider vinegar, and your favorite herbs. Submerge the ribs in this mixture and let them sit for at least 4–6 hours, preferably overnight.
If using a dry rub, apply it liberally after oiling the ribs, pressing it into the meat so it sticks well. You can wrap the seasoned ribs in plastic wrap and refrigerate them for a few hours to let the flavors settle.
Step 3: Cooking Low and Slow
This is the golden rule for ribs: low and slow wins the race. Whether you’re using an oven, grill, or smoker, keep the heat low — between 225°F and 275°F. This temperature range allows the fat and collagen in the ribs to break down gently, resulting in succulent, tender meat.
Place the ribs bone-side down and cover them loosely with foil or a grill lid. Let them cook undisturbed for several hours. Check on them occasionally, but resist the urge to open the oven or grill too often — you’ll let out valuable heat and moisture.
If you want a sticky finish, start brushing on BBQ sauce during the last 30 minutes of cooking. Apply a layer, let it cook for 10 minutes, and repeat to build up a delicious glaze.
Step 4: Resting and Slicing the Ribs
Once your ribs reach the ideal internal temperature — around 195°F to 203°F — take them off the heat and let them rest. This step is crucial. Resting allows the juices to redistribute through the meat, keeping it moist when sliced.
Place the ribs on a cutting board, cover loosely with foil, and let them sit for at least 15 minutes. When slicing, use a sharp knife and cut between the bones for clean portions.
Rested and sliced properly, your beef back ribs will be juicy, flavorful, and fall-off-the-bone tender — just the way they should be.
Tips for Juicy, Tender Ribs
Meat Thermometer Use
Want foolproof results? Use a meat thermometer. It’s the most reliable way to know when your ribs are done. Insert the probe into the thickest part of the meat, away from the bone. For perfectly tender beef back ribs, aim for an internal temperature of 195°F to 203°F.
This temperature range ensures that the connective tissue has broken down fully, giving you that signature “melt in your mouth” texture. Don’t go by time alone — meat varies in thickness and fat content, so a thermometer takes out the guesswork.
Wrapping Techniques
Wrapping ribs during the cooking process — often referred to as the “Texas Crutch” — is a tried-and-true method to lock in moisture. After the first 2–3 hours of cooking, wrap the ribs in aluminum foil with a splash of liquid like beef broth, apple juice, or a vinegar-based sauce. This step helps steam the ribs, speeding up the breakdown of connective tissue.
You can also add butter, brown sugar, or a bit of BBQ sauce inside the foil for extra flavor. Return the wrapped ribs to the heat and cook for another 1–2 hours. Once unwrapped, finish them unwrapped for a crispy exterior.
Pairing Suggestions
Side Dishes to Complement Your Ribs
Beef back ribs are rich and hearty, so pair them with sides that balance the meal. Here are a few delicious options:
- Coleslaw – The tangy crunch cuts through the richness of the meat.
- Cornbread – Slightly sweet and perfect for soaking up sauces.
- Macaroni and Cheese – A creamy, comforting classic.
- Baked Beans – Smoky and sweet, they pair beautifully with BBQ.
- Grilled Vegetables – Lighten things up with zucchini, peppers, and asparagus.
Mix and match to suit your taste or occasion — whether it’s a backyard cookout or a weeknight dinner.
Best Sauces to Serve With
While the ribs are delicious on their own, a good sauce can elevate them further. Here are a few favorites:
- Classic BBQ Sauce – Sweet, smoky, and tangy.
- Spicy Chipotle Sauce – For heat lovers.
- Garlic Butter Sauce – Rich and savory.
- Mustard-Based Sauce – Tangy and sharp, great with beef.
Offer a few different sauces on the side so everyone can dip or drizzle to their liking.
Common Mistakes to Avoid
Overcooking or Undercooking
One of the most common issues with beef back ribs is getting the timing wrong. Overcooking can dry the ribs out, leaving you with tough meat that lacks moisture. On the flip side, undercooking leaves the connective tissue intact, resulting in chewy and unappetizing ribs.
To avoid this, always monitor your internal temperature. Remember, the sweet spot for perfectly tender beef back ribs is between 195°F and 203°F. Cooking within this range allows the fat and collagen to break down completely, which gives you that irresistible, fall-off-the-bone texture.
Also, avoid cooking at too high a temperature to speed things up. High heat will likely char the exterior while leaving the interior tough. Stick with the low and slow method for the best results — it’s worth the wait.
Skipping the Resting Period
You’ve cooked your ribs to perfection, and they smell incredible. It’s tempting to slice into them immediately. But hold up — skipping the resting phase is a rookie mistake.
Resting your ribs for at least 15 to 20 minutes after cooking allows the juices to redistribute throughout the meat. If you cut them right away, all that flavorful juice runs out, and your ribs will be noticeably drier.
To rest your ribs properly, place them on a cutting board and loosely cover them with foil. Let them sit undisturbed, and you’ll be rewarded with moist, flavorful bites every time.
Storage and Reheating Tips
Keeping Ribs Moist After Cooking
Leftovers? Lucky you! Beef back ribs can be just as delicious the next day—if stored correctly. First, allow the ribs to cool to room temperature. Then wrap them tightly in foil or plastic wrap and store them in an airtight container in the refrigerator. Properly stored, they’ll keep for 3 to 4 days.
To prevent the meat from drying out, avoid leaving the ribs uncovered in the fridge. You can also brush them lightly with BBQ sauce or a bit of broth before sealing them up to help lock in moisture.
If you’re freezing them, wrap the ribs tightly in foil and place them in a freezer-safe bag. They can last up to 2 months this way. Be sure to label the bag with the date.
Best Way to Reheat Leftovers
When it comes to reheating, your goal is to warm the ribs without drying them out. Here are a few effective methods:
- Oven Method (Best Overall): Preheat your oven to 250°F, place the ribs in a baking dish with a splash of broth or water, and cover with foil. Heat for 20–30 minutes or until warmed through.
- Microwave (Quick but Risky): Place ribs in a microwave-safe dish, add a damp paper towel on top, and microwave in 30-second intervals, checking frequently.
- Grill (For a Bit of Char): Reheat on indirect heat for 10–15 minutes, flipping halfway and basting with sauce to keep them juicy.
Avoid reheating at high temperatures, which will quickly dry out the meat and ruin the texture you worked so hard to achieve.
FAQs about Beef Back Ribs Recipe
How long should I cook beef back ribs?
Beef back ribs should be cooked low and slow for 3 to 5 hours, depending on the cooking method and temperature. In the oven, 275°F for 3–4 hours is ideal. If you’re smoking, extend the time to 5–6 hours at 225°F.
Can I make beef back ribs in an air fryer?
While air fryers aren’t the traditional choice, you can cook beef back ribs in one. Set your air fryer to 375°F, cook for about 25–30 minutes, and flip halfway through. Just keep in mind that you won’t get the same depth of flavor or tenderness as you would from baking or smoking.
What’s the difference between back ribs and short ribs?
Back ribs come from the upper part of the cow’s rib section, near the spine. They have less meat on top but more between the bones. Short ribs are from the lower section and are meatier, fattier, and better suited for braising. Both are delicious but require different cooking methods.
How do I know when the ribs are done?
Use a meat thermometer to check the internal temperature. When it reaches 195°F to 203°F, your ribs are done. You can also test by inserting a toothpick into the meat — it should go in and out with little resistance.
Should I remove the membrane from beef back ribs?
Yes, removing the membrane (also known as the silver skin) is highly recommended. It’s tough, chewy, and prevents seasonings from fully penetrating the meat. Removing it ensures better texture and flavor.
Conclusion
Beef back ribs are a true carnivore’s delight — rich, meaty, and packed with flavor. Whether you bake, grill, or smoke them, the key to success lies in the preparation and cooking technique. From removing the membrane and applying the perfect rub to cooking them low and slow and letting them rest, each step plays a crucial role in creating ribs that are tender, juicy, and bursting with taste.
Don’t rush the process. Treat your beef back ribs with care and patience, and you’ll be rewarded with a meal that’s as satisfying as it is delicious. Pair them with your favorite sides and sauces, avoid common pitfalls, and you’ll have a go-to recipe that wows your guests every single time.


