Wacky Cake Recipe: Wacky Cake, also affectionately known as “Crazy Cake” or “Depression Cake,” isn’t your typical dessert. It’s a little quirky, a little old-fashioned, and totally unforgettable. The magic of this cake lies in what it doesn’t include: no eggs, no milk, no butter—and yet it’s still moist, fluffy, and utterly delicious. You might be wondering, “How on earth is that even possible?” That’s where the wackiness comes in.
Unlike conventional cake recipes that call for rich dairy and eggs for texture and lift, Wacky Cake uses vinegar and baking soda to do all the heavy lifting. The result is a delightfully spongy cake with a soft crumb and a rich, chocolatey flavor that defies its humble ingredients. And here’s the real kicker—you mix the entire thing right in the pan. No bowls, no mixers, and barely any dishes to wash up afterward.
Origins and Popularity of Wacky Cake
Wacky Cake dates back to the Great Depression and World War II, when common baking staples like milk, eggs, and butter were scarce or rationed. Cooks had to get creative, and this cake was born out of pure necessity. Over time, what started as a “make-do” dessert became a nostalgic classic, passed down through generations.
Today, it’s making a big comeback. Why? Because it’s ridiculously easy, practically foolproof, and can be whipped up with ingredients you probably already have in your pantry. Plus, it’s vegan without even trying! Whether you’re a novice baker, on a tight budget, or just craving something sweet without the fuss—Wacky Cake is your new best friend.
Ingredients Needed for Wacky Cake
Basic Pantry Staples
One of the most endearing qualities of Wacky Cake is its simplicity. You’re not running to the store for fancy ingredients here. You’re likely to have everything you need already tucked away in your kitchen. Here’s what you’ll need:
- 1 ½ cups all-purpose flour
- 1 cup granulated sugar
- ¼ cup unsweetened cocoa powder
- 1 tsp baking soda
- ½ tsp salt
- 1 tsp white or apple cider vinegar
- 1 tsp vanilla extract
- 5 tbsp vegetable oil
- 1 cup cold water
That’s it—no eggs, no milk, no butter. It almost feels like a kitchen experiment more than a baking recipe, and that’s part of the fun.
Optional Add-ons and Variations
Want to jazz up your Wacky Cake? Go for it. The beauty of this recipe is how versatile it is. Here are a few ideas:
- Add chocolate chips to the batter for extra indulgence
- Mix in a teaspoon of instant coffee to intensify the chocolate flavor
- Swap out water for brewed coffee or almond milk
- Add a pinch of cinnamon or nutmeg for warmth
- Top with powdered sugar, berries, or a drizzle of melted peanut butter
There’s no right or wrong here—just a lot of room to play and personalize.
Kitchen Tools You’ll Need
Must-Have Tools for Preparation
Minimalist at heart? Good news—Wacky Cake is a minimalist’s dream. Here’s all you really need to pull it off:
- Measuring cups and spoons
- A fork or whisk
- An 8×8-inch or 9×9-inch square baking pan
- A spatula (optional for scraping)
- An oven (of course)
That’s it! No electric mixer, no food processor, and definitely no extra bowls cluttering up your sink.
Baking Pan Options and Sizes
Traditionally, this cake is mixed and baked in the same 8-inch square pan, but you’ve got options:
- 8×8 or 9×9 square pan for thicker slices
- 9-inch round pan for a more classic cake shape
- Double the recipe and use a 9×13-inch pan for larger gatherings
Just remember—pan size will slightly affect baking time, so keep an eye on that oven.
Step-by-Step Instructions for Making Wacky Cake
Step 1: Preparing the Dry Ingredients
Start by preheating your oven to 350°F (175°C). Then, grab your baking pan and add the dry ingredients directly into it. That’s right—skip the bowl.
In your ungreased pan, combine:
- 1 ½ cups flour
- 1 cup sugar
- ¼ cup cocoa powder
- 1 tsp baking soda
- ½ tsp salt
Use a fork or whisk to mix everything evenly. Make sure to get into the corners of the pan so no pockets of dry ingredients are left behind.
This is your base—and trust me, it’s going to transform in the most magical way.
Step 2: Creating the Wells
Now comes the quirky part—creating the wells. Once your dry ingredients are evenly mixed in the pan, use your spoon or fingers to form three small wells in the flour mixture.
Here’s the purpose behind each:
- One for vinegar
- One for vanilla extract
- One for oil
They don’t have to be deep or perfectly shaped—just distinct enough to keep the liquids from merging right away. This unusual method helps distribute the ingredients more evenly once everything is combined, ensuring a consistent texture and taste throughout your cake.
Take a second to appreciate how simple and low-effort this is. No fancy prep bowls or messy beaters. It’s a rustic, no-fuss approach that works like a charm.
Step 3: Pouring in the Wet Ingredients
Next up, pour the following into the designated wells:
- 1 tsp vinegar into one well
- 1 tsp vanilla extract into the second
- 5 tbsp oil into the third
Then pour 1 cup of cold water all over the top. Don’t worry about the order—it’s all going to come together beautifully in the next step.
A quick note on the water: make sure it’s cold, not warm. The reaction between the vinegar and baking soda starts immediately, and the cool temperature slows things down just enough to give you time to mix everything evenly before the batter begins rising.
Step 4: Mixing the Batter Right in the Pan
Now grab your fork or whisk and start mixing everything together directly in the pan. Scrape along the edges and bottom to make sure no dry flour gets left behind. The batter should be smooth and slightly bubbly thanks to the baking soda and vinegar reacting.
Mix until there are no visible streaks of flour. Don’t over-mix—just enough to combine everything thoroughly. You’ll notice the batter looks a bit looser than traditional cake batter, and that’s completely normal.
This step is especially satisfying—it’s like watching science and dessert collide. It might feel a bit like a school experiment, but what you’re really doing is crafting a rich, moist chocolate cake with minimal effort and ingredients.
Step 5: Baking the Cake to Perfection
Pop your pan into the preheated oven and bake for 30 to 35 minutes. If you’re using a larger or deeper pan, it might need an extra 5 minutes. To check if it’s done, insert a toothpick or knife into the center—if it comes out clean, you’re good to go.
While it’s baking, your kitchen will fill with that irresistible aroma of chocolate cake. You might even forget that you made it without milk, butter, or eggs—it smells that good.
Once it’s baked, remove the pan from the oven and let the cake cool completely in the pan on a wire rack. This helps the crumb set and keeps it from becoming too dense or gooey in the center.
And there you have it—your delicious Wacky Cake, made from scratch with barely any cleanup required.
Tips and Tricks for the Perfect Wacky Cake
Texture and Flavor Enhancements
Even though Wacky Cake is known for its simplicity, there are a few insider tricks to elevate it to new heights:
- Add a tablespoon of brewed coffee instead of water to deepen the chocolate flavor.
- Sift your dry ingredients before mixing to prevent clumping and ensure a fluffier texture.
- Chill the batter for 5 minutes before baking for a smoother crumb.
- Use high-quality cocoa powder—this makes a massive difference in flavor.
If you love moist cakes, wrap the cake in plastic wrap once it’s cooled and let it sit overnight before serving. This locks in the moisture and intensifies the flavors.
Troubleshooting Common Mistakes
Even the simplest recipes can go sideways. Here’s how to avoid common pitfalls:
- Cake turned out flat? Double-check that your baking soda is fresh. It’s crucial for the rise.
- Bitter aftertaste? That might be too much vinegar. Stick with the exact measurement.
- Crumbly texture? This usually means overmixing the batter or too much flour—make sure you’re measuring it right (spoon it into the measuring cup and level it off).
- Dry cake? Could be from overbaking. Oven temperatures vary, so keep an eye on your cake from the 28-minute mark onward.
These minor tweaks and checks can be the difference between a good cake and a spectacular one.
Delicious Frosting Options
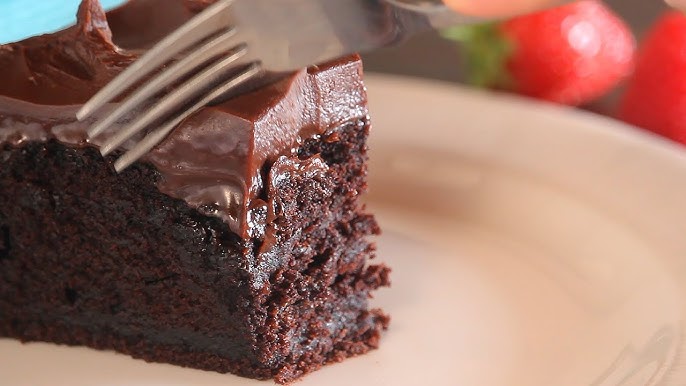
Simple Chocolate Glaze
If you’re a chocolate lover, a silky chocolate glaze is the perfect finishing touch for your Wacky Cake. It’s quick to whip up and adds an elegant shine and extra layer of indulgence.
Here’s a quick recipe for a foolproof chocolate glaze:
Ingredients:
- 1 cup powdered sugar
- 2 tablespoons unsweetened cocoa powder
- 2 tablespoons plant-based milk (or regular milk if not keeping it vegan)
- 1 teaspoon vanilla extract
Instructions:
- In a small bowl, sift the powdered sugar and cocoa powder together.
- Stir in the milk and vanilla until smooth and pourable.
- Drizzle over the cooled cake and let it set for 15–20 minutes.
This glaze sets into a thin, shiny coating that adds just the right amount of sweetness without overwhelming the cake’s soft, chocolaty base.
Vegan-Friendly Frosting Choices
Want a fluffier, more traditional frosting but still keep it dairy-free? No problem. Try one of these:
Vegan Buttercream Frosting:
- ½ cup vegan butter
- 2 cups powdered sugar
- 1 tsp vanilla extract
- 2–3 tbsp plant-based milk
Beat the vegan butter until light, gradually add sugar, then add vanilla and milk to reach desired consistency. Slather generously over your cooled Wacky Cake.
Coconut Whipped Cream: Chill a can of full-fat coconut milk overnight. Scoop out the solid part, whip it with a little vanilla and powdered sugar, and you’ve got a light, dreamy topping.
Whether you go for a rich glaze or a fluffy frosting, these additions take your cake from “delicious” to “out of this world.”
Serving and Storing Your Wacky Cake
Best Ways to Serve
Wacky Cake is incredibly versatile when it comes to serving. Here are a few crowd-pleasing ideas:
- Serve warm with a scoop of vanilla ice cream
- Dust with powdered sugar for a simple, elegant look
- Top with berries for a fruity contrast
- Pair with coffee or tea as an afternoon treat
It’s just as fitting for a casual weekday dessert as it is for a special occasion. You can even serve it straight from the pan—super casual, super cozy.
Storing for Freshness
Wacky Cake stores beautifully. Once the cake has cooled completely:
- Cover it tightly with plastic wrap or foil
- Store at room temperature for up to 3 days
- Or refrigerate for up to a week
Want to make it ahead of time? Wacky Cake freezes like a dream. Cut it into slices, wrap each one in plastic wrap, and pop them in a freezer bag. When you’re ready for dessert, just thaw a slice at room temperature or give it a quick zap in the microwave.
Having a slice of Wacky Cake ready to go anytime is the kind of emergency preparation we all need in life.
Why Wacky Cake is Perfect for Any Occasion
Allergy-Friendly and Versatile
One of the best things about Wacky Cake is how inclusive it is. Because it contains no dairy or eggs, it’s naturally:
- Vegan
- Dairy-free
- Egg-free
- Nut-free (depending on frosting and toppings)
With just a few easy swaps, you can even make it gluten-free by using a 1:1 gluten-free flour blend.
This cake checks a lot of boxes and works for nearly any diet or restriction. It’s a go-to dessert for potlucks, school events, and family gatherings where you need a dessert that everyone can enjoy.
Quick, Budget-Friendly Dessert
With food prices climbing and time always in short supply, Wacky Cake is a lifesaver. It’s:
- Made from inexpensive, everyday ingredients
- Ready in under an hour, start to finish
- No special equipment required
Even if you’re not a baker, you can make this cake and feel like a kitchen hero. It’s perfect for last-minute cravings or when you want something sweet without the stress.
FAQs about Wacky Cake Recipe
Can I make Wacky Cake without vinegar?
Yes, but you’ll need an acid to activate the baking soda. Lemon juice or apple cider vinegar can be substituted in equal amounts.
How do I make this gluten-free?
Use a 1:1 gluten-free flour blend. Make sure it includes xanthan gum or add ¼ tsp per cup of flour for structure.
Can I use this recipe for cupcakes?
Absolutely. Pour the batter into a lined cupcake pan and bake for 18–20 minutes at 350°F.
What’s the best way to store leftovers?
Keep the cake tightly wrapped at room temperature for up to 3 days or refrigerate for up to a week. It also freezes well for up to 3 months.
Can I double the recipe for a larger crowd?
Yes! Just double all ingredients and bake in a 9×13-inch pan. Increase baking time to around 40–45 minutes.
Conclusion
Wacky Cake is the kind of recipe every home cook should have up their sleeve. It’s charmingly simple, unfailingly delicious, and packed with nostalgia. No eggs, no milk, no butter—and yet it’s everything a chocolate cake should be: moist, rich, and deeply satisfying.
Whether you’re vegan, short on ingredients, or just in the mood for an easy dessert, Wacky Cake delivers. And with a few creative twists, you can make it your own every single time. So grab your pan, gather your pantry staples, and whip up a little old-school magic.