Vanilla Buttercream Frosting Recipe: Vanilla buttercream frosting is like the little black dress of the dessert world—classic, timeless, and incredibly versatile. If you’ve ever bitten into a cupcake and marveled at the smooth, sweet topping, chances are you were enjoying vanilla buttercream. It’s the go-to frosting for bakers everywhere, whether you’re icing cupcakes for a birthday party, decorating cookies during the holidays, or spreading a luscious layer over a layered cake.
What makes it so special? First off, it’s incredibly easy to make with just a handful of ingredients you probably already have in your pantry. Plus, it’s customizable. Want it lighter and fluffier? Beat it a bit longer. Need it thicker to pipe roses on a cake? Just reduce the liquid a touch. Whether you’re a seasoned baker or just starting out, mastering vanilla buttercream will elevate your desserts from good to unforgettable.
This frosting is not only delicious with its rich, creamy texture and sweet vanilla flavor, but it’s also a great base to play around with. Add cocoa powder for chocolate buttercream, mix in some berry puree for a fruity twist, or tint it with food coloring for themed events. The possibilities are endless once you get the basics down.
So, if you’re ready to whip up the creamiest, dreamiest vanilla buttercream frosting, let’s dive in.
Ingredients You’ll Need
Before we roll up our sleeves, let’s gather everything you need. One of the best things about vanilla buttercream is its simplicity—most of the ingredients are probably already in your kitchen.
Basic Ingredients:
- 1 cup (2 sticks) unsalted butter, room temperature – This is the base. Make sure it’s softened but not melted.
- 3-4 cups powdered sugar (also called confectioners’ sugar or icing sugar) – The sweetener and structure builder.
- 2 teaspoons pure vanilla extract – For that rich, aromatic flavor.
- 2-4 tablespoons milk or heavy cream – To reach your desired consistency.
- A pinch of salt – Just enough to balance the sweetness.
Optional Add-Ins:
- Almond extract – Just a few drops can change the flavor profile completely.
- Food coloring – Great for themed cakes and fun projects.
- Whipped cream or marshmallow fluff – For an extra light and fluffy version.
Using high-quality ingredients can make a noticeable difference. Real vanilla extract gives a deeper, more aromatic taste compared to imitation. And if you want to go the extra mile, use organic butter and fresh cream. The richer the ingredients, the more decadent your frosting will be.
Now that we’ve got everything on the counter, let’s talk tools.
Equipment Required
You don’t need a professional kitchen setup to make amazing vanilla buttercream, but a few tools will make the job easier and more enjoyable.
Must-Have Tools:
- Electric hand mixer or stand mixer – This is essential for creaming the butter and whipping everything together.
- Mixing bowl – A large one so your ingredients don’t spill over.
- Rubber spatula – For scraping down the sides of the bowl and getting every last bit of frosting out.
- Measuring cups and spoons – Precision is key, especially with sugar and extract.
Nice-to-Have Tools:
- Sifter – Helps remove lumps from powdered sugar for a smoother texture.
- Offset spatula – Great for spreading the frosting evenly on cakes.
- Piping bags and tips – If you’re planning to decorate with finesse.
Having the right tools not only speeds up the process but also ensures that your frosting turns out smooth and airy every time.
Preparing Your Ingredients Properly
Now, this might seem like an easy-to-skip step, but preparing your ingredients the right way makes a huge difference in the final product. Think of it like warming up before a workout—you’ll get better results and avoid disaster.
Room Temperature Butter is Non-Negotiable
The butter must be soft enough to whip but not melted. When it’s at room temperature, it creams better, incorporating air into the frosting. Cold butter won’t mix well and can leave you with lumpy frosting, while melted butter can make it too runny and greasy.
If you forgot to take your butter out ahead of time, you can microwave it for about 10 seconds—but be very careful not to melt it. Another trick is to cut it into cubes and let it sit for 15-20 minutes.
Sifting Powdered Sugar Prevents Lumps
Powdered sugar tends to clump, especially if it’s been sitting in the pantry for a while. Sifting it removes those lumps and makes it easier to mix, resulting in a smoother, silkier frosting. It might seem like an extra step, but it really improves the texture.
Measure Everything in Advance
Pre-measuring your ingredients (also known as mise en place) saves time and helps you avoid mistakes. You’ll be surprised how much easier the process becomes when everything is ready to go.
Step-by-Step Instructions
This is where the magic happens. Follow these steps exactly, and you’ll have the perfect vanilla buttercream frosting in less than 15 minutes.
Step 1: Cream the Butter
Place your room-temperature butter into a mixing bowl. Using your hand mixer or stand mixer fitted with the paddle attachment, beat the butter on medium speed for about 2-3 minutes. You’re looking for a creamy, pale-yellow texture.
This step is crucial. Creaming the butter incorporates air, making the frosting fluffy and light. If your butter still looks stiff or greasy, it’s not ready yet. Keep mixing.
Step 2: Gradually Add Powdered Sugar
Turn your mixer to low and slowly start adding the powdered sugar, about 1 cup at a time. After each addition, beat until fully combined before adding more. Once all the sugar is in, turn the mixer to medium-high and beat for another 2-3 minutes.
This step ensures your frosting has the right structure and sweetness. Don’t dump all the sugar in at once—it can make the frosting grainy and hard to mix.
Step 3: Add Vanilla Extract and Milk
Add the vanilla extract, a pinch of salt, and 2 tablespoons of milk or cream. Mix on low speed to incorporate, then turn up the speed and beat for another 1-2 minutes. Check the consistency—if it’s too thick, add a little more milk, one tablespoon at a time.
Want a stiffer frosting for piping flowers? Use less milk. For a softer, spreadable texture? Use more.
Step 4: Beat Until Fluffy and Light
Once all the ingredients are in, beat the frosting on high speed for a final 3-5 minutes. The longer you beat it, the fluffier and lighter it will become. Scrape down the sides of the bowl as needed to make sure everything is well mixed.
And there you have it—perfect vanilla buttercream, ready to frost your masterpiece.
Customizing Your Buttercream
Once you’ve nailed the classic vanilla buttercream recipe, the fun really begins—customization! One of the greatest things about buttercream is its flexibility. You can tweak its flavor, color, and texture without losing its creamy, dreamy essence. Let’s dive into how you can personalize your frosting to suit any occasion or craving.
Flavor Variations
You don’t have to stop at vanilla. Add your favorite flavors to give your buttercream a new twist:
- Chocolate: Add ½ cup of unsweetened cocoa powder to the mix.
- Lemon or Orange: Use citrus zest and substitute half of the vanilla extract with citrus juice.
- Almond or Coconut: Replace vanilla with almond or coconut extract for a nuttier profile.
- Coffee: Add a tablespoon of instant espresso dissolved in a teaspoon of water for a mocha-inspired frosting.
Experiment with small batches first to ensure you love the flavor before committing it to your cake.
Coloring Buttercream
For special events like birthdays, baby showers, or holidays, colored frosting adds that extra wow factor. Gel food coloring is ideal because it doesn’t water down the buttercream. Start with a toothpick to add color in small amounts and mix thoroughly. You can always add more, but you can’t take it out once it’s in!
Pro Tip: For deep, rich colors like red or black, make the buttercream a day ahead. The color deepens over time.
Texture Adjustments
Need stiffer frosting for piping? Use less milk or add an extra half-cup of powdered sugar. Want it extra light and airy? Whip it longer or fold in some whipped cream for a “cloud frosting” effect. For silky-smooth finishes on cakes, beat in a tablespoon of corn syrup.
The bottom line? Don’t be afraid to play. Buttercream is as forgiving as it is delicious.
How to Store Buttercream Frosting
So, you’ve made a big batch of buttercream—what now? Proper storage is key to maintaining its texture and taste. Thankfully, buttercream stores beautifully and is super easy to bring back to life with a quick whip.
Room Temperature Storage
If you plan to use the frosting within 1–2 days and your kitchen isn’t too warm (think under 72°F or 22°C), you can cover the bowl with plastic wrap and leave it on the counter. Just give it a stir before using.
Refrigeration
For longer storage, buttercream can be refrigerated for up to a week. Place it in an airtight container, then let it come to room temperature before re-whipping to restore its fluffiness. The frosting may look a bit firm out of the fridge, but don’t worry—that’s totally normal.
Freezing for Future Use
Want to make frosting ahead of time? Buttercream freezes well for up to 3 months. Store it in a freezer-safe container, and when ready to use, thaw it overnight in the fridge and then whip it again before frosting. You’ll be amazed how fresh it tastes.
Quick Tip: Label your container with the date so you don’t forget how long it’s been in there.
Frosting Cakes and Cupcakes Like a Pro
You’ve made the buttercream, and it tastes amazing—now it’s time to put it to use. Whether you’re a total beginner or someone who just wants to sharpen their skills, here are some pro tips for applying your frosting like a seasoned baker.
Frosting Cupcakes
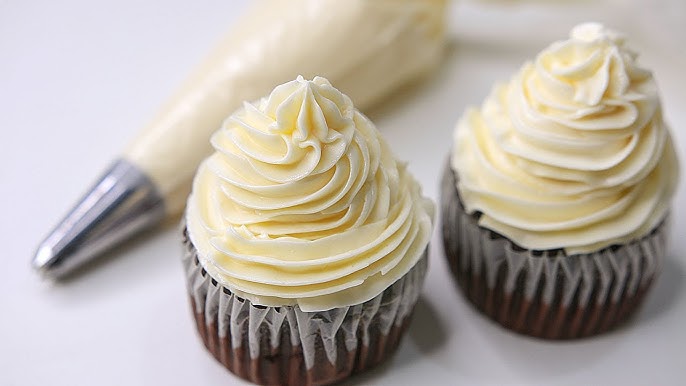
Start by filling a piping bag fitted with a large star or round tip. Hold the bag at a 90-degree angle above the center of the cupcake, then apply even pressure while swirling from the center outward. It might take a few tries, but once you get the hang of it, you’ll be frosting like a bakery pro in no time.
Want a simpler approach? Use a butter knife or offset spatula to apply a thick dollop and swirl it on top.
Frosting Cakes
Apply a thin layer of buttercream (called a crumb coat) to lock in loose crumbs, then chill the cake for 20–30 minutes. This makes the final layer go on smooth. Use an offset spatula to spread the frosting, working from the top down. Smooth the sides with a bench scraper for that clean, polished look.
Piping Details
Use smaller tips to create borders, rosettes, and other designs. If you’re new to piping, practice on parchment paper before decorating your actual dessert.
Pro Tip: If your frosting is too soft to hold its shape while piping, chill it for 10–15 minutes and try again.
Common Mistakes and How to Fix Them
Even experienced bakers run into the occasional buttercream blunder. The good news? Most issues are easily fixed. Let’s look at some common problems and how to troubleshoot them.
Buttercream is Too Runny
This usually happens when the butter is too soft or you’ve added too much liquid. To fix it:
- Chill it in the fridge for 10–15 minutes.
- Add more powdered sugar, a few tablespoons at a time, until it thickens.
Frosting is Grainy
This is often due to not sifting the powdered sugar or using cold butter. Here’s what you can do:
- Beat the frosting for a few extra minutes to smooth it out.
- Add a tablespoon of warm milk and beat again—it can help dissolve the sugar granules.
Too Sweet
Buttercream can be overwhelmingly sweet for some tastes. To tone it down:
- Add a pinch more salt to balance the sweetness.
- Incorporate a bit of cream cheese or sour cream for tanginess.
Air Bubbles in Frosting
This can happen if you beat the buttercream at high speed too long. To remove bubbles:
- Mix the frosting slowly with a spatula or paddle attachment for a couple of minutes.
- Use a rubber spatula to press the frosting against the sides of the bowl to push out trapped air.
Identifying and fixing these common mistakes ensures your buttercream will always look and taste top-tier.
Making Buttercream in Advance for Events
If you’re prepping for a big event—like a wedding, birthday party, or baby shower—making buttercream in advance can save your sanity. Luckily, it holds up well and is easy to refresh before use.
Planning Ahead
Calculate how much frosting you’ll need in advance. A standard batch (with 1 cup of butter) typically covers:
- 12–18 cupcakes
- One 9-inch, 2-layer cake
- About 24 cookies, depending on thickness
If you’re decorating with piped flowers or borders, make extra—you don’t want to run out mid-project.
Storage Tips for Events
Keep your frosting in color-labeled containers if you’re using multiple colors. Store them in the fridge until the night before your event, then let them sit at room temperature and re-whip for a few minutes before applying.
Transporting Frosted Cakes
For best results, chill your frosted cake before transport to prevent smudging. Place it in a cake box, and use a non-slip mat in your vehicle to keep it from sliding.
How to Make Buttercream Thicker or Thinner
Getting the perfect consistency for your buttercream frosting is essential—too thick and it’s hard to spread, too thin and it won’t hold its shape. Luckily, adjusting the texture is super simple once you know the tricks.
To Make It Thicker
If your buttercream is too soft or runny, here’s how you can thicken it:
- Add More Powdered Sugar: This is the easiest and most common solution. Add a couple of tablespoons at a time and beat well after each addition. It not only thickens the frosting but also stabilizes it for piping.
- Chill It: Pop the frosting into the fridge for 15–30 minutes. Butter firms up when cold, so this will naturally thicken the mix.
- Use Less Liquid: Next time, add milk or cream slowly and stop when the desired consistency is reached.
To Make It Thinner
If your buttercream is too stiff or crumbly:
- Add Milk or Cream: Do this one teaspoon at a time. Mix thoroughly before adding more—you’d be surprised how much just a little bit can change the consistency.
- Use Corn Syrup or Honey: A tablespoon of either can smooth out and thin buttercream while adding a glossy finish.
Perfecting your frosting’s texture is like finding the right pair of jeans—it may take a few tries, but once you get it right, everything just fits.
Pairing Buttercream with Cakes and Other Desserts
Vanilla buttercream is like the universal friend—it gets along with just about everyone. But some pairings are just magical, enhancing both the cake and the frosting for a memorable dessert experience.
Best Cakes for Vanilla Buttercream
- Classic Vanilla Cake: A match made in heaven—simple, sweet, and timeless.
- Chocolate Cake: The sweet creaminess of vanilla buttercream contrasts beautifully with rich, dark chocolate.
- Red Velvet Cake: Buttercream provides a sweet counterbalance to the slight tang of red velvet.
- Carrot Cake: Ditch the cream cheese frosting once and try vanilla buttercream. You might be surprised.
- Lemon Cake: Bright, zesty cake pairs perfectly with smooth, mellow vanilla.
Other Uses for Vanilla Buttercream
- Cookies: Sandwich between two sugar cookies for a delicious treat.
- Brownies: Spread a thin layer over fudgy brownies for extra sweetness.
- Cupcakes: A swirl of frosting transforms any cupcake into a bakery-style showstopper.
- Macarons: Use it as a filling inside delicate macaron shells.
Vanilla buttercream is the little black dress of the baking world—it goes with everything and elevates any dessert.
Buttercream vs Other Types of Frosting
Not all frostings are created equal. While buttercream is a fan favorite, there are several other options out there. Let’s look at how it compares.
| Type of Frosting | Texture | Sweetness Level | Best For |
|---|---|---|---|
| Vanilla Buttercream | Light and fluffy | High | Cakes, cupcakes, cookies |
| Cream Cheese Frosting | Soft and tangy | Medium | Red velvet, carrot cake |
| Swiss Meringue | Silky and smooth | Lower | Elegant cakes, layer cakes |
| Whipped Cream | Airy and light | Mild | Shortcakes, fruit-based desserts |
| Ganache | Rich and glossy | Medium | Chocolate cakes, truffles |
While buttercream is often the sweetest option, it’s also the easiest to make and the most versatile. So, if you’re looking for a crowd-pleasing choice, buttercream is hard to beat.
Troubleshooting and Pro Tips for Success
To ensure success every time, here are a few expert tips and common trouble spots to watch out for.
Top Tips:
- Always use room-temperature butter. It’s the foundation of good texture.
- Sift your sugar. Prevents a grainy finish.
- Don’t overbeat. While a bit of air is good, too much can cause bubbles.
- Use good vanilla. It’s the key flavor—splurge on pure extract.
What to Avoid:
- Using melted butter: It ruins the texture.
- Adding too much liquid: Makes frosting soupy and unstable.
- Overfilling piping bags: Makes them hard to control and prone to bursting.
- Frosting warm cakes: Wait until cakes are completely cool or your frosting will melt.
The more you practice, the better you get. Trust the process, and don’t stress about perfection—homemade frosting is all about heart and flavor.
FAQs about Vanilla Buttercream Frosting Recipe
1. Can I make buttercream without a mixer?
Yes, but it takes a lot of elbow grease! Use a sturdy whisk or spoon and be prepared to beat vigorously for at least 10–15 minutes.
2. How long does homemade buttercream last?
Stored in the fridge, it can last up to 7 days. Frozen, it keeps well for up to 3 months.
3. Is there a way to reduce the sweetness of buttercream?
Absolutely. Add a pinch more salt, or blend in some cream cheese or unsweetened cocoa powder to cut the sweetness.
4. Can I color vanilla buttercream with natural dyes?
Yes. Beet juice, spinach powder, and turmeric are great natural options, though the colors won’t be as vibrant as synthetic food coloring.
5. Why is my buttercream separating?
It’s likely too warm. Chill it for 15 minutes, then beat again to bring it back together.
Conclusion
Vanilla buttercream frosting is more than just a topping—it’s the heart and soul of so many beloved desserts. From birthdays to weddings, cupcakes to cookies, this smooth, fluffy, and flavorful frosting adds the perfect finishing touch. And the best part? It’s simple enough for beginners yet versatile enough for pros.
With just a few ingredients and a little practice, you can whip up bakery-worthy frosting right in your own kitchen. Whether you’re spreading it on a cake, piping it into swirls, or just enjoying a spoonful straight from the bowl (no judgment here), buttercream is a joy to make and even more fun to eat.
So, next time you’re baking, skip the store-bought stuff and make your own buttercream. Your taste buds—and your guests—will thank you.


