Strawberry Bread Recipe: Strawberry bread is one of those classic treats that feels like a hug in every bite. Whether you’re craving something fruity for breakfast, looking for a unique dessert, or just want a fresh way to use those ripe strawberries sitting in your fridge, this strawberry bread recipe has you covered. It’s moist, sweet, and packed with bursts of berry flavor that make each slice a little piece of heaven.
You don’t need to be a pro baker to pull off this recipe, either. The process is incredibly simple and beginner-friendly. If you’ve ever made banana bread, then you’re already halfway there. This strawberry variation is just as easy but offers a fresh, fruity twist that’s perfect for spring and summer.
Why Strawberry Bread is a Favorite
One of the reasons strawberry bread has a cult following is because it’s both nostalgic and innovative. For many, it brings back memories of grandma’s kitchen—warm, comforting, and filled with the aroma of freshly baked bread. Yet, it’s also versatile enough to be modernized with new ingredients and twists like nuts, white chocolate chips, or even a drizzle of cream cheese glaze.
The natural sweetness of strawberries makes this bread not overly sugary, allowing it to be enjoyed as a breakfast item or a light dessert. Plus, strawberries are loaded with antioxidants and vitamins, so you can almost feel good about indulging. Almost.
What Makes This Recipe Special
What sets this particular recipe apart is its perfect balance of moisture and structure. A lot of strawberry bread recipes either turn out too dry or too soggy—but not this one. Thanks to a precise ratio of oil, sugar, and fruit, the texture is soft and fluffy with just the right crumb.
We also use fresh strawberries for maximum flavor, although you can swap in frozen if needed (more on that later). With easy-to-follow steps, customizable options, and ingredients you probably already have in your pantry, this recipe is going to become your go-to.
Ingredients You’ll Need
Before we dive into the process, let’s talk about what you’ll need. Here’s a simple list of ingredients that create the magic:
- 1½ cups of fresh strawberries (chopped)
- 1¾ cups of all-purpose flour
- 1 teaspoon of baking soda
- ½ teaspoon of salt
- ½ teaspoon of cinnamon (optional but recommended)
- 1 cup of granulated sugar
- ½ cup of vegetable oil
- 2 large eggs
- 1 teaspoon of vanilla extract
- ¼ cup of sour cream or yogurt (for extra moisture)
All of these ingredients combine to make a rich, flavorful loaf with that ideal strawberry kick.
Fresh vs. Frozen Strawberries
Fresh strawberries are ideal because they deliver a vibrant color and juicy flavor. But let’s be real—sometimes you just have a bag of frozen ones on hand. And that’s totally okay. If you’re using frozen strawberries, be sure to thaw and drain them thoroughly. Excess water can throw off the texture of the bread and make it soggy.
Frozen strawberries tend to be softer after thawing, so chop them gently to avoid turning them into mush. Tossing them in a tablespoon of flour before adding them to the batter helps keep them from sinking to the bottom of the loaf.
Optional Add-ins to Customize Your Bread
Want to make your strawberry bread extra special? Try mixing in:
- ½ cup chopped nuts (walnuts or pecans work great)
- ½ cup white or dark chocolate chips
- A teaspoon of lemon zest for a citrusy zing
- ½ cup shredded coconut
Feel free to experiment based on your taste. Just be cautious not to overload the batter—too many extras can weigh it down and mess with the baking time.
Essential Tools and Equipment
You don’t need fancy equipment to whip up a delicious loaf of strawberry bread, but having the right tools makes the process smoother and ensures better results. Here’s a quick list of what you’ll want to have on hand before you begin.
- Large mixing bowls (at least two)
- Measuring cups and spoons
- Rubber spatula or wooden spoon
- Electric hand mixer or stand mixer (optional but helpful)
- 9×5-inch loaf pan
- Parchment paper or non-stick spray
- Wire cooling rack
- Knife and cutting board (for the strawberries)
These basic kitchen items make prep and cleanup much easier, plus they help you achieve a consistent bake.
Must-Have Kitchen Tools
The loaf pan is a must. Using a 9×5-inch loaf pan ensures your bread bakes evenly and has that classic loaf shape. Non-stick pans are great, but even then, you should always grease the pan or line it with parchment paper to avoid sticking.
An electric hand mixer is optional, but if you want a super smooth batter, it’s worth using. You can still get great results with just a whisk or spatula if you’re going the low-tech route.
Preparation Tips Before You Start
Before diving into the recipe, take a few minutes to prep everything. It makes the whole process faster and more enjoyable.
- Preheat your oven to 350°F (175°C). Getting the oven hot before you put the bread in is crucial for even baking.
- Grease your loaf pan or line it with parchment paper to make cleanup a breeze.
- Measure all your ingredients and chop your strawberries ahead of time so everything’s ready to go.
Taking a few extra minutes to prep pays off in the end. You won’t be scrambling to find ingredients mid-recipe, and your strawberry bread will turn out better for it.
Step-by-Step Instructions
Alright, let’s get to the fun part—making the bread! Follow these steps, and you’ll have a homemade loaf that’s bursting with flavor and perfect texture.
Step 1 – Prepping the Strawberries
Start by washing and hulling about 1½ cups of fresh strawberries. Chop them into small, bite-sized pieces. You don’t want them too big, or they’ll create soggy pockets in the bread. Once chopped, gently toss them with a tablespoon of flour. This helps keep them suspended in the batter instead of sinking to the bottom.
If you’re using frozen strawberries, make sure they’re fully thawed and drained. You may want to pat them dry with a paper towel to soak up any extra moisture.
Step 2 – Mixing the Dry Ingredients
In a large bowl, whisk together your dry ingredients:
- 1¾ cups all-purpose flour
- 1 teaspoon baking soda
- ½ teaspoon salt
- ½ teaspoon ground cinnamon (optional)
Mix these well to make sure the baking soda and salt are evenly distributed throughout the flour. This ensures a uniform rise and flavor throughout your bread.
Step 3 – Preparing the Wet Mixture
In a separate bowl, beat together the following:
- 1 cup granulated sugar
- ½ cup vegetable oil
- 2 large eggs
- 1 teaspoon vanilla extract
- ¼ cup sour cream or plain yogurt
You can use a hand mixer or just a whisk, depending on what you have. The goal is to get a smooth, creamy mixture with no lumps. The sour cream is key here—it adds tang and moisture that makes the bread soft and rich.
Step 4 – Combining Wet and Dry Mixes
Now it’s time to bring everything together. Slowly add the dry ingredients into the wet mixture, stirring gently until just combined. Avoid overmixing; this can lead to tough, dense bread.
Once the batter is smooth and evenly mixed, fold in your chopped strawberries (and any optional add-ins you’re using). Gently fold with a spatula to avoid breaking up the fruit too much.
Step 5 – Baking the Strawberry Bread
Pour the batter into your greased or lined loaf pan and smooth the top with a spatula. Tap the pan on the counter a couple of times to release any air bubbles.
Bake at 350°F (175°C) for 50–60 minutes. The top should be golden and a toothpick inserted in the center should come out clean. If it starts browning too quickly, cover it loosely with foil for the last 15 minutes.
Let the bread cool in the pan for about 10 minutes before transferring it to a wire rack. Cooling it completely before slicing helps the texture set and prevents it from falling apart.
Tips for Perfect Strawberry Bread Every Time
There’s nothing more disappointing than slicing into a beautiful loaf only to find it’s underbaked, too dense, or just plain soggy. Let’s make sure that never happens with your strawberry bread. Here are some tried-and-true tips to help you bake it to perfection every single time.
1. Don’t Overmix the Batter
When you combine the wet and dry ingredients, mix just until they’re blended. Overmixing activates the gluten in the flour, leading to a dense, rubbery texture. A few lumps in the batter are totally fine. The strawberries will help create a naturally moist crumb, so no need to work the batter too hard.
2. Use Room Temperature Ingredients
Eggs and sour cream at room temperature blend more easily and evenly into the batter. This leads to a more consistent texture and better rise. If you forgot to take them out early, just let your eggs sit in warm water for 5 minutes and microwave the sour cream for 10-15 seconds.
3. Coat Your Strawberries in Flour
This simple step prevents the strawberries from sinking to the bottom of your loaf. It’s a small trick that makes a big difference in how evenly the fruit is distributed throughout the bread.
4. Avoid Excess Moisture
If your strawberries are overly juicy, pat them dry with a paper towel. Too much moisture from the fruit can throw off your batter’s consistency and lead to sogginess in the center.
5. Test for Doneness
Strawberry bread can sometimes look done on the outside before it’s fully baked inside. Use the toothpick test: insert it into the center of the loaf—if it comes out clean or with a few crumbs, you’re good to go. If it’s wet or gooey, give it more time in the oven, checking every 5 minutes.
6. Let It Cool Completely Before Slicing
Tempting as it may be, cutting the bread too soon can ruin the structure. Give it at least 30-40 minutes to cool on a wire rack so it sets properly and slices cleanly.
These tips may seem small, but combined they’ll help you avoid common pitfalls and bake a loaf that looks as good as it tastes.
Storing and Serving Suggestions
Your strawberry bread is out of the oven, beautifully golden, and the kitchen smells like heaven. But now what? Let’s talk about how to store it properly and get the most out of each delicious slice.
Storing Your Bread
To keep your strawberry bread fresh and moist, wrap it tightly in plastic wrap or aluminum foil once it’s completely cooled. Store it at room temperature for up to 3 days. If you want to keep it longer, you can refrigerate it for up to a week—but make sure it’s wrapped well to prevent drying out.
For even longer storage, strawberry bread freezes beautifully. Slice it, wrap each piece individually in plastic wrap, and then place all the slices in a zip-top freezer bag. When you’re ready to eat, just let it thaw at room temperature or microwave it for 20–30 seconds for a quick treat.
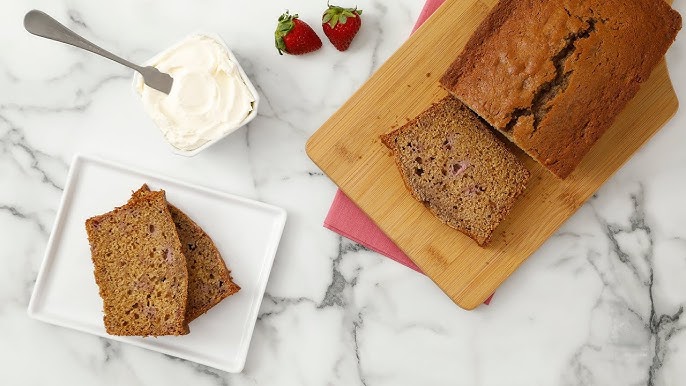
Serving Suggestions
Strawberry bread is incredibly versatile when it comes to serving options. Here are a few of our favorites:
- Warm with Butter: A simple pat of butter on a warm slice brings out all the fruity sweetness.
- Toasted with Cream Cheese: Slightly toast a slice and spread with cream cheese for a tangy contrast.
- As French Toast: Yes, you read that right! Turn your strawberry bread into an epic breakfast by dipping slices in egg batter and pan-frying like regular French toast.
- With Fresh Berries and Whipped Cream: Perfect for a brunch spread or light dessert.
Whether you’re enjoying a slice on a lazy Sunday morning or serving it at a family gathering, strawberry bread fits the bill every time.
FAQs about Strawberry Bread Recipe
1. Can I use other berries in place of strawberries?
Absolutely! Blueberries, raspberries, or chopped cherries can be excellent substitutes. Just be mindful of their moisture levels and toss them in flour to avoid sinking.
2. How long does strawberry bread last?
At room temperature, it lasts about 3 days if stored properly. In the fridge, up to a week. For long-term storage, freeze it for up to 3 months.
3. Can I make strawberry bread gluten-free?
Yes, just use a 1:1 gluten-free flour blend. Make sure it contains xanthan gum or add some separately to mimic the texture of regular flour.
4. What’s the best way to freeze strawberry bread?
Slice it, wrap each slice tightly in plastic wrap, and place them in a freezer-safe bag. Thaw at room temperature or microwave when ready to eat.
5. Can I add a glaze or frosting?
Definitely! A simple lemon glaze or cream cheese frosting can take this bread to the next level. Just make sure the bread is completely cool before adding any toppings.
Conclusion
Strawberry bread is one of those delightful recipes that brings joy with every bite. It’s easy to make, smells amazing while baking, and delivers a perfect balance of sweet and fruity flavor. Whether you’re a baking newbie or a seasoned pro, this recipe is forgiving, customizable, and downright delicious.
The beauty of this bread is in its simplicity—just a handful of pantry staples and a few juicy strawberries transform into something extraordinary. Once you try it, you’ll wonder how you ever lived without it. Plus, it’s a fantastic way to use up fresh berries before they go bad.
So go ahead—bake a loaf, share it with your loved ones (or keep it all to yourself), and make strawberry bread a staple in your baking rotation. You won’t regret it.