Seared Tuna Recipe: If you’re looking for a dish that screams “gourmet” but can be whipped up in just minutes, seared tuna is your best friend. This beautiful, protein-packed meal is not only incredibly healthy but also one of the most flavorful dishes you can make with minimal ingredients. Whether you’re a seasoned home cook or a beginner just testing the waters, seared tuna offers simplicity without sacrificing sophistication.
Why is seared tuna such a culinary favorite? Because it blends the buttery richness of raw tuna with the smoky char from a high-heat sear, giving it a unique texture and taste. The center stays rare or medium-rare—melting in your mouth like sushi-grade sashimi—while the outer layer gets that golden, crispy finish.
This recipe also checks a lot of boxes for health-conscious eaters. Tuna is high in protein, low in fat, and rich in omega-3 fatty acids, which promote heart health and reduce inflammation. Pair it with a crisp salad or steamed veggies, and you’ve got a balanced meal that looks and tastes like it came from a five-star kitchen.
So buckle up, because we’re about to dive into the exact steps, tools, and ingredients you’ll need to master the art of cooking the perfect seared tuna right at home.
Choosing the Right Tuna
Not all tuna is created equal—especially when it comes to searing. For the best results, you’ll want a tuna variety that’s both flavorful and firm enough to hold its shape during high-heat cooking.
Best Types of Tuna for Searing
- Yellowfin (Ahi) – This is the go-to choice for seared tuna. It’s firm, lean, and has a clean, mild flavor that works well with many seasonings.
- Bigeye Tuna – Slightly fattier than yellowfin, offering a richer taste and texture.
- Bluefin Tuna – Known for its luxurious marbling, this is a sushi-grade favorite but can be pricey.
- Albacore – A lighter option, though a bit flakier and less ideal for searing compared to others.
How to Select Fresh Tuna
Here are the top signs to look for at the market:
- Color: Deep red or pink flesh, not brown or grayish.
- Texture: Firm to the touch and moist, but not slimy.
- Smell: Clean ocean scent—avoid anything overly fishy.
- Cut: Steaks should be at least 1 to 1.5 inches thick for best results when searing.
Pro Tip: Always ask your fishmonger if the tuna is sushi-grade. This ensures it’s safe to eat even if left rare in the center.
Essential Ingredients for Seared Tuna
The beauty of this recipe is in its simplicity. You don’t need a pantry full of spices—just a few quality ingredients that enhance the natural flavor of the fish.
Core Ingredients
- Tuna Steaks (6–8 oz each) – Sushi-grade preferred.
- Salt & Pepper – For basic seasoning.
- Olive Oil or Sesame Oil – For a rich, nutty sear.
- Soy Sauce – Adds umami depth.
- Lemon or Lime Juice – Brightens the flavor.
Optional Flavor Boosters
- Garlic (minced or powder) – For a pungent kick.
- Ginger (grated or powdered) – Adds freshness and heat.
- Sesame Seeds – For a crunchy crust.
- Wasabi or Sriracha – For a spicy edge.
- Honey or Maple Syrup – A hint of sweetness to balance acidity.
Having all your ingredients ready before you start cooking—what chefs call “mise en place”—will help the process go smoothly.
Tools You’ll Need
Don’t worry—you don’t need a fancy kitchen setup to make seared tuna at home. But a few key tools will make a world of difference in the final result.
Kitchen Tools for a Perfect Sear
- Heavy Skillet or Cast-Iron Pan – Retains and distributes heat evenly.
- Tongs – For flipping the tuna without piercing it.
- Sharp Knife – For slicing tuna cleanly.
- Cutting Board – Preferably non-wooden for easy cleaning.
- Small Bowl for Marinade – Keeps things tidy.
Alternatives for Minimal Kitchens
- Non-stick pan: Not ideal, but it works with added care.
- Butter knife for slicing: Use the edge carefully if you don’t have a chef’s knife.
- Paper towels: For patting tuna dry, crucial for that perfect crust.
Investing in quality tools not only makes cooking easier but also improves the texture and look of your final dish.
Preparing the Tuna
Before you even think about firing up the pan, let’s talk prep. Proper preparation makes the difference between “meh” and mouthwatering.
How to Clean and Cut Tuna Steaks
- Rinse the tuna under cold water, then pat it dry thoroughly with paper towels.
- Trim off any sinew or discolored parts from the edges.
- Cut into uniform steaks if not pre-cut, about 1 to 1.5 inches thick. Thinner cuts will overcook quickly.
Marination Tips for Maximum Flavor
A quick marinade (15–30 minutes) can elevate your tuna from basic to bold. Here’s a simple one to try:
Simple Seared Tuna Marinade:
- 2 tbsp soy sauce
- 1 tbsp sesame oil
- 1 tsp lemon juice
- 1 tsp grated ginger
- ½ tsp garlic powder
- Pinch of black pepper
Directions:
- Combine ingredients in a bowl.
- Coat both sides of tuna steaks and let sit for up to 30 minutes in the fridge.
- Pat dry lightly before searing to avoid steaming the fish.
Why marinate? It not only adds flavor but also tenderizes the surface for a better sear.
Perfecting the Sear
Getting that mouthwatering crust on your tuna requires the right technique. It’s all about high heat, timing, and confidence.
How to Achieve the Ideal Sear
- Preheat your pan until it’s smoking hot. A cast-iron skillet is your best bet.
- Add oil with a high smoke point (like sesame or avocado oil).
- Place the tuna steak in the pan gently—it should sizzle immediately.
- Sear for 1 to 2 minutes on each side for a rare center. Add another 30–60 seconds if you want it medium.
- Avoid flipping repeatedly. Let it form a crust before turning.
- Use tongs or a spatula to press down gently for even contact.
Tips to Avoid Overcooking
- Always cook on high heat and fast.
- Don’t walk away—this is a dish that requires your full attention.
- If using sesame seeds, press them firmly into the tuna before searing to avoid burning.
Remember: Seared tuna should be crisp on the outside and ruby-red in the center. Overcook it, and it becomes dry and chewy, losing all that delicate flavor.
Serving Suggestions
Now that you’ve nailed the sear, it’s time to present your tuna like a pro. The right sides and garnishes can take this dish to the next level.
Best Side Dishes for Seared Tuna
- Asian Slaw – Crunchy, tangy, and colorful.
- Garlic Fried Rice – A savory partner with a hint of crunch.
- Avocado Salad – Creamy texture pairs beautifully with lean tuna.
- Wasabi Mashed Potatoes – A bold, spicy twist on a classic.
- Steamed Veggies or Edamame – Clean, simple, and healthy.
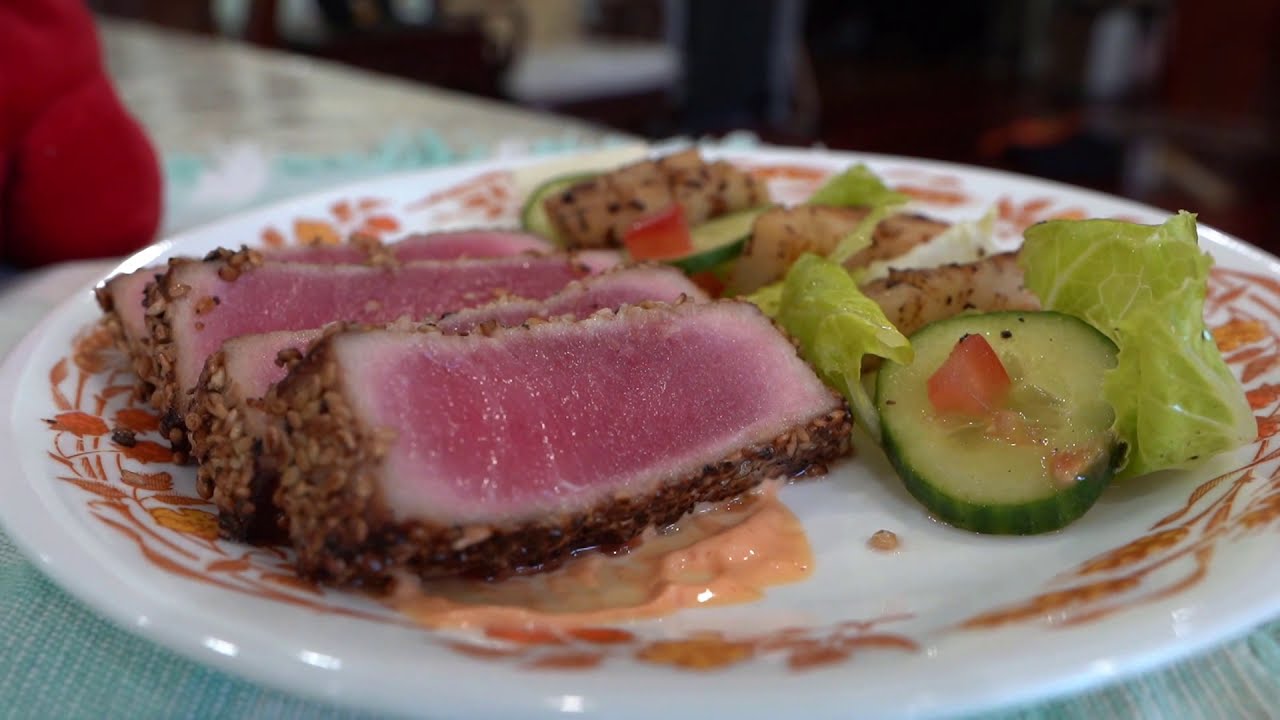
Plating Like a Pro
- Slice tuna steaks against the grain into ¼-inch thick slices.
- Fan out the slices on a white plate for maximum contrast.
- Drizzle with soy sauce reduction or a light ginger-lime dressing.
- Sprinkle with chopped chives, toasted sesame seeds, or microgreens for that fine-dining flair.
This dish is all about elegance and simplicity. A little finesse in plating goes a long way toward impressing guests—or just treating yourself.
Seared Tuna Variations
Want to switch things up? This dish is a blank canvas for your culinary creativity. Try these crowd-pleasing variations:
Asian-Inspired Tuna
- Marinade: Soy sauce, rice vinegar, garlic, ginger, sesame oil.
- Garnish: Scallions, sesame seeds, pickled ginger.
Mediterranean Style
- Marinade: Olive oil, lemon zest, rosemary, thyme.
- Side: Couscous, grilled vegetables, tzatziki.
Spicy Cajun Tuna
- Rub: Cajun seasoning, paprika, garlic powder, cayenne.
- Serve with: Corn salad or creole rice.
Crusted Tuna
- Coat with: Crushed peppercorns, sesame seeds, or crushed pistachios before searing.
- Adds crunch and visual wow-factor.
Tataki Style (Japanese)
- Lightly seared, then chilled and sliced thin.
- Served with ponzu sauce or citrus soy dressing.
Tuna is incredibly versatile—don’t be afraid to experiment and find your favorite version.
Storing and Reheating Leftovers
Though best enjoyed fresh, seared tuna can be stored and reheated the right way to maintain its quality.
How to Store Seared Tuna
- Allow to cool completely.
- Wrap tightly in plastic wrap or an airtight container.
- Store in the refrigerator for up to 2 days.
Avoid storing next to strongly scented foods to prevent flavor contamination.
Reheating Tips
- Do not microwave. This will dry it out instantly.
- Instead, gently reheat in a skillet over medium-low heat with a splash of water or sauce to retain moisture.
- Best enjoyed cold in salads, poke bowls, or sandwiches to avoid overcooking.
If you’re meal-prepping, consider undercooking slightly on day one to compensate for reheating later.
Nutritional Breakdown of Seared Tuna
One of the reasons seared tuna is such a hit in health-conscious circles? Its stellar nutritional profile.
| Nutrient | Per 6 oz Tuna Steak |
|---|---|
| Calories | 220–250 kcal |
| Protein | 40g+ |
| Fat | 5–10g |
| Omega-3 Fatty Acids | 1g+ |
| Carbs | 0g (unless sauces/sides are added) |
| Cholesterol | ~45 mg |
| Sodium | Depends on seasoning/marinade |
Health Benefits
- Heart Health: Thanks to omega-3s.
- Weight Management: High protein keeps you full longer.
- Muscle Building: Low-fat, high-protein combo ideal for fitness goals.
- Brain Function: Omega-3s support cognitive function.
For those watching their sodium, opt for low-sodium soy sauce or skip it altogether in the marinade.
Common Mistakes to Avoid
Even though seared tuna is simple to make, there are a few pitfalls that can ruin an otherwise perfect dish. Avoid these mistakes to ensure your tuna comes out tasting like it was cooked by a pro.
Overcooking the Tuna
This is the number one error. Tuna is best served rare to medium-rare. Overcooking dries it out and strips away its natural flavor. Remember:
- 1–2 minutes per side max.
- It should still be cool or slightly warm in the center when you take it off the heat.
Using Low-Quality Tuna
Not all tuna is meant for searing. Cheap cuts can be tough and flavorless, and may even smell “fishy.” Always aim for sushi-grade, fresh steaks that are vibrant in color and firm to the touch.
Not Drying the Tuna Before Searing
If there’s too much moisture on the surface, the tuna will steam instead of sear. Pat it dry thoroughly with paper towels before cooking.
Skipping the Preheat
Your pan needs to be smoking hot. This is essential to achieve that golden, crispy crust in a short time frame without cooking the inside too much.
Using Too Much Marinade During Cooking
While marinating is excellent for flavor, too much liquid in the pan will lower the temperature and cause your tuna to boil rather than sear. Always pat off excess marinade before placing the fish in the pan.
Avoiding these simple mistakes can drastically improve your cooking results, turning your dish from average to outstanding with just a few thoughtful steps.
Tuna Quality and Sustainability
As delicious as tuna is, it’s also important to consider its environmental impact and sustainability. Not all tuna is fished or farmed in the same way, and your choices can make a big difference.
What is Sustainable Tuna?
Sustainable tuna comes from fisheries that follow practices that:
- Avoid overfishing.
- Minimize bycatch of dolphins and other marine life.
- Protect the ocean environment.
How to Choose Sustainable Tuna
- Look for certifications like MSC (Marine Stewardship Council) or Dolphin Safe labels.
- Buy pole-and-line caught tuna – these methods are more selective and eco-friendly.
- Ask questions at your fish counter. Don’t be shy about asking where the tuna came from and how it was caught.
Why It Matters
Tuna populations, especially species like Bluefin, have been significantly overfished. By choosing responsibly sourced tuna, you’re helping protect ocean ecosystems and ensuring that future generations can enjoy this amazing fish too.
When in doubt, consult seafood sustainability guides like those from Monterey Bay Aquarium’s Seafood Watch program to make the best choice.
Pairing Drinks with Seared Tuna
Want to elevate your seared tuna experience even more? The right drink pairing can make each bite even more enjoyable.
Wine Pairings
- Sauvignon Blanc – Crisp and citrusy, it complements the light, clean flavors of tuna.
- Rosé – Especially if you’ve used spicy seasonings or sesame in your marinade.
- Pinot Noir – Light-bodied enough to pair with rare tuna, particularly if it’s crusted with pepper.
Beer Pairings
- Pilsners – Light, clean, and don’t overpower the tuna.
- Wheat Beers – Slightly sweet and citrusy, great for Asian marinades.
- Sake or Japanese Rice Beer – Perfect with a soy-ginger tuna.
Non-Alcoholic Options
- Sparkling Water with Lemon or Lime
- Green Tea or Jasmine Tea
- Ginger Lemonade – Zesty and refreshing!
Pairing your dish with the right beverage enhances the overall flavor experience, turning a simple dinner into a full-on dining event.
Making It a Meal: Full Menu Ideas
Want to serve your seared tuna as part of a complete meal for guests or a date night? Here’s a sample menu you can use.
Appetizer Options
- Edamame with sea salt
- Miso soup with scallions and tofu
- Seaweed salad
Main Course
- Seared Tuna Steak with sesame crust
- Served with Asian slaw and garlic fried rice
Dessert
- Green tea ice cream
- Coconut rice pudding with mango slices
Drinks
- Dry rosé or cold sake
- Mint and cucumber infused water
This simple yet elegant menu showcases the tuna beautifully and adds variety without overwhelming your prep time or budget.
FAQs about Seared Tuna Recipe
Q1: Can I use frozen tuna for searing?
Yes, but make sure it’s sushi-grade and fully thawed in the fridge. Pat it dry thoroughly before searing.
Q2: Is it safe to eat seared tuna rare?
Absolutely, if it’s sushi-grade. The key is using high-quality tuna from a trusted source.
Q3: What sauces go well with seared tuna?
Ponzu, wasabi mayo, soy-ginger glaze, or even a spicy aioli pair beautifully.
Q4: How long can I store leftovers?
Up to 2 days in the refrigerator, but it’s best enjoyed fresh or chilled the next day in salads or bowls.
Q5: Can I grill instead of pan-sear?
Yes! Just preheat your grill to high and follow the same timing—about 1–2 minutes per side.
Conclusion
Seared tuna is one of those rare dishes that strikes the perfect balance between simplicity and elegance. It’s quick to prepare, packed with flavor, and impressively nutritious. With just a few key ingredients, some attention to detail, and the right technique, you can whip up a restaurant-quality meal in less than 30 minutes.
From selecting the freshest cuts to mastering the sear and exploring creative marinades, you now have everything you need to create the ultimate seared tuna dish. Whether you’re cooking for a crowd or just treating yourself to a fancy solo dinner, this recipe is guaranteed to deliver.
So the next time you want something fast, healthy, and gourmet—skip the takeout and sear some tuna instead. You won’t regret it.


