Seared Ahi Tuna Recipe: Seared Ahi tuna is more than just a meal—it’s a bold culinary statement. If you’ve ever dined at a high-end seafood restaurant, chances are you’ve seen it featured prominently on the menu. Its vibrant red color, tender texture, and rich, meaty flavor make it a showstopper. But here’s the best part: you don’t have to be a professional chef to whip this up at home.
Ahi tuna, also known as yellowfin tuna, is prized for its firm texture and mild taste, making it ideal for quick searing. When cooked correctly, the outer edges caramelize beautifully while the center stays raw and buttery—a mouthwatering contrast of textures and flavors.
Why is this dish so beloved? Well, it’s healthy, incredibly quick to prepare, and versatile enough to serve over salad, rice, or with a dipping sauce. Plus, it’s Instagram-worthy, and who doesn’t love a meal that looks as amazing as it tastes?
Let’s take a deep dive into this elegant yet simple dish. Follow along, and you’ll be plating up restaurant-quality seared Ahi tuna in no time.
Ingredients You’ll Need
Getting the ingredients right is half the battle won. Since Ahi tuna is the star of the dish, quality matters more than quantity.
Fresh Ahi Tuna Selection
Your first and most important ingredient is, of course, the Ahi tuna itself. You’ll want to look for sushi-grade tuna. This means it’s been frozen at a temperature low enough to kill parasites, making it safe for raw consumption. You can usually find this at specialty fish markets or high-end grocery stores.
Look for:
- Bright red, not brown or dull in color.
- A firm texture with minimal odor.
- Vacuum-sealed packaging if not freshly cut.
Aim for about 6 ounces per person. Ahi tuna steaks should be at least 1 to 1.5 inches thick to allow for a proper sear while keeping the inside rare.
Essential Spices and Marinade Components
The beauty of this dish lies in its simplicity. You don’t need a pantry full of exotic spices. Here’s what you’ll typically need:
- Soy sauce – For that deep umami flavor.
- Sesame oil – Adds a nutty undertone.
- Lime or lemon juice – Offers a fresh, acidic contrast.
- Garlic (minced) – Gives a savory punch.
- Ginger (grated) – Brings in a zesty warmth.
- Salt & pepper – Basic seasoning that enhances everything.
Optional additions include crushed red pepper for a kick or a dab of wasabi for an Asian-inspired twist.
Optional Toppings and Sauces
Want to elevate your dish even more? Here are some optional toppings and sauces to consider:
- Toasted sesame seeds
- Thinly sliced scallions
- Ponzu sauce
- Spicy mayo (a mix of mayo and sriracha)
- Pickled ginger
- Avocado slices
These extras can take your Ahi tuna from simple to sensational in just seconds.
Tools and Equipment
Before we get into the cooking process, let’s make sure you’ve got the right gear. You don’t need a commercial kitchen setup, but a few quality tools make all the difference.
Best Pan for Searing Tuna
The right pan can make or break this recipe. Go for a heavy-bottomed skillet or a cast-iron pan. These pans distribute heat evenly and can get hot enough to give your tuna that perfect, crusty sear without overcooking the interior.
Avoid non-stick pans unless they can handle high heat. The goal is to cook the outside quickly while leaving the inside raw, which means the pan needs to be screaming hot.
Other Kitchen Essentials
Here’s what else you’ll need:
- Sharp knife – To slice the tuna cleanly without tearing.
- Tongs – For flipping the tuna safely.
- Mixing bowl – To prepare your marinade.
- Paper towels – For patting the tuna dry (essential for a good sear).
- Cutting board – Preferably one designated for raw fish.
These tools help streamline the process and keep things clean and efficient.
Preparing the Tuna
Now that you’ve got your ingredients and tools ready, it’s time to prep the star of the show.
How to Properly Clean and Cut Ahi Tuna
Start by patting the tuna dry with paper towels. Moisture is the enemy of a good sear, so get it as dry as possible. Then, inspect the steak for any dark bloodlines—these can be chewy and bitter. If present, trim them away using a sharp knife.
Cut the steak into even portions if you’re serving multiple people. Uniform thickness helps ensure each piece cooks evenly. You can also trim the edges slightly to give it a more appealing, square shape (totally optional but pro-level presentation).
Marinating Techniques for Flavor Boost
While some purists prefer their tuna seasoned simply with salt and pepper, a short marinade can enhance flavor dramatically.
Here’s a quick marinade recipe:
- 2 tbsp soy sauce
- 1 tsp sesame oil
- 1 tsp lime juice
- 1 garlic clove (minced)
- ½ tsp grated ginger
Mix everything in a bowl and coat the tuna steaks. Let them sit for about 10–15 minutes—no longer, as the acid can start to cook the fish. Remember, the goal is flavor infusion, not ceviche!
Step-by-Step Cooking Instructions
It’s go time. Cooking Ahi tuna is all about timing and temperature. Follow these steps to get that coveted sear with a rare, sushi-style center.
Step 1: Preheat Your Pan
Place your skillet or cast-iron pan on the stove and crank up the heat. Let it heat up for about 3–5 minutes until it’s extremely hot—this is crucial for searing. You’ll know it’s ready when a drop of water sizzles and evaporates on contact.
Add a small amount of high-smoke-point oil like avocado or grapeseed oil to the pan. Swirl it around to coat the surface.
Step 2: Seasoning the Tuna
Right before placing it in the pan, season the tuna with salt and pepper on all sides. You can also sprinkle on sesame seeds at this point for an added crunch and visual appeal.
Once seasoned, handle the steaks gently and be ready to move quickly. Things happen fast once the tuna hits the pan.
Step 3: The Searing Process
This is where the magic happens. Once your pan is blazing hot, gently place the Ahi tuna steak into the skillet using tongs. You should hear a dramatic sizzle—music to a cook’s ears!
Sear the steak for 30 to 45 seconds per side. That’s it. Yes, it’s that quick. You’re not cooking it through; you’re just giving it a flavorful outer crust. The inside should remain rare and tender, almost sashimi-like in texture. If you’re searing a thicker piece, you can quickly hit the edges as well by holding the steak with tongs and rolling the sides across the pan.
Important tips:
- Don’t overcrowd the pan. Cook one or two steaks at a time for best results.
- Resist the urge to move it. Let the tuna sit undisturbed during searing to develop that beautiful crust.
- Ventilation helps. Open a window or use your range hood—this process can get smoky!
Once all sides are seared, remove the tuna from the pan and place it on a clean cutting board.
Step 4: Resting the Tuna
Although it’s not as critical as with red meat, letting the Ahi tuna rest for a few minutes helps redistribute its juices. This short pause also gives you time to plate your sides or whip up a sauce.
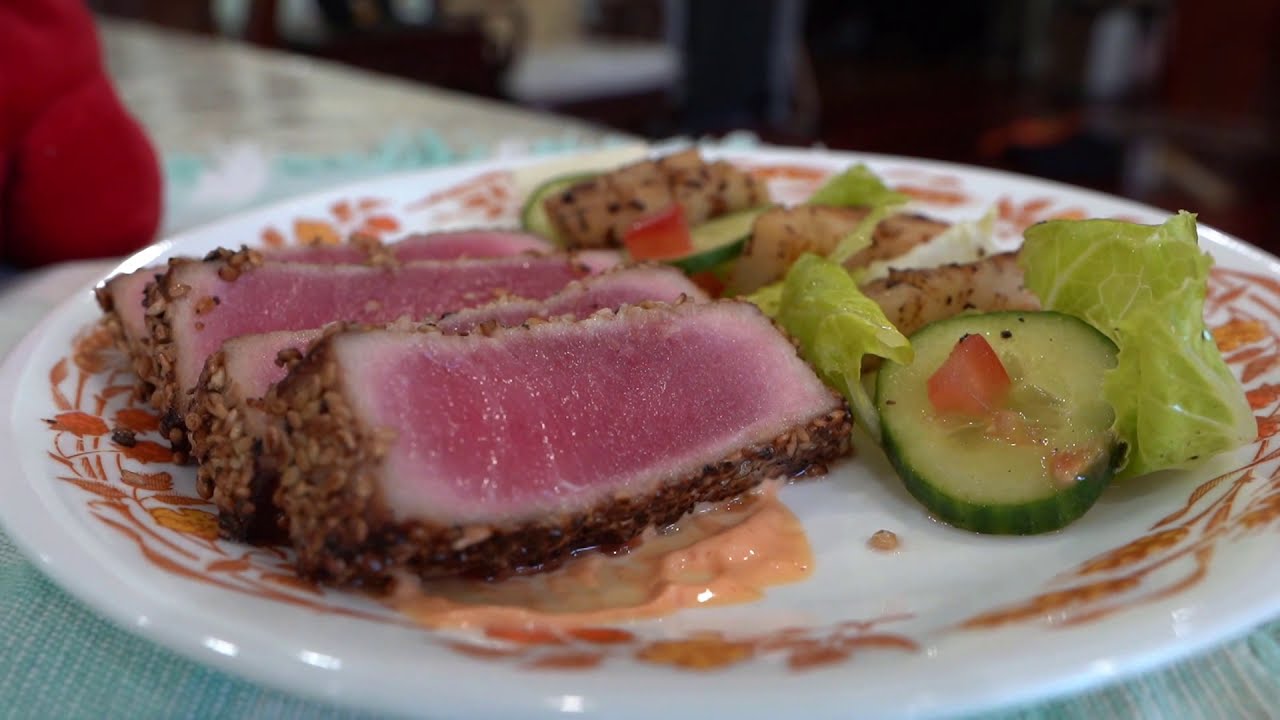
After 2–3 minutes, use a sharp knife to slice the tuna against the grain into ½-inch thick slices. This makes for easier chewing and a prettier presentation.
Now’s the moment to appreciate your handiwork: a gorgeously seared exterior encasing a ruby-red, buttery center. It’s a work of edible art.
Serving Suggestions
You’ve seared the tuna to perfection—what now? Presentation matters, and how you serve your Ahi tuna can elevate the entire meal experience.
Pairings and Plating Ideas
Here are some tasty and visually stunning ideas for plating:
- Over a bed of greens – Ahi tuna slices look amazing over arugula or mixed greens, especially with a drizzle of sesame dressing.
- With jasmine rice or quinoa – A hearty base that complements the tuna’s rich flavor.
- As a poke-style bowl – Add avocado, seaweed salad, pickled ginger, cucumber, and edamame for a colorful and healthy bowl.
- Topped with spicy mayo or ponzu sauce – Both provide a punch of flavor and creamy or citrusy contrast.
Garnish with sesame seeds, microgreens, or thin scallion strips for a restaurant-worthy finish.
Nutritional Benefits of Ahi Tuna
Ahi tuna isn’t just delicious—it’s a nutritional powerhouse. For those watching their diet or just trying to eat cleaner, this fish checks all the boxes.
Protein-Rich and Low in Fat
A 6-ounce serving of Ahi tuna provides around 35 grams of protein while being low in saturated fats. This makes it a great option for fitness enthusiasts, athletes, or anyone trying to maintain lean muscle mass.
Omega-3 Fatty Acids
Tuna is loaded with omega-3s, which are great for heart health, reducing inflammation, and even boosting brain function. It’s a smart addition to any well-rounded diet.
Vitamins and Minerals
Ahi tuna is also a source of:
- Vitamin D
- Vitamin B12
- Selenium
- Niacin
- Phosphorus
These nutrients support energy levels, immune health, and overall well-being.
Just remember: due to mercury levels, limit your tuna consumption to 2–3 servings per week, especially for pregnant women or children.
Common Mistakes to Avoid
Even though seared Ahi tuna is a simple dish, a few missteps can ruin the texture or flavor. Let’s go over the most common mistakes and how to avoid them.
Overcooking the Tuna
This is the number one mistake. Ahi tuna should be seared, not cooked through. Overcooking makes it dry, chewy, and flavorless. Remember, a good sear is quick and only affects the outer layer. Keep your heat high and your cooking time short—about 30 to 45 seconds per side.
Using Low-Quality Tuna
The quality of your tuna directly affects the outcome. Using lower-grade fish not meant for raw consumption can lead to a mushy texture and unpleasant taste. Always look for sushi-grade or sashimi-grade tuna from a trusted fishmonger or market.
Skipping the Drying Step
If you skip patting your tuna dry, it will steam in the pan rather than sear. That means no golden crust, no texture, and a soggy finish. Use paper towels to blot the surface dry before seasoning and cooking.
Marinating for Too Long
A quick 10–15 minute marinade is enough. Any longer and the acid (like lime or lemon juice) can start to “cook” the fish, altering the texture and defeating the purpose of searing. Always marinate briefly and cook immediately after.
Storage and Reheating Tips
So you made a batch and have leftovers—no problem. But keep in mind, seared Ahi tuna is best enjoyed fresh. If you must store and reheat it, here’s how.
How to Store Leftover Seared Tuna
- Let it cool to room temperature before storing.
- Wrap it tightly in plastic wrap or place it in an airtight container.
- Store in the refrigerator for up to 2 days.
Do not freeze already cooked tuna—it can ruin the texture.
Reheating Guidelines
If you need to reheat:
- Avoid the microwave—it will overcook the tuna quickly.
- Instead, place the slices in a hot pan for 5–10 seconds per side just to warm them up slightly.
- Or, eat them cold! Chilled Ahi tuna makes a fantastic topping for salads and poke bowls.
Variations and International Twists
If you’re feeling adventurous, here are a few global spins on your classic seared Ahi tuna that will bring new excitement to your table.
Japanese-Style Tuna Tataki
This version involves lightly searing the tuna and slicing it thinner, then serving with a citrus-soy dipping sauce (ponzu) and garnishes like grated daikon, scallions, and wasabi.
Spicy Korean-Inspired Tuna
Add gochujang (Korean chili paste), soy sauce, garlic, and a bit of sesame oil to your marinade. Serve with kimchi and steamed rice for a fusion flavor bomb.
Mediterranean-Style Tuna
Marinate with olive oil, lemon juice, garlic, oregano, and black pepper. Serve with a Greek salad or roasted vegetables and tzatziki sauce for a healthy, refreshing twist.
FAQs about Seared Ahi Tuna Recipe
Q1: Can I eat seared Ahi tuna raw in the middle?
Yes, as long as it’s sushi-grade or sashimi-grade. These are specifically handled and frozen to kill parasites, making them safe for raw consumption.
Q2: What sides go best with seared Ahi tuna?
Some great options include jasmine rice, quinoa, roasted vegetables, Asian slaw, seaweed salad, or mixed greens.
Q3: How do I know if the tuna is cooked correctly?
The edges should be nicely browned and crisp while the center remains a vibrant pink or red. It should feel slightly warm but soft in the middle.
Q4: Is Ahi tuna healthy?
Absolutely! It’s high in lean protein and omega-3 fatty acids, and low in saturated fat. Just monitor portion sizes due to mercury levels.
Q5: What’s the best sauce to serve with seared Ahi tuna?
Ponzu sauce, spicy mayo, wasabi aioli, or a soy-ginger reduction are all excellent options that complement the tuna’s flavor.
Conclusion
Seared Ahi tuna is one of those rare dishes that checks every box: it’s elegant, simple, healthy, and downright delicious. Whether you’re cooking for a weeknight dinner or entertaining guests, this dish always impresses. With a handful of quality ingredients and the right technique, you can create a gourmet experience in your own kitchen.
Remember, the key is in the prep: choose high-quality tuna, keep it dry, season boldly, and cook quickly. Don’t be afraid to try variations and make it your own. Once you’ve mastered the basics, the possibilities are endless—from Asian-inspired plates to Mediterranean flair.
So grab that skillet, heat it up, and go sear some tuna like a pro!


