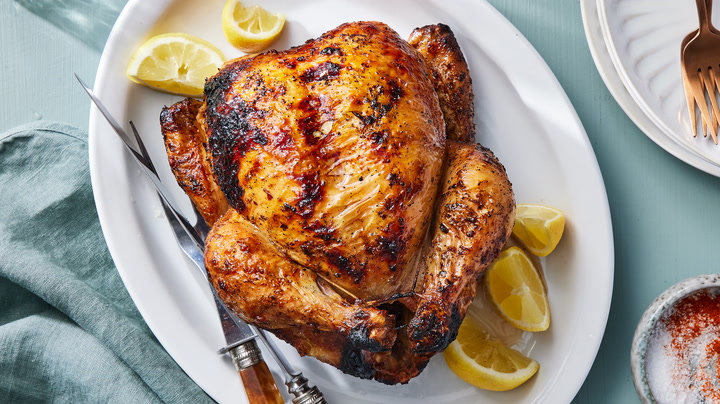
Rotisserie Chicken Recipe: There’s something magical about the smell of rotisserie chicken slowly turning on the spit—crispy, golden skin and juicy, tender meat that practically melts in your mouth. Whether it’s a quick weeknight dinner or the centerpiece of a family feast, rotisserie chicken hits the spot every time.
But here’s the secret: you don’t need to run to the store or have a fancy rotisserie oven to enjoy this delight. With the right recipe, some patience, and a few kitchen tools, you can recreate that succulent, savory flavor right at home. Not only does homemade rotisserie chicken taste better, but it’s also healthier and cheaper.
In this step-by-step guide, we’re diving deep into everything you need to know—no fluff, just the delicious stuff. From selecting your ingredients and tools to marinating and cooking like a pro, get ready to master your very own homemade rotisserie chicken.
Ingredients You’ll Need
Let’s start with what really makes this dish sing—the ingredients. The good news? Most of what you need might already be in your kitchen. Here’s a breakdown of the essential ingredients:
Main Ingredients:
- 1 whole chicken (3.5 to 4.5 lbs) – Make sure it’s fresh, not frozen.
- 2 tablespoons olive oil or melted butter – For that crispy, golden skin.
- 1 tablespoon salt – Kosher or sea salt for flavor and moisture retention.
- 1 tablespoon ground black pepper – Adds a bit of spice and depth.
- 1 tablespoon paprika – Smoked or sweet, this gives that signature color and warmth.
- 1 teaspoon garlic powder
- 1 teaspoon onion powder
- 1 teaspoon dried thyme or rosemary
Optional Add-ins:
- Lemon slices – For a burst of citrus inside the cavity.
- Fresh herbs (like parsley, thyme, rosemary) – Great for stuffing inside or rubbing under the skin.
- Chili flakes – If you like a bit of heat.
- Honey or brown sugar – A touch of sweetness for caramelized skin.
You’re welcome to get creative here. Play around with herbs, swap in Cajun or Italian seasoning, or add a bit of mustard for tang. The idea is to balance salt, fat, acid, and heat—a foolproof formula for flavor.
Equipment and Tools Required
Before you jump into cooking, let’s talk gear. You don’t need a commercial-grade rotisserie setup, but having the right tools will make your life a whole lot easier. Here’s what you’ll want on hand:
Must-Have Tools:
- Rotisserie spit and forks – Most countertop ovens or grills have attachments.
- Kitchen twine – For trussing the chicken and ensuring even cooking.
- Meat thermometer – Don’t guess; check your temps.
- Large mixing bowl – For marinating the chicken.
- Basting brush – To apply oil or butter evenly.
Optional But Helpful:
- Drip tray – Catches juices, reduces mess.
- Injector – For injecting marinade into the chicken for deeper flavor.
- Oven-safe gloves or tongs – Handling a hot chicken on a spit isn’t fun without these.
Don’t have a rotisserie? No problem. You can still replicate that rotating effect in an oven using a roasting rack and occasionally turning the chicken manually.
Preparing the Chicken
Now that we’ve got our ingredients and tools, it’s time to get our hands dirty (literally). Preparing the chicken properly is key to ensuring it cooks evenly and turns out juicy and flavorful.
Step 1: Clean and Trim
Start by removing the chicken from its packaging and removing the giblets (usually found in the cavity). Rinse the chicken under cold water and pat it completely dry with paper towels. This is crucial—moist skin = soggy skin.
Trim off any excess fat or loose skin around the neck and cavity, but don’t go overboard. You want to maintain the structure for even cooking.
Step 2: Tuck the Wings
To prevent burning, tuck the wings under the chicken’s body. This also helps it rotate evenly if you’re using a rotisserie.
Step 3: Truss the Chicken
This is the part most people skip—but don’t! Trussing (tying the legs together with kitchen twine) helps the chicken cook uniformly, keeps it compact, and gives you that classic rotisserie shape. Tie the legs together and loop the twine around the body to hold the wings tight.
Step 4: Prepping the Skin
Once the chicken is clean and tied, rub it down with olive oil or melted butter. This adds flavor and helps the skin crisp up during cooking. Be generous—you want every inch covered.
Making the Marinade
Marinade is where the magic begins. It’s the difference between bland bird and flavor bomb. We’re going for a dry rub with a touch of oil—simple, effective, and oh-so-tasty.
Step 1: Mix the Spices
In a bowl, combine salt, pepper, paprika, garlic powder, onion powder, and thyme. Feel free to toss in some lemon zest or chili flakes if you’re feeling adventurous.
Step 2: Rub It In
Using your hands, rub the spice blend all over the chicken—under the skin, over the skin, and inside the cavity. Get into every nook and cranny. This is your foundation of flavor.
Step 3: Let It Sit
For best results, let the chicken marinate for at least 2 hours—or even better, overnight in the fridge. This gives the spices time to penetrate the meat and work their magic.
Mounting the Chicken on the Rotisserie
Once your chicken is marinated and packed with flavor, it’s time to get it on the spit and prepped for cooking. This step might seem intimidating if you’re new to using a rotisserie setup, but it’s easier than it looks.
Step 1: Secure the Chicken on the Spit
Slide the rotisserie spit through the cavity of the chicken from one end to the other. Ensure it’s centered—this allows it to rotate evenly. Place the forks on both ends and secure them tightly to hold the chicken in place. The key is stability—you don’t want the bird flopping around mid-rotation.
Step 2: Balance the Load
If your rotisserie setup allows, make sure the weight is evenly distributed. An unbalanced load can lead to uneven cooking and strain on your motor.
Step 3: Insert the Drip Tray
Place a drip tray beneath the chicken to catch those flavorful juices. Not only does this help with cleanup, but you can also use these drippings later for gravy or basting.
Step 4: Check for Clearance
Ensure the chicken has enough space to rotate freely without touching the heating elements or the sides of the oven or grill. This prevents burning and ensures a golden, even finish.
Cooking the Chicken on the Rotisserie
Now comes the fun part—cooking! This is where all your prep work starts to pay off. The rotation ensures self-basting, while the indirect heat crisps the skin and locks in juices.
Step 1: Preheat Your Rotisserie or Grill
Set your rotisserie oven or grill to a medium-high heat—around 375°F (190°C) is perfect. If you’re using a charcoal grill, stack the coals on the sides, not directly under the chicken, to avoid flare-ups.
Step 2: Let It Spin
Place the spit in the rotisserie and let the chicken start turning. Keep the lid closed as much as possible to maintain a steady temperature. Resist the urge to peek too often!
Step 3: Monitor the Time and Temperature
Cook the chicken for about 15–20 minutes per pound. Use a meat thermometer to check the internal temperature at the thickest part of the thigh—you’re aiming for 165°F (74°C). If the skin is browning too quickly, reduce the heat slightly.
Step 4: Baste Occasionally (Optional)
For an extra burst of flavor and golden skin, you can baste the chicken every 20–30 minutes with its own drippings or a bit of melted butter mixed with herbs.
Checking for Doneness
Even though you have a timer in mind, don’t just rely on time. The best way to make sure your chicken is cooked through—and not dry—is by checking for doneness the right way.
Use a Meat Thermometer
Insert the thermometer into the thickest part of the thigh, avoiding the bone. Once it reads 165°F (74°C), you’re good to go. If it’s not quite there, give it another 10–15 minutes and recheck.
Visual Clues
- The juices should run clear when you pierce the thigh.
- The skin should be golden brown and crispy.
- The legs should wiggle easily when moved.
Don’t Rush the Process
Patience is key. A rotisserie chicken needs time to develop that rich, roasted flavor and crispy exterior. Trust the process, and don’t crank up the heat too much in a rush.
Resting the Chicken
You’ve done all the hard work—now it’s time to let the chicken chill (literally). Resting your chicken before carving is absolutely essential.
Why Resting Matters
When you take the chicken off the heat, the juices are still actively moving around. If you slice it too early, all that flavor ends up on the cutting board instead of staying in the meat.
How Long to Rest
Let your chicken rest for at least 15 to 20 minutes. Cover it loosely with foil to keep it warm, but don’t wrap it too tightly, or the skin will lose its crisp.
During This Time…
This is the perfect time to finish off your side dishes—roast some veggies, whip up mashed potatoes, or toast some garlic bread. Make use of the downtime while the chicken settles.
Carving and Serving
Finally, the moment you’ve been waiting for! Carving a rotisserie chicken the right way ensures every bite is juicy and delicious.
Tools You’ll Need
- Sharp carving knife
- Meat fork or tongs
- Cutting board with a groove to catch juices
Carving Steps
- Remove the legs and thighs – Cut through the skin between the leg and the body. Gently pull the leg away and slice through the joint.
- Separate the drumsticks from the thighs – Bend the drumstick backward to find the joint and slice through it.
- Remove the wings – Twist and pull them off gently.
- Carve the breast meat – Make a deep cut along the breastbone and slice the meat down in even strips.
Serving Ideas
- Pair with roasted potatoes and seasonal vegetables.
- Serve with warm pita and tzatziki for a Mediterranean twist.
- Make a hearty chicken sandwich or salad with leftovers.
Storing Leftovers Properly
Let’s face it—rotisserie chicken makes amazing leftovers. The trick is keeping it just as juicy and flavorful the next day. Here’s how you can store and reheat it like a pro.
Refrigerating Leftovers
If you have extra chicken, remove the meat from the bones to make storage easier and more space-efficient. Place it in an airtight container and refrigerate within two hours of cooking. Stored properly, it should last 3–4 days in the fridge.
Freezing for Later
Want to save it for a rainy day? Rotisserie chicken freezes beautifully. Just shred or cut it into chunks, place it in a freezer-safe bag or container, and store it for up to 3 months. Label it with the date, so you know when to use it by.
Reheating Tips
To keep the meat moist:
- Reheat in a covered dish in the oven at 325°F (160°C) with a splash of broth.
- For quicker reheating, microwave it in a microwave-safe container with a damp paper towel over the top.
- Avoid reheating it more than once to maintain quality and reduce food safety risks.
Different Flavor Variations
Want to shake things up next time? Rotisserie chicken is like a blank canvas. You can experiment with global flavors or tailor the spices to your mood. Here are some fun and tasty variations.
Lemon Herb Chicken
Add lemon zest, rosemary, and oregano to your dry rub. Stuff the cavity with lemon slices and fresh thyme. It’s zesty, aromatic, and super fresh.
Spicy Cajun Style
Mix paprika, cayenne, black pepper, garlic powder, and onion powder for a bold, spicy rub. Add a touch of hot sauce to your butter basting mix for extra kick.
Mediterranean Inspired
Use a mix of garlic, olive oil, lemon, oregano, and mint. Pair it with hummus, olives, and pita for a full Mediterranean meal.
Asian Fusion
Combine soy sauce, sesame oil, ginger, and garlic for a marinade. Glaze the chicken during the last 10 minutes of cooking with a bit of honey and hoisin sauce.
BBQ Glazed Chicken
Marinate with smoked paprika, garlic, and a bit of brown sugar. Then, baste it with your favorite barbecue sauce during the final 15 minutes of cooking.
Each variation brings a whole new vibe to your dinner table—don’t be afraid to get creative!
Serving Suggestions and Side Dishes
A perfect rotisserie chicken deserves equally delicious sides. Here are some classic and creative options to round out your meal.
Classic Sides
- Mashed Potatoes – Creamy, buttery, and always a crowd-pleaser.
- Roasted Vegetables – Think carrots, Brussels sprouts, or sweet potatoes.
- Steamed Rice or Pilaf – Keeps it simple and light.
Fresh Salads
- Caesar Salad – Crisp romaine, Parmesan, and croutons.
- Greek Salad – Tomatoes, cucumber, olives, and feta.
- Coleslaw – Adds a tangy crunch that pairs well with savory chicken.
Bread and Grains
- Garlic Bread – Always a winner.
- Dinner Rolls – Perfect for sopping up those juices.
- Couscous or Quinoa – Lighter alternatives packed with nutrients.
Dips and Sauces
- Gravy – Made from pan drippings.
- Chimichurri – For a herby punch.
- Tzatziki or Ranch – Cool and creamy contrasts to warm chicken.
Troubleshooting Common Issues
Even the best cooks hit a snag sometimes. If your rotisserie chicken didn’t come out quite right, here are some common problems and how to fix them next time.
Problem: Chicken Is Dry
- Solution: You may have overcooked it. Use a meat thermometer next time.
- Try brining the chicken beforehand to help it retain moisture.
Problem: Skin Isn’t Crispy
- Solution: Make sure the chicken is patted completely dry before seasoning.
- Rub with enough oil and keep the heat high enough during cooking.
Problem: Uneven Cooking
- Solution: Truss your chicken well and ensure it’s balanced on the spit.
- Preheat your grill or oven fully and avoid opening the lid too often.
Problem: Undercooked Meat
- Solution: Always check the internal temperature. Every chicken is different, and timing can vary based on weight.
Troubleshooting isn’t about failure—it’s part of the learning process. Each attempt brings you closer to perfect rotisserie chicken.
FAQs about Rotisserie Chicken Recipe
1. Can I make rotisserie chicken without a rotisserie setup?
Absolutely. Use your oven with a roasting rack, turning the chicken halfway through cooking. It won’t rotate, but you can still get similar results.
2. How long does it take to cook a 4 lb chicken on the rotisserie?
Typically, 15–20 minutes per pound. So around 1 hour to 1 hour 20 minutes for a 4 lb bird.
3. What’s the best way to keep rotisserie chicken moist?
Avoid overcooking. Use a thermometer and rest the chicken before carving. Brining can also help retain moisture.
4. Can I use frozen chicken for rotisserie cooking?
No, you should thaw it fully before cooking to ensure even cooking and food safety.
5. Is rotisserie chicken healthy?
Yes, especially when homemade. You control the ingredients, avoid preservatives, and it’s high in protein and low in carbs.
Conclusion
And there you have it—everything you need to know to master the art of homemade rotisserie chicken. From choosing the right ingredients and preparing your bird with care to getting that perfect golden brown finish, it’s all doable with a little time and love.
Not only is rotisserie chicken deeply satisfying to eat, but it’s also versatile, cost-effective, and healthier when made at home. Once you’ve done it yourself, you might never go back to the store-bought kind.
So fire up that grill, prep your marinade, and get ready to wow your family or guests. With this step-by-step guide, you’re fully equipped to serve a dinner that’s as impressive as it is delicious.


