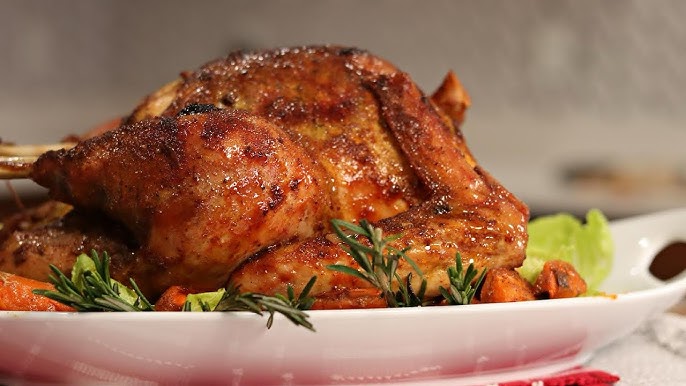
Roasted Turkey Recipe: Roasted turkey has become an iconic centerpiece on dining tables, especially during Thanksgiving, Christmas, and festive gatherings. But why is it so popular? This tradition dates back centuries, where families gathered to celebrate abundance and thankfulness, often showcasing turkey as the star of the feast. Its size makes it ideal for feeding large crowds, and its mild flavor pairs beautifully with a range of spices and sides. Plus, there’s something nostalgic and comforting about the golden-brown, juicy bird arriving at the center of the table—it’s not just food, it’s an experience.
What You’ll Learn in This Guide
In this step-by-step guide, you’ll learn everything you need to know to prepare the perfect roasted turkey. From selecting the right bird and prepping it with love, to seasoning, roasting, carving, and even storing leftovers—we’ve got you covered. Whether you’re a first-timer or just looking to perfect your technique, this guide simplifies the process without compromising on flavor or presentation. By the end of it, you’ll have the confidence to cook a turkey that’s juicy on the inside and beautifully crispy on the outside.
Choosing the Right Turkey
Fresh vs. Frozen – Which is Better?
When it comes to choosing between fresh and frozen turkeys, it often boils down to preference and convenience. Fresh turkeys tend to have a better texture and slightly more flavor because they haven’t been frozen, which can sometimes affect the moisture content. However, frozen turkeys are more readily available and budget-friendly. If you go the frozen route, be sure to account for defrosting time—it can take several days depending on the size. Always check labels: avoid birds injected with saline or preservatives if you’re aiming for natural flavor.
Ideal Turkey Size Based on Guests
One of the most common questions is: how big should your turkey be? A general rule is to plan for 1.5 pounds per person. So, for a group of 8, you’d want a 12-pound turkey. This accounts for bones and some leftovers. If you’re feeding a larger group, consider getting two smaller turkeys instead of one massive bird, which can be harder to cook evenly. And if you’re cooking for a small family, opt for a bone-in turkey breast—same great flavor, less hassle.
Ingredients You’ll Need
Basic Ingredients
To keep things simple yet flavorful, these are the essentials you’ll need:
- 1 whole turkey (12–14 lbs)
- Kosher salt
- Black pepper
- Unsalted butter (room temperature)
- Olive oil
- Fresh herbs: rosemary, thyme, sage
- Garlic cloves
- Onion
- Carrots
- Celery
- Lemon
These basic ingredients help build a flavorful base, especially when combined with good technique and attention to detail.
Optional Flavor Enhancers
Want to take your turkey to the next level? Try these add-ons:
- White wine or apple cider (for basting or roasting liquids)
- Paprika or cayenne for a spicy kick
- Honey or maple syrup for a sweet glaze
- Bacon strips (lay over the turkey to infuse flavor)
- Poultry seasoning mix
Customizing your seasoning can make your turkey unforgettable. Choose flavors that complement your side dishes and personal taste preferences.
Prepping the Turkey
Thawing (If Frozen)
If your turkey is frozen, it’s crucial to thaw it safely. The safest method is in the refrigerator—allow 24 hours of thawing time for every 4–5 pounds. So, a 12-pound turkey needs about 3 days. Place the bird in a leak-proof plastic bag and set it in a tray to catch any drips.
Cleaning and Patting Dry
Once thawed, rinse the turkey cavity and body under cold water, then pat it completely dry with paper towels. This step helps the skin crisp up during roasting. Moisture is the enemy of crispy skin, so be thorough.
Removing Giblets and Neck
Don’t forget to reach inside the cavity to remove the giblet bag and neck. These are often used for making gravy or stuffing. Set them aside in the fridge until you’re ready to use them. Leaving them inside can ruin your turkey (and your oven!).
Brining the Turkey for Extra Flavor
Wet Brine vs. Dry Brine
Brining is the secret weapon for juicy turkey meat. But should you wet brine or dry brine? Both methods work, but they offer different results.
A wet brine involves soaking the turkey in a saltwater solution. This helps infuse the bird with moisture and flavor. To do this, you’ll need a large container or brining bag and enough fridge space to keep the turkey submerged and cold for 12–24 hours.
On the other hand, dry brining is simpler and less messy. Rub salt (and optional spices) directly onto the turkey and let it sit uncovered in the fridge for up to 48 hours. This method not only seasons the meat thoroughly but also helps dry out the skin, leading to a crisper finish once roasted.
Both methods result in incredibly flavorful turkey. If you’re short on time or fridge space, dry brine is the easier, more efficient route.
How Long to Brine
Timing matters. For wet brining, aim for 12 to 24 hours, depending on the size of your turkey. For dry brining, a minimum of 24 hours is ideal, though 48 hours yields the best flavor and texture. Be sure to rinse off any excess salt after wet brining and pat the bird completely dry. For dry brining, just brush off the excess salt—no rinsing needed.
Brining is optional but highly recommended. It transforms your turkey from potentially bland and dry into a tender, flavorful feast that people will talk about long after the plates are cleared.
Seasoning and Stuffing
Herb Butter Rub
One of the most effective ways to infuse flavor into your turkey is with an herb butter rub. Mix softened butter with finely chopped garlic, rosemary, thyme, sage, lemon zest, salt, and pepper. Then, gently lift the turkey skin and rub the mixture directly onto the meat under the skin, as well as on the outside.
This technique does more than flavor the bird—it helps create a beautiful golden crust while keeping the meat tender and moist. For an extra layer of flavor, drizzle olive oil over the bird before roasting. The combination of butter and oil works wonders on achieving that mouthwatering, crispy skin.
Aromatic Stuffing for Flavor (Not to Eat)
Here’s a key tip: Don’t stuff the turkey with traditional bread stuffing. It can affect cooking time and sometimes result in food safety issues. Instead, fill the cavity with aromatic ingredients that add flavor to the meat without being eaten.
Popular aromatics include:
- Halved onions
- Garlic cloves
- Lemon halves
- Apple slices
- Celery stalks
- Fresh herb bundles (thyme, rosemary, sage)
These ingredients steam from the inside, subtly infusing the turkey with fragrance and depth. Want to serve stuffing too? Cook it separately for better control over texture and flavor.
Roasting Process – Step by Step
Oven Temperature Settings
Start with a preheated oven set to 325°F (163°C). This ensures the turkey cooks slowly and evenly, avoiding dryness. Some prefer to blast the turkey at 450°F (232°C) for the first 30 minutes to get a head start on browning the skin, then lower it to 325°F for the remainder of the cook time. Either method works—just make sure you monitor it closely.
Roasting Time Per Pound
As a general rule, roast the turkey for 15–20 minutes per pound. So, a 12-pound turkey will take about 3 to 4 hours. Use a roasting pan with a rack to lift the bird, allowing hot air to circulate all around it. Tent the turkey loosely with foil for the first part of roasting to prevent the skin from browning too early.
At about halfway through cooking, remove the foil and let the skin crisp up. Keep an eye on it—every oven is different.
Basting the Turkey
Basting involves spooning or brushing pan juices over the turkey to keep it moist. It’s not strictly necessary, but it can help enhance flavor and give that extra golden finish. If you choose to baste, do it every 30–45 minutes. Open the oven door quickly to avoid temperature drops and use a baster or large spoon to drizzle the juices over the bird.
Pro tip: Instead of just basting with turkey juices, try a mix of melted butter and herbs. Your taste buds will thank you.
How to Know When It’s Done
Using a Meat Thermometer
Forget guessing—use a meat thermometer. This is the only reliable way to ensure your turkey is fully cooked and safe to eat. Insert the thermometer into the thickest part of the thigh (without touching the bone). When it reads 165°F (74°C), the turkey is done.
Some turkeys come with a pop-up timer, but don’t trust it blindly. Those often pop after the meat is overcooked. A digital thermometer gives you precise control over your cook.
Checking Juices and Texture
Another sign your turkey is done? The juices run clear when you cut between the leg and thigh. If they’re still pink or reddish, it needs more time.
You’ll also notice the legs moving freely in their sockets and the skin looking crispy and browned. Use your senses: the smell, color, and firmness are all part of the cues.
Remember, an overcooked turkey can be dry and tough. Pull it out at the right moment and give it a rest (literally)—you’ll enjoy the rewards of juicy, tender meat every time.
Resting the Turkey Before Carving
Why Resting is Crucial
You’ve pulled a golden, sizzling turkey out of the oven—so why wait to dig in? Resting might feel like a test of patience, but it’s a vital step in the process. When the turkey roasts, its juices move toward the center of the bird. If you slice into it immediately, those juices spill out, leaving you with dry meat.
Letting the turkey rest for 30 to 45 minutes allows the juices to redistribute throughout the meat. This means every slice will be moist, flavorful, and perfectly tender. Simply transfer the bird to a cutting board and loosely tent it with foil to keep it warm.
Not only does resting improve flavor, but it also gives you time to make gravy from the drippings and prep your side dishes. Win-win, right?
How Long to Let It Sit
For best results, rest the turkey for at least 30 minutes, but up to an hour if needed. Don’t worry—it won’t go cold. The foil traps the heat, and the internal temperature will stay safe for a while. This buffer also helps keep the turkey intact for cleaner, easier carving.
A well-rested turkey is the key to a great feast. Skipping this step is like skipping dessert—just don’t do it!
Carving the Turkey Like a Pro
Tools You’ll Need
Carving doesn’t have to be intimidating. With the right tools and technique, you can make beautiful, Instagram-worthy slices. Here’s what you’ll need:
- A sharp carving knife or chef’s knife
- A carving fork or sturdy tongs
- A large cutting board (preferably one with a juice groove)
- A platter for serving
Make sure your knife is sharp—a dull blade will shred the meat rather than slice it cleanly.
Carving Step-by-Step
- Remove the Legs and Thighs: Pull each leg away from the body and cut through the joint. Separate the drumstick from the thigh if desired.
- Slice the Thigh Meat: Cut across the grain for the most tender slices.
- Cut Off the Breasts: Make a long slice down one side of the breastbone, following the contour of the ribs. Gently pull the breast meat away and slice it crosswise.
- Wings Come Last: Twist and cut at the joint to remove the wings.
Arrange everything nicely on a platter and garnish with herbs or citrus for that extra touch of elegance. And just like that—you’ve carved a turkey like a pro.
Serving Suggestions
Perfect Side Dishes
The turkey may be the star, but side dishes are the supporting cast that makes the meal unforgettable. Here are some classics that pair beautifully with roasted turkey:
- Mashed potatoes with gravy
- Roasted Brussels sprouts or green beans
- Stuffing (cooked separately!)
- Cranberry sauce
- Sweet potato casserole
- Cornbread or dinner rolls
Want to add a fresh twist? Try a quinoa salad, honey-glazed carrots, or a charred vegetable medley.
Sauce and Gravy Ideas
Turkey without gravy is like a movie without popcorn—it’s just not the same. Use the pan drippings to make a savory homemade gravy by adding flour and stock, whisking until smooth.
For something different, try:
- Mushroom gravy
- Giblet gravy (using those parts you set aside earlier)
- Cranberry-orange sauce for a sweet contrast
Sauces elevate the whole experience, giving you flavor-packed bites from start to finish.
Storing and Reusing Leftovers
How to Store Properly
Once the feast is over, it’s time to think about storage. Don’t leave the turkey out too long—refrigerate within 2 hours to avoid bacteria. Place carved meat in airtight containers and refrigerate for up to 4 days, or freeze it for up to 3 months.
Keep gravy and stuffing in separate containers. Label with dates to avoid confusion later on.
Best Leftover Recipes
Leftover turkey is a gift that keeps on giving. Try these tasty ideas:
- Turkey sandwiches or paninis with cranberry mayo
- Turkey noodle soup with leftover veggies
- Turkey pot pie with buttery crust
- Turkey quesadillas or enchiladas
- Turkey salad with Greek yogurt dressing
Get creative and mix things up—you might even find you enjoy the leftovers more than the main meal!
Troubleshooting Common Issues
Dry Turkey?
A dry turkey can be heartbreaking after all your hard work. Causes usually include overcooking or not enough fat (like butter or oil). Next time, brine your bird, baste it more often, or consider roasting it breast-side down for part of the time.
For now, fix dry slices by drizzling hot broth or gravy over them to rehydrate. Serving with extra sauce or stuffing also helps balance out the dryness.
Uneven Cooking?
If the breast is cooked but the thighs aren’t, tent the breast with foil and return the bird to the oven until the thighs reach 165°F. This protects the already-done parts while finishing the rest.
Using a roasting rack and rotating the turkey mid-way through cooking also ensures more even results. An oven thermometer helps you monitor hot and cool spots too.
FAQs about Roasted Turkey Recipe
1. How long does it take to thaw a turkey in the fridge?
Plan for 24 hours per 4–5 pounds of turkey. A 12-pound bird takes about 3 days to thaw.
2. Can I roast a turkey without brining?
Yes, but brining helps enhance moisture and flavor. Dry brine is a quick, easy alternative.
3. What should I do if the turkey is done too early?
Wrap it in foil and towels, and let it rest in a warm cooler or oven set to low (around 200°F).
4. Do I have to baste the turkey?
Basting adds flavor and moisture, but it’s optional. Brining and proper roasting techniques can eliminate the need.
5. What wine pairs well with roasted turkey?
Go for Pinot Noir, Chardonnay, or Riesling. They complement turkey’s mild flavor without overpowering it.
Conclusion
Roasting a turkey may seem like a monumental task, but with a clear plan, some patience, and the right techniques, it becomes a delicious tradition worth repeating. From picking the perfect bird to seasoning, roasting, carving, and serving, each step plays a role in creating an unforgettable meal. And remember, it’s not about perfection—it’s about bringing people together over a table filled with love and laughter.
So go ahead, take the plunge, and roast that turkey with confidence. You’ve got this!


