Refried Beans Recipe: There’s nothing quite like a warm, hearty bowl of refried beans to round out a comforting meal. Whether you’re spooning them into tacos, layering them in burritos, or just enjoying them as a side, refried beans are a staple of Mexican cuisine that’s loved all over the world.
This guide will walk you through everything you need to know to make authentic, flavorful refried beans right at home—from choosing the right beans to getting that perfect creamy texture.
What Are Refried Beans?
Refried beans, or frijoles refritos, aren’t actually “fried twice,” as the name might imply. The name is a mistranslation from Spanish—refritos actually means “well-fried,” not “twice-fried.” The process involves cooking and then pan-frying cooked beans, usually pinto or black beans, in fat and mashing them into a soft, creamy consistency.
They are the ultimate comfort food, packed with flavor and easy to make. Their versatility makes them a hit in many households—they’re affordable, filling, and loaded with protein and fiber.
Refried beans are not only a side dish; they’re a base for many Mexican dishes like tostadas, burritos, and enchiladas. Whether you’re going for a vegetarian option or loading them with bacon and cheese, they bring a delightful, creamy element to any meal.
History and Cultural Significance
The origins of refried beans trace back to traditional Mexican and Tex-Mex kitchens. Beans have been a dietary staple in Latin America for thousands of years, and the method of cooking them with onions, lard, and spices evolved as a way to give leftovers new life.
In Mexican cuisine, every family has its own take on refried beans—some like them silky smooth, others chunky with bits of onions and garlic. Some fry them in lard for a traditional flavor, while others opt for olive oil or butter. The way they’re made often tells a story of regional preferences and family tradition.
These beans have become a symbol of Mexican home cooking, and they’ve spread internationally, becoming a staple in kitchens from Texas to Tokyo. Learning to make them is more than mastering a recipe—it’s understanding a cultural tradition.
Ingredients Needed
Key Ingredients
Making refried beans from scratch doesn’t require a long grocery list. Here’s what you’ll typically need:
- 1 lb (about 2 cups) dried pinto beans – You can also use black beans for a variation.
- 1 small onion, halved – Adds depth and aroma.
- 3 cloves garlic – Fresh and fragrant.
- Salt – For seasoning.
- Lard, bacon grease, butter, or vegetable oil – Your fat of choice for frying.
- Water or low-sodium broth – To cook the beans.
These are the essentials, but don’t be afraid to make it your own. Start simple, then adjust to your taste.
Optional Add-ins for Extra Flavor
Once you’ve mastered the basics, try experimenting with these flavor-boosters:
- Jalapeños or chili peppers – For some heat.
- Cumin and oregano – Classic Mexican spices.
- Chopped cilantro – Fresh and vibrant.
- Cheese (Cotija, cheddar) – To top it off or mix in.
- Chorizo or bacon – Meaty and smoky for extra richness.
These additions can take your refried beans to a whole new level. Think of the base recipe as your canvas—and paint with flavor!
Preparation Before Cooking
Choosing the Right Beans
The type of bean you use will impact both flavor and texture. Pinto beans are the most traditional choice for refried beans, thanks to their creamy texture and earthy flavor. However, black beans are a delicious alternative if you’re looking for something slightly firmer and nuttier.
Avoid canned beans for the base recipe if you want the best taste. Cooking dried beans from scratch gives you more control over flavor and texture—and it’s surprisingly easy once you get the hang of it.
Inspect your beans before cooking. Look for debris, stones, or shriveled beans and discard them. This quick step can save you from a gritty bite later.
Soaking Methods (Quick vs Overnight Soak)
Soaking your beans before cooking helps reduce cooking time and makes them easier to digest. Here are your two main options:
Overnight Soak (Recommended):
- Place the beans in a large bowl.
- Cover with several inches of water.
- Soak for 8-12 hours or overnight.
- Drain and rinse before cooking.
Quick Soak (For When You’re in a Hurry):
- Put beans in a pot and cover with water.
- Bring to a boil for 2 minutes.
- Remove from heat, cover, and let sit for 1 hour.
- Drain and rinse.
Both methods soften the beans and reduce cooking time, but the overnight soak generally produces better texture and flavor.
Cooking the Beans
Stovetop Method
Now that your beans are soaked and ready to go, it’s time to start cooking. The stovetop method is traditional and gives you great control over texture and flavor. Here’s how to do it:
Step-by-Step Instructions:
- Place your soaked beans in a large pot – Add enough water or broth to cover the beans by about 2 inches.
- Add aromatics – Toss in your halved onion and garlic cloves. These ingredients infuse your beans with flavor as they simmer.
- Bring to a boil – Turn the heat to high and let everything come to a rolling boil.
- Reduce to a simmer – Once boiling, lower the heat and let it simmer gently.
- Cook for 1.5 to 2 hours – Stir occasionally and add more water as needed. You want the beans tender but not falling apart.
Pro Tips:
- Don’t add salt at the beginning—it can toughen the skins. Wait until the beans are almost done.
- Skim off any foam that forms at the top during boiling for a cleaner flavor.
When they’re soft and fully cooked, remove the onion and garlic if desired. Drain the beans but save the cooking liquid—you’ll need it for mashing later.
Instant Pot or Pressure Cooker Option
Short on time? The Instant Pot or a traditional pressure cooker is your best friend. It cuts the cooking time dramatically without sacrificing taste.
How to Use the Instant Pot:
- Add soaked beans to the pot – About 1 lb of beans, covered with 5-6 cups of water.
- Include aromatics – Add onion, garlic, and even a bay leaf if you like.
- Set to high pressure – Cook for 25-30 minutes.
- Natural release – Let the pressure release naturally for about 15-20 minutes.
Just like with the stovetop method, remember to save the cooking liquid. It’s gold when it comes to getting the perfect refried texture later.
Refrying Process
Best Oils and Fats to Use
The frying part is where refried beans get their signature richness and flavor. The fat you choose will shape the entire dish’s taste.
Here are the most popular choices:
- Lard – The most authentic and traditional fat used in Mexican cuisine. It gives the beans an incredibly rich and deep flavor.
- Bacon grease – Adds a smoky, savory element that’s irresistible.
- Butter – Makes the beans creamy with a slightly sweet note.
- Vegetable or olive oil – Great vegetarian options, though olive oil will lend a stronger, distinctive flavor.
Steps for Frying:
- Heat 2-3 tablespoons of your fat of choice in a skillet over medium heat.
- Add finely chopped garlic or onions if desired, and sauté until golden.
- Add your cooked beans (drained) into the pan.
- Mash and stir using a potato masher or the back of a spoon.
As you mash, add back in the cooking liquid a little at a time until you reach your desired consistency. Some like their refried beans smooth and spreadable, while others prefer a chunkier texture.
Mashing Techniques – Smooth or Chunky
The texture of your refried beans can totally change how they complement your dish. Here’s how to get it just right:
For Smooth Beans:
- Use an immersion blender or regular blender.
- Add enough liquid to help them blend smoothly.
- Fry them after blending to maintain the rich flavor.
For Chunky Beans:
- Stick with a hand masher or even a sturdy wooden spoon.
- Mash only some of the beans and leave the rest intact.
- Add in bits of fried onion or jalapeño for extra bite.
Either way, keep the pan on medium heat and stir frequently. Let the beans fry for 10-15 minutes so the flavors can meld and the texture thickens. You’ll know they’re done when they start pulling away from the sides of the skillet.
Serving Suggestions
How to Serve Refried Beans
Once your beans are perfectly refried, it’s time to dig in. These creamy, savory beans are incredibly versatile and can be served in so many ways that you’ll never run out of ideas.
Here are some of the most popular ways to enjoy them:
- As a side dish: A classic pairing with rice, enchiladas, tamales, tacos, or grilled meats.
- Inside burritos and tacos: Spread refried beans onto a tortilla before adding fillings—it acts like a flavorful glue that holds everything together.
- Topped on tostadas: Add a layer of refried beans, followed by lettuce, salsa, cheese, and avocado for a crunchy delight.
- Bean dip: Warm them up, mix in cheese, salsa, or sour cream, and serve with tortilla chips.
- With breakfast: Pair them with scrambled eggs and tortillas for a hearty start to the day.
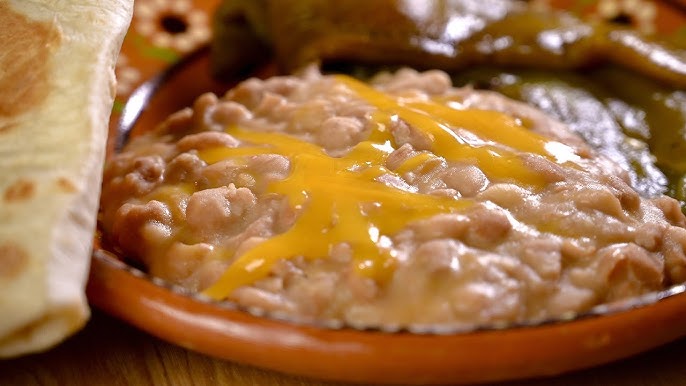
Don’t forget the garnishes! A little shredded cheese, chopped cilantro, a drizzle of crema, or a spoonful of salsa can elevate your refried beans to a whole new level.
Storing and Reheating Refried Beans
Got leftovers? Lucky you. Refried beans store beautifully and are just as delicious the next day.
How to Store:
- Let the beans cool completely before storing.
- Transfer to an airtight container.
- Store in the fridge for up to 5 days.
Freezing Tips:
- Portion beans into freezer-safe bags or containers.
- Flatten bags to save space and promote even freezing.
- Label with the date—use within 2-3 months for best flavor.
How to Reheat:
- Stovetop: Add a splash of water or broth to loosen them up and heat over medium heat, stirring often.
- Microwave: Cover and heat in intervals, stirring occasionally.
- Oven: For large batches, reheat in a covered dish at 350°F until warmed through.
Just like mashed potatoes or risotto, refried beans thicken as they cool. A little liquid and some gentle stirring bring them right back to life.
Health Benefits of Refried Beans
Nutritional Profile
Refried beans are not just tasty—they’re also packed with nutrients. When made from scratch and with healthy fats, they can be a wholesome addition to your meals.
Here’s what you get in one cup of homemade refried beans:
| Nutrient | Amount |
|---|---|
| Calories | ~215 kcal |
| Protein | 13g |
| Fiber | 12g |
| Carbs | 36g |
| Fat | 5g |
| Iron | 3 mg (15% DV) |
| Potassium | 600 mg (17% DV) |
Key Benefits:
- High in fiber – Aids digestion and keeps you feeling full.
- Rich in plant-based protein – Great for vegetarians and vegans.
- Supports heart health – Beans are known to reduce cholesterol levels.
- Low in sugar – Naturally sweet without added sugars.
Just be cautious with the fat and salt levels—opt for olive oil or avocado oil for a heart-healthier version.
How to Make Them Healthier
Want to enjoy refried beans guilt-free? Here are a few tips:
- Use olive oil or avocado oil instead of lard.
- Go light on salt – Season gradually and taste as you go.
- Add more vegetables – Mix in sautéed bell peppers, spinach, or tomatoes.
- Try low-sodium broth – For added flavor without the extra salt.
Homemade refried beans are a fantastic way to eat clean while still enjoying comfort food. It’s all about balance and choosing wholesome ingredients.
Common Mistakes to Avoid
Even the most seasoned cooks can slip up when making refried beans. Here are a few common pitfalls and how to avoid them:
1. Not soaking the beans: Skipping this step can result in unevenly cooked or tough beans. Always soak, even if it’s just a quick soak.
2. Salting too early: Adding salt during the early stages of cooking beans can make them tough. Salt at the end, when they’re almost done.
3. Overcooking or undercooking: Keep a close eye on your beans while they simmer. Undercooked beans are hard and chalky, while overcooked beans turn mushy and fall apart.
4. Not saving the bean broth: This liquid is key to achieving the perfect texture during the mashing step. It adds flavor and prevents the beans from drying out.
5. Using the wrong fat or too much of it: While lard adds richness, too much can make the dish greasy. Use just enough to sauté and enhance flavor without overwhelming the dish.
Steer clear of these mistakes, and your beans will come out perfect every time.
FAQs about Refried Bean Recipe
1. Can I use canned beans for this recipe?
Yes, you can, but cooking dried beans from scratch gives you better flavor and texture. If using canned, rinse them well and reduce the cooking time.
2. Are refried beans vegan?
They can be! Just use vegetable oil instead of lard or bacon fat, and skip the cheese or dairy toppings.
3. How long do homemade refried beans last in the fridge?
They’ll stay fresh for up to 5 days in an airtight container. You can also freeze them for 2–3 months.
4. Can I add spices while cooking the beans?
It’s best to add spices like cumin or chili powder during the refrying stage to preserve their flavor.
5. Why are my beans dry or too thick after refrying?
Just add more of the reserved bean liquid or water while mashing to adjust the texture.
Conclusion
Refried beans are one of those humble dishes that can transform a meal from good to unforgettable. Whether you’re cooking for a crowd or just craving some comfort food, learning to make refried beans from scratch is a game-changer. They’re budget-friendly, customizable, and ridiculously satisfying.
With just a few simple ingredients, a bit of patience, and some tasty fat, you’ll be whipping up restaurant-worthy refried beans in your own kitchen. So soak those beans, heat up your skillet, and get ready to make your new favorite side dish.


