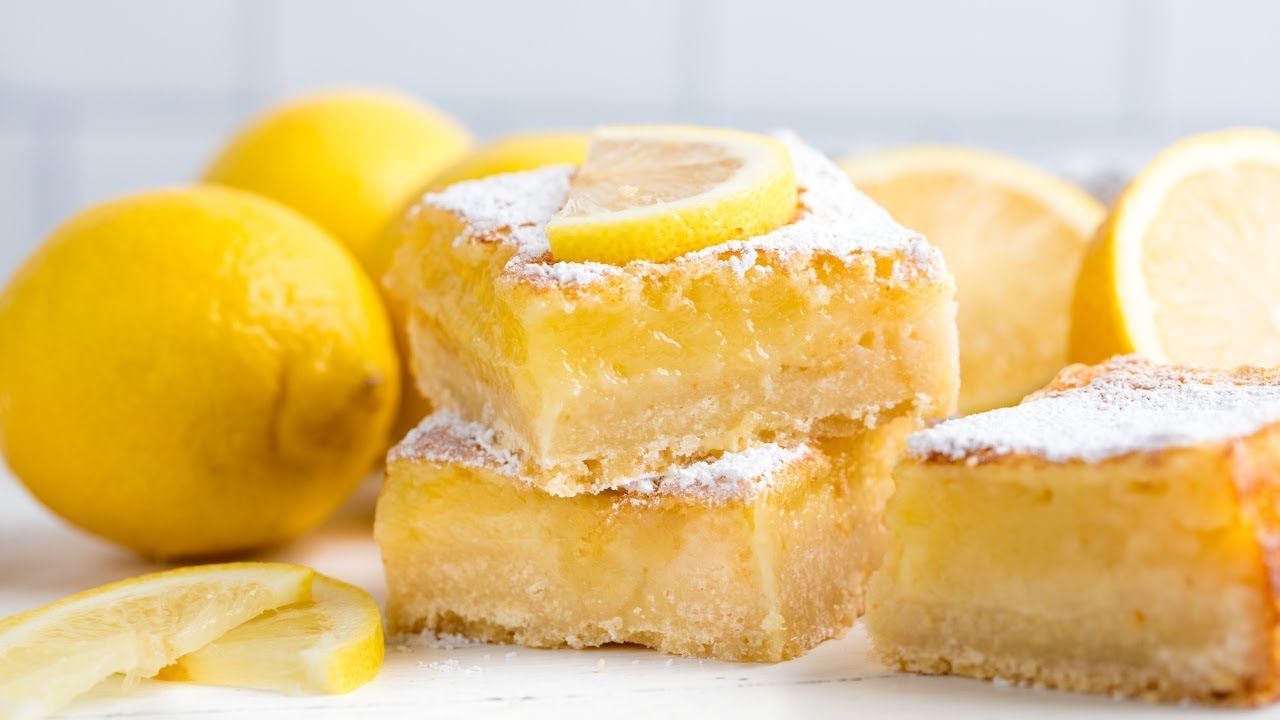
Lemon Squares Recipe: Lemon squares, also known as lemon bars, are a zesty, tangy dessert with a buttery shortbread crust topped with a luscious lemon filling. They strike the perfect balance between sweet and tart, making them a favorite treat for citrus lovers. What sets lemon squares apart is their simplicity and their ability to shine without needing any fancy decoration or embellishment. You bite into a soft, slightly gooey lemon topping that melts in your mouth, layered over a crumbly, buttery crust. Sounds like heaven, right?
Why Everyone Loves Them
Lemon squares are incredibly versatile. Whether you’re baking for a summer picnic, a holiday gathering, or just to satisfy your sweet tooth, they fit right in. They’re easy to transport, crowd-pleasing, and most importantly – incredibly delicious. They also freeze well, making them great for prepping ahead. And let’s not forget – that vibrant yellow hue and the dusting of powdered sugar make them look as good as they taste.
Ingredients You’ll Need
For the Crust
The crust is the base that holds everything together. It’s a simple shortbread, but don’t underestimate its importance. It provides a buttery, crumbly texture that contrasts beautifully with the soft lemon layer.
- 1 cup (2 sticks) unsalted butter, softened
- 1/2 cup granulated sugar
- 2 cups all-purpose flour
- 1/4 teaspoon salt
You can add a teaspoon of vanilla extract if you want to enhance the flavor, though it’s not traditional.
For the Lemon Filling
This is where the magic happens. The filling should be tangy and rich but not overwhelmingly sweet. Use fresh lemons if possible – bottled lemon juice just doesn’t do justice here.
- 1 1/2 cups granulated sugar
- 1/4 cup all-purpose flour
- 4 large eggs
- 2/3 cup fresh lemon juice (about 3-4 lemons)
- Zest of 1 lemon
- Powdered sugar (for dusting)
Kitchen Tools You’ll Need
Before you get started, make sure your kitchen is ready. Here’s a quick checklist of tools:
- 9×13-inch baking dish
- Mixing bowls
- Electric mixer or whisk
- Measuring cups and spoons
- Spatula
- Fine mesh sieve (optional, for zest or dusting sugar)
A parchment-lined pan helps make the squares easier to remove and slice neatly.
Step-by-Step Lemon Squares Recipe
Step 1: Preheat and Prep
Start by preheating your oven to 350°F (175°C). Line your baking dish with parchment paper, leaving a little overhang on the sides to lift the bars out later. Lightly grease the paper if you’re worried about sticking.
This step is crucial because baking the crust and filling at the right temperature ensures both layers cook evenly. Don’t skip preheating – it sets the stage for perfection.
Step 2: Make the Shortbread Crust
In a large bowl, cream together the softened butter and granulated sugar until light and fluffy. Add the flour and salt, mixing just until a dough forms. It’ll be crumbly but should hold together when pressed.
Transfer the dough into your prepared baking dish and press it down evenly with your hands or the bottom of a glass. Try to get it as level as possible – an uneven crust can lead to lopsided bars.
Step 3: Bake the Crust
Place the crust in your preheated oven and bake for about 20 minutes or until it’s just beginning to turn golden around the edges. You don’t want it too brown – it will continue to cook when you add the lemon filling.
Remove the crust from the oven and let it cool slightly while you prepare the filling. This gives the crust time to firm up and prevents it from getting soggy underneath the lemon layer.
Step 4: Prepare the Lemon Filling
While the crust is cooling, let’s whip up that rich, zesty lemon layer. In a large mixing bowl, whisk together the sugar and flour first. This prevents clumping and helps the flour distribute evenly throughout the filling.
Now, add the eggs, lemon juice, and zest. Whisk until fully combined and smooth. If you want an extra silky texture, you can strain the mixture through a fine mesh sieve to remove any egg bits or pulp from the lemon juice. The lemon zest adds a vibrant citrus punch, so don’t skip it!
The consistency should be pourable and slightly thick but not too runny. If it feels too thin, let it sit for a few minutes to thicken slightly – but don’t let it sit too long, or it could begin to separate.
Step 5: Pour and Bake Again
Pour the lemon filling over the slightly cooled crust. Tilt the pan gently to ensure it spreads evenly to all corners. Then carefully return the pan to the oven.
Bake for another 20 to 25 minutes, or until the center is just set and no longer jiggles when shaken. Don’t overbake – the filling will continue to set as it cools, and you don’t want a dry, rubbery texture.
Once baked, let the lemon bars cool in the pan on a wire rack for at least 1 hour. Then, transfer them to the fridge for another 1-2 hours before slicing. Chilling not only helps them firm up but also makes cutting much cleaner.
Cooling and Cutting Tips
Cutting lemon squares can be a little tricky – they’re delicate and sticky if not cooled properly. Here’s how to do it like a pro:
- Chill before cutting: This is key. Always chill your bars for at least 2 hours before slicing. It helps them firm up.
- Use a sharp knife: Wipe it clean between each cut to keep the edges smooth and clean.
- Dust after cutting: If you dust with powdered sugar before slicing, it can melt and disappear. Dust the tops after you cut them into squares for the best look.
- Trim edges: For a professional presentation, you can trim the outer edges before slicing the rest into neat bars.
Whether you’re cutting into 12 large squares or 24 bite-sized pieces, they’ll look irresistible with a snowy layer of sugar on top.
Storage Instructions
Lemon squares are surprisingly low-maintenance when it comes to storage. Here’s how to keep them fresh:
- Room temperature: They can sit out for a day if you’re serving them the same day.
- Refrigerator: Store in an airtight container for up to 5 days. Place parchment paper between layers to prevent sticking.
- Freezer: Yes, you can freeze lemon bars! Wrap each square in plastic wrap, then place in a freezer-safe container. They’ll keep for up to 3 months. Thaw in the fridge overnight before serving.
Pro tip: Don’t dust with powdered sugar before freezing – wait until they’re thawed and ready to serve.
Variations to Try
Want to mix it up? Lemon squares are the perfect canvas for creativity. Here are a few fun twists:
- Berry Lemon Bars: Add a layer of fresh raspberries or blueberries before pouring the filling.
- Lime Bars: Swap out lemon juice for lime for a tropical twist.
- Gluten-Free: Use almond flour or a gluten-free flour blend for the crust.
- Coconut Crust: Mix shredded coconut into the crust for extra texture and flavor.
- Lavender Lemon Bars: Add a pinch of culinary lavender to the filling for a fragrant, floral note.
You can also drizzle with white chocolate or top with a lemon glaze for an extra fancy touch.
Common Mistakes to Avoid
Even with a simple recipe, a few missteps can throw off your results. Avoid these common pitfalls:
- Not pre-baking the crust: This is crucial to prevent a soggy bottom.
- Using bottled lemon juice: Always go with fresh-squeezed for the best flavor.
- Overmixing the filling: Too much air in the batter can cause cracks.
- Overbaking: Keep an eye on the oven! Overbaking makes the filling rubbery.
- Cutting too soon: Give them time to chill so they don’t fall apart when sliced.
If you avoid these mistakes, you’ll end up with bakery-worthy lemon bars every time.
Nutrition Information
Lemon squares may be small, but they pack quite a bit of flavor—and yes, calories too. Here’s a general breakdown for one square (based on a 12-piece batch):
| Nutrient | Amount per Serving |
|---|---|
| Calories | 220–250 kcal |
| Total Fat | 10–12g |
| Saturated Fat | 6–7g |
| Cholesterol | 70mg |
| Sodium | 80–100mg |
| Carbohydrates | 30–35g |
| Sugars | 20–25g |
| Protein | 3g |
These numbers can vary depending on the size of your bars and exact ingredients used. For example, using low-fat butter or sugar substitutes can slightly reduce the calorie count.
While they’re not exactly a “health food,” lemon squares are great for an occasional indulgence. You can always opt for smaller pieces or substitute ingredients if you’re watching your intake.
Pairing Ideas
Lemon squares shine on their own, but pairing them with complementary treats and drinks can take your dessert table to the next level. Here are a few tasty pairings:
Beverages
- Iced Tea: Classic black or herbal iced tea balances the tartness.
- Coffee: A creamy latte or cappuccino makes a great contrast.
- Champagne or Prosecco: Ideal for a celebration—bubbles and citrus are a match made in heaven.
Desserts
- Fruit Salad: The freshness of mixed berries pairs beautifully with the zing of lemon.
- Whipped Cream or Yogurt Parfait: A dollop of unsweetened cream adds richness without overwhelming the citrus.
- Cheesecake Bites: If you’re serving a dessert spread, these offer a creamy counterpart to the sharpness of lemon squares.
Don’t be afraid to experiment. The bright lemon flavor can cut through heavy desserts or fatty dishes, making them perfect for rounding off a rich meal.
Perfect Occasions for Lemon Squares
These citrusy delights are welcome at nearly any occasion, but here are some of the best times to serve them:
- Picnics and BBQs: Light, portable, and refreshing—ideal for outdoor events.
- Tea Parties and Brunches: Lemon squares are elegant and petite, fitting right in with scones and finger sandwiches.
- Holiday Gatherings: Their zesty flavor makes a nice contrast to heavy holiday desserts.
- Potlucks and Bake Sales: Easy to make in large batches and a guaranteed crowd-pleaser.
- Gift Boxes and Trays: They hold up well and look beautiful dusted with powdered sugar.
Whatever the setting, lemon squares bring a touch of sunshine and a pop of flavor that guests will remember.
Tips for a Professional Touch
Want to elevate your lemon squares from homemade to patisserie-level? Here are a few expert tips:
- Use a Microplane for Zesting: You’ll get ultra-fine zest without the bitter pith.
- Strain the Filling: This removes any lumps or eggy bits, creating a silky-smooth finish.
- Add Cornstarch: A teaspoon in the filling helps it set more firmly and slice cleaner.
- Let Them Rest Overnight: Flavors deepen and texture improves if you chill them overnight before serving.
- Decorate Creatively: Add thin lemon slices, edible flowers, or a light glaze for presentation.
These small upgrades don’t take much extra time but can dramatically improve the end result. Presentation matters, especially if you’re sharing or gifting your treats.
FAQs about Lemon Squares Recipe
1. Can I make lemon squares ahead of time?
Absolutely! Lemon squares can be made up to two days in advance and stored in the fridge. In fact, they taste even better after chilling.
2. Why is my lemon filling runny?
This usually means it was underbaked or didn’t chill long enough. Be sure to bake until just set and cool fully before slicing.
3. Can I double the recipe?
Yes! Use a larger baking pan (like 11×15) and adjust baking times slightly. Keep an eye on the edges to avoid overbaking.
4. Do lemon squares need to be refrigerated?
Yes, to keep the filling fresh and safe, store them in the refrigerator. Take them out 15 minutes before serving for best texture.
5. How do I keep the powdered sugar from melting?
Wait until the bars are fully cooled and just before serving to dust them. You can also use non-melting powdered sugar if available.
Final Thoughts
Lemon squares are one of those rare desserts that are as simple to make as they are impressive to serve. With just a handful of ingredients and a little attention to detail, you can create a treat that’s fresh, tangy, and totally satisfying. Whether you’re baking for a crowd or just want something sweet to brighten your day, these bars deliver every single time.
Their nostalgic flavor and cheerful appearance make them a staple in kitchens around the world—and now, with this guide, you’ve got everything you need to master them.


