Deer Chili Recipe: There’s something deeply satisfying about a hot, spicy bowl of chili—especially when it’s made with lean, flavorful deer meat. Whether you’re a hunter with a freezer full of venison or just looking to try something new in the kitchen, deer chili is a rustic, hearty dish that brings comfort and bold taste to the table.
This isn’t just any chili. We’re talking about a meal that connects you to nature, fills your kitchen with rich aromas, and delivers a punch of protein without the heaviness of fatty meats. It’s the ultimate comfort food for cool evenings, camping trips, or game day gatherings.
The secret to a killer deer chili lies in the balance of spices, the tenderness of the venison, and the love you stir into every step of the process. This guide will walk you through each phase—from prepping the meat to the final simmer. By the end, you’ll have a pot full of soul-warming chili ready to impress.
Why Deer Meat?
If you’ve never cooked with deer meat before, you’re in for a treat. Venison, as it’s officially known, is a game meat with a unique flavor that’s earthy and slightly sweet. Unlike beef, it’s incredibly lean, which means it’s lower in fat and calories but still packs a serious protein punch.
One of the main reasons home cooks and foodies love deer meat is its versatility. You can use it in burgers, stews, tacos—and yes, chili. Its texture and taste hold up beautifully in slow-cooked dishes, absorbing all those savory spices and tomatoey goodness.
But beyond flavor, deer meat tells a story. It’s not mass-produced or factory-farmed. Often, it comes from local hunters or small suppliers who value sustainability. Cooking with venison is like adding a bit of adventure and heritage to your meal.
Health Benefits of Venison
Venison isn’t just delicious—it’s also a nutritional powerhouse. Here’s why this protein-packed meat deserves a spot on your menu:
- Low in Fat: Venison has significantly less fat than beef or pork, making it ideal for those watching their cholesterol or calorie intake.
- High in Protein: Just one serving of deer meat can provide over 20 grams of protein, perfect for muscle repair and energy.
- Rich in Iron and Zinc: These essential minerals support immune health and energy levels.
- Contains B Vitamins: Venison is a good source of B12 and B6, which help with brain function and metabolism.
Plus, since many deer are wild or pasture-raised, they’re free from the hormones and antibiotics found in conventional meats. This makes venison a more natural, wholesome choice for you and your family.
Ingredients You’ll Need
Before you get started, you’ll want to gather all your ingredients. Having everything ready makes the cooking process smoother and way more enjoyable.
Main Ingredients:
- 2 pounds of ground deer meat (or venison stew meat, finely chopped)
- 1 can (15 oz) of kidney beans, drained and rinsed
- 1 can (15 oz) of black beans, drained and rinsed
- 1 can (28 oz) of crushed tomatoes
- 1 can (14 oz) of diced tomatoes
- 1 large onion, chopped
- 2 cloves garlic, minced
- 1 green bell pepper, diced
- 1 red bell pepper, diced
Spices and Seasonings:
- 2 tbsp chili powder
- 1 tsp ground cumin
- 1 tsp paprika
- 1/2 tsp cayenne pepper (adjust to taste)
- 1/2 tsp black pepper
- Salt to taste
- 1 tsp oregano
- 1/2 tsp cinnamon (optional but adds a rich undertone)
Optional Add-ins:
- Corn (1 cup, frozen or fresh)
- Jalapeños for extra heat
- Dash of hot sauce
- A square of dark chocolate (yep—adds depth and richness!)
- 1/2 cup beer or beef broth for added flavor
Feel free to adjust quantities based on your spice tolerance and flavor preferences. Chili is forgiving like that!
Kitchen Tools Required
To make this chili recipe a success, you’ll need a few basic kitchen tools. Luckily, it doesn’t take much to whip up a mean pot of deer chili.
- Large pot or Dutch oven – This is where the magic happens. Go for something heavy-bottomed for even cooking.
- Cutting board – For prepping all your veggies and meat.
- Sharp knife – Trust me, a good knife makes chopping venison much easier.
- Wooden spoon – Great for stirring without damaging your cookware.
- Measuring spoons and cups – Precision counts when balancing spices.
- Can opener – You’ll be using several canned ingredients.
- Colander – For draining and rinsing the beans.
Having the right tools on hand can save you from last-minute stress and let you focus on the fun part—cooking.
Preparing the Venison
How to Clean and Trim the Meat
Before you even think about tossing the deer meat into a pan, you need to make sure it’s prepped properly. Venison often comes with a bit of silver skin—a tough, shiny membrane—that can make the meat chewy if not removed.
Grab your sharp knife and gently trim off any visible silver skin or sinew. If you’re working with stew meat instead of ground venison, cut it into small, bite-sized cubes for quicker cooking.
Rinse the meat under cold water and pat it dry with paper towels. This helps get rid of any gamey residue and allows for better browning during cooking.
Best Practices for Marinating
Although not necessary, marinating the venison can enhance its flavor and tenderness. If you have time, let it soak for a few hours or overnight in a mix of:
- Olive oil
- Garlic
- Worcestershire sauce
- Red wine vinegar
- A pinch of salt and pepper
This step infuses the meat with richness and removes any lingering wild taste, making your chili smoother and more savory.
Step-by-Step Cooking Instructions
Step 1: Browning the Venison
First things first—let’s brown that beautiful deer meat. This step is crucial because it develops flavor that becomes the backbone of your chili.
Start by heating 1-2 tablespoons of oil (olive or vegetable) in a large pot or Dutch oven over medium-high heat. Once the oil is shimmering, add your ground venison or cubed meat. Don’t overcrowd the pot—brown it in batches if needed. The key here is to get a nice sear on the meat, not just steam it.
As the venison hits the pan, you’ll hear that satisfying sizzle. Stir occasionally and break up the meat with a spoon if it’s ground. You’re aiming for a browned, slightly crispy texture on the edges, which usually takes about 6-8 minutes.
Once browned, drain any excess liquid or fat (though there usually isn’t much with lean venison). Transfer the meat to a plate and set aside while you move on to the veggies.
Pro tip: Don’t skip the fond—the browned bits stuck to the bottom of the pan. These are flavor gold and will lift your chili to a whole new level.
Step 2: Sautéing the Veggies
Now it’s time to build your flavor base. In the same pot, add a bit more oil if necessary, then toss in the chopped onion, green and red bell peppers, and minced garlic. Cook over medium heat, stirring frequently.
As the onions soften and turn translucent, about 5 minutes in, you’ll notice a sweet aroma wafting through your kitchen. This is when you know you’re on the right track. Cook for another 2-3 minutes until everything is slightly caramelized and golden.
If the pan looks dry, you can deglaze it with a splash of beer or broth, scraping up those delicious bits from the bottom. This step not only cleans the pot but also infuses even more savory depth into your chili.
This is also the time to introduce your spices: chili powder, cumin, paprika, cayenne, black pepper, and oregano. Stir them into the veggies and toast them for a minute or two. This awakens the spices and releases their essential oils, turning your kitchen into a chili-scented wonderland.
Step 3: Combining Ingredients
With your veggies sautéed and spices bloomed, it’s time to bring everything together. Return the browned venison to the pot, then pour in your crushed tomatoes, diced tomatoes, and both types of beans (drained and rinsed).
Give everything a good stir to ensure even distribution. If your chili seems too thick, now’s the time to add a bit of beef broth, beer, or even water—start with 1/2 cup and adjust as needed. It should be hearty, not soupy.
Add in any extras you’re using: corn, jalapeños, hot sauce, or a square of dark chocolate. Yes, chocolate. It won’t make your chili sweet—it simply deepens the flavor, giving your chili that extra oomph.
Bring the whole pot to a low boil, then reduce the heat to low and cover partially with a lid. Let it simmer gently for at least 45 minutes to an hour, stirring occasionally. This is where the flavors marry and intensify into something truly special.
Step 4: Simmering for Perfection
Simmering might seem like a passive step, but it’s where the magic truly happens. Low and slow is the name of the game here. As your chili bubbles away, the venison becomes tender, the beans soak up the flavor, and all those spices mellow into a unified, bold blend.
During this time, you might notice the consistency thickening. This is normal—and desirable! Stir occasionally to prevent sticking and ensure even cooking. If the chili starts getting too thick, just splash in a bit more broth or water to loosen it up.
After about an hour, take a spoonful and give it a taste. The chili should be rich, with a pleasant heat and depth of flavor. You can simmer it longer if you want even more intensity—up to two hours if you’re really patient.
Some people say chili tastes even better the next day, and they’re not wrong. Letting it rest overnight in the fridge gives the flavors time to meld even more.
Step 5: Final Taste Test and Adjustments
Before you declare your chili done, give it one final taste test. This is your chance to fine-tune the balance of flavors. Is it too mild? Add a pinch more cayenne or a dash of hot sauce. Too acidic? A sprinkle of sugar can smooth that out. Too thick? A splash of broth will do the trick.
Check the salt level as well—beans and tomatoes can soak up a lot of salt, so you may need to adjust. Stir in a handful of chopped fresh cilantro or green onions if you like a burst of freshness to contrast the richness.
Once everything tastes just right, turn off the heat and let it sit for about 10 minutes. This allows the flavors to settle and makes serving easier.
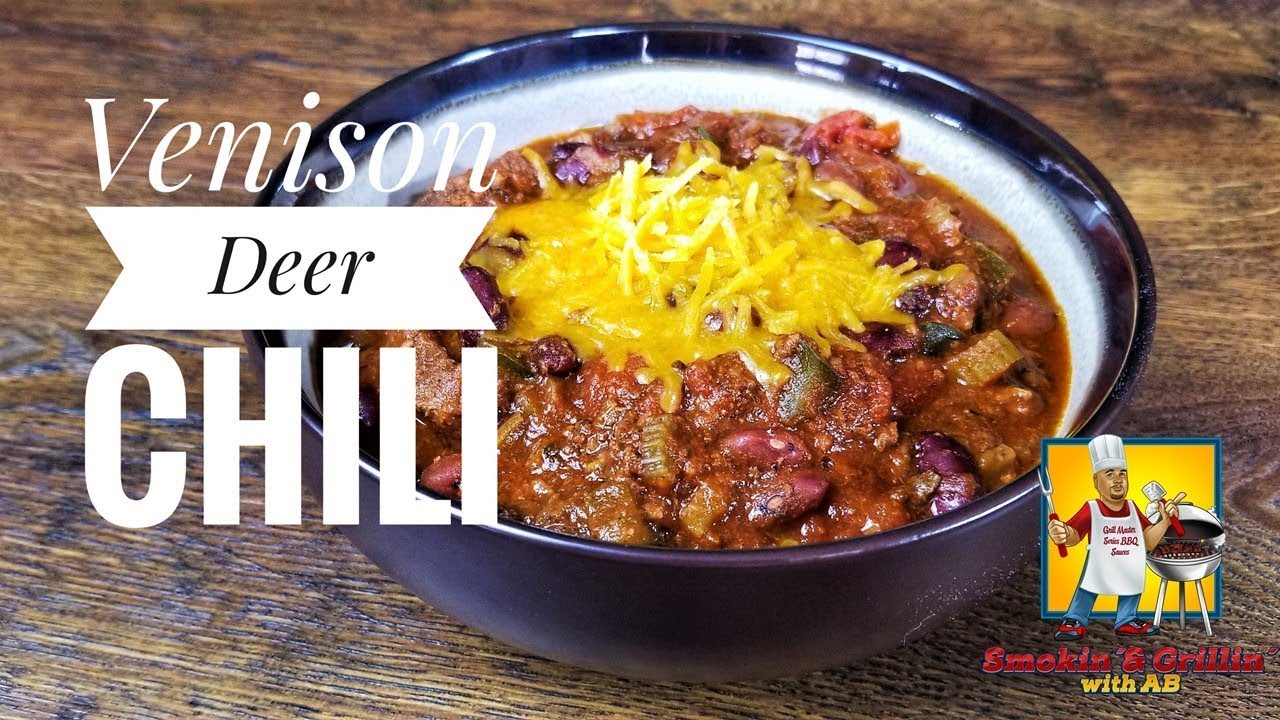
Now you’re ready to ladle this bad boy into bowls, top with shredded cheese, sour cream, and maybe a few slices of jalapeño if you like it hot. Serve with cornbread, tortilla chips, or a crusty loaf of bread and enjoy the fruits of your labor.
Serving Suggestions for Deer Chili
Once your pot of deer chili is done simmering and the flavors have melded into pure comfort food bliss, it’s time to think about presentation and what to serve on the side. While the chili is undeniably the star, the right accompaniments can elevate the meal into a true culinary experience.
Classic Toppings:
- Shredded Cheese: Cheddar, Monterey Jack, or even a pepper jack for a kick.
- Sour Cream: Adds a cool, creamy contrast to the heat of the chili.
- Fresh Herbs: Chopped cilantro or green onions bring brightness and color.
- Diced Avocado: Creamy texture that balances out the spice.
- Sliced Jalapeños: For those who live on the spicy side.
- Crushed Tortilla Chips: Add crunch and a fun twist.
Perfect Pairings:
- Cornbread: A classic chili companion. Sweet, crumbly, and perfect for soaking up that rich chili sauce.
- Rice: Serving chili over a bed of white or brown rice can stretch the dish and mellow the heat.
- Baked Potatoes: Chili-stuffed baked potatoes are a hearty, satisfying variation.
- Tortilla Chips: Great for scooping or crunching on the side.
- Grilled Cheese Sandwiches: Dip and bite—comfort food heaven.
Presentation-wise, serve in large bowls with all the toppings laid out buffet-style so everyone can build their perfect bowl. For gatherings, keep it warm in a slow cooker and let people serve themselves. It’s rustic, homey, and 100% crowd-pleasing.
Storing and Reheating Deer Chili
Made too much chili? Lucky you! Deer chili stores and reheats like a dream, and many say it even tastes better the next day. Here’s how to keep it fresh and flavorful for days to come.
Refrigerating:
Let the chili cool completely before transferring it to an airtight container. Store it in the fridge for up to 4-5 days. Be sure to label the container with the date—chili tends to disappear mysteriously, and it’s easy to forget when you made it!
When reheating, warm it on the stovetop over medium heat, stirring occasionally until heated through. You can also microwave individual portions—just cover the bowl with a damp paper towel to avoid splatter and retain moisture.
Freezing:
Chili is freezer-friendly and makes a perfect meal-prep option. Ladle it into freezer-safe bags or containers, leaving some space for expansion. Flatten the bags to save freezer space and stack easily. It can be frozen for up to 3 months.
To reheat, thaw overnight in the fridge, then warm it gently on the stove. If you’re in a rush, microwave it from frozen using defrost settings or heat it directly in a pot.
This method ensures you always have a quick, hearty meal on hand for busy nights or unexpected guests.
Common Mistakes to Avoid When Making Deer Chili
Even seasoned cooks can slip up with chili. Here are a few common pitfalls and how to steer clear of them:
1. Not Browning the Venison Properly
Browning adds layers of flavor. Skipping this step or crowding the pan results in steamed, flavorless meat. Always brown in batches and deglaze the pan to preserve those tasty bits.
2. Adding Spices Too Late
Chili spices need time to cook and release their oils. Add them early—preferably when sautéing the onions and garlic—to maximize their flavor.
3. Skipping the Simmer
Chili needs time. A quick 20-minute cook won’t cut it. Let it simmer for at least 45 minutes to an hour for the flavors to truly meld.
4. Using Too Much Heat
It’s tempting to go all-in with the chili powder and jalapeños, but balance is key. You can always add heat later, but you can’t take it out once it’s in.
5. Overloading with Beans
While beans add heartiness, too many can overwhelm the dish and throw off the texture. Stick to 1-2 cans for a balanced bowl.
Avoid these missteps, and your chili will be rich, flavorful, and deeply satisfying every time.
Variations of Deer Chili
One of the best things about chili is how adaptable it is. Once you’ve mastered the classic, don’t be afraid to get creative. Here are some popular deer chili variations to spice up your recipe book.
White Deer Chili:
- Swap out red tomatoes for white beans and green chiles.
- Use chicken broth and add corn, cumin, and Monterey Jack cheese.
- Creamy, mild, and perfect for those who prefer a subtler flavor.
Spicy Southwest Style:
- Add chipotle peppers in adobo sauce for smoky heat.
- Use black beans, corn, and diced green chilies.
- Top with fresh lime juice and crushed tortilla chips.
Smoky BBQ Chili:
- Mix in 1/2 cup of your favorite BBQ sauce for a sweet and smoky twist.
- Add a touch of brown sugar and smoked paprika.
- Serve with cornbread for a southern spin.
Beer and Bacon Chili:
- Sauté chopped bacon before browning the deer meat.
- Deglaze the pan with dark beer for a rich, malty depth.
- A crowd-pleaser at tailgates and cookouts.
Each version brings its own unique flair, so experiment until you find your favorite twist.
FAQs about Deer Chili Recipe
1. What is the best cut of deer meat for chili?
The best cut for deer chili is ground venison or diced shoulder meat. These cuts are lean and cook well in slow-simmered dishes, soaking up the rich flavors of the chili.
2. Do I need to add fat to venison chili?
Yes, since venison is very lean, adding a bit of beef fat, bacon, or olive oil can enhance flavor and improve texture.
3. Can I make deer chili in a slow cooker?
Absolutely! A slow cooker is perfect for deer chili. It allows the flavors to develop deeply and keeps the meat tender and juicy over time.
4. What spices go well with venison chili?
Classic chili spices like chili powder, cumin, garlic, paprika, and oregano pair perfectly with venison. For extra heat, add cayenne or crushed red pepper.
5. How long does deer chili last in the fridge?
Deer chili can be stored in the refrigerator for up to 4 days in an airtight container. It also freezes well for up to 3 months.
6. Is deer chili gamey?
When cooked properly with the right spices and ingredients, deer chili should not taste gamey. Soaking the meat in milk or buttermilk beforehand can help mellow any strong flavors.
Conclusion
There’s something incredibly fulfilling about cooking up a pot of homemade deer chili. It’s a dish that honors tradition, embraces bold flavors, and brings people together around the table. Whether you’re cooking it for a game day party, a cozy winter dinner, or simply craving something hearty and homemade, this deer chili recipe won’t disappoint.
From selecting quality venison and balancing the right spices, to simmering with patience and serving with style, each step of the process adds a personal touch. And with all the tips, tricks, and variations we’ve covered, you’re now armed with everything you need to master this comforting classic.
So fire up that stove, pull out your biggest pot, and let the chili magic begin!


