Chicken Parmigiana Recipe: Chicken Parmigiana, often affectionately called “Chicken Parm,” is a classic Italian-American comfort dish that’s become a staple in many kitchens around the world. It features breaded chicken breasts, pan-fried until golden, topped with a generous ladle of marinara sauce, and a blanket of melted mozzarella and Parmesan cheese. Served over spaghetti or alongside a salad, it’s hearty, satisfying, and delicious.
Imagine biting into a crispy, juicy chicken cutlet, perfectly seasoned and layered with gooey cheese and tangy tomato sauce—it’s the kind of meal that wins hearts. Whether you’re a cooking novice or a seasoned chef, this dish is a guaranteed crowd-pleaser.
Origin and Popularity of the Dish
Chicken Parmigiana has its roots in Italian cuisine but is distinctly a creation of Italian immigrants in America. It evolved from eggplant Parmigiana (Melanzane alla Parmigiana), a traditional Southern Italian dish. Over time, chicken replaced eggplant to suit American palates and available ingredients.
It quickly became a staple in Italian-American households and restaurants. Today, you’ll find it on menus from family diners to upscale Italian bistros. Its broad appeal lies in its comforting flavors and rich textures—making it perfect for a Sunday family dinner or a cozy date night at home.
Essential Ingredients for Chicken Parmigiana
Choosing the Right Chicken
The best Chicken Parmigiana starts with high-quality chicken. Opt for boneless, skinless chicken breasts—they’re lean, tender, and perfect for breading. Try to choose similar-sized pieces to ensure even cooking. If they’re too thick, consider slicing them in half or butterflying them to get that ideal thickness of about half an inch.
Organic or free-range chicken can make a noticeable difference in taste and texture. While it might be a bit pricier, the flavor payoff is worth it.
Key Ingredients You’ll Need
Here’s a rundown of the essential ingredients to bring this dish to life:
- Chicken Breasts – 2 large, boneless, skinless
- Salt and Pepper – to taste
- All-purpose Flour – for the first layer of breading
- Eggs – 2, beaten
- Breadcrumbs – 1 cup, preferably Italian seasoned
- Parmesan Cheese – 1/2 cup, freshly grated
- Mozzarella Cheese – 1 cup, shredded
- Marinara Sauce – 1.5 cups, homemade or store-bought
- Olive Oil – for frying
- Fresh Basil or Parsley – chopped, for garnish
Each component plays a crucial role: the breadcrumbs add crunch, the Parmesan adds umami, and the mozzarella provides that melty, cheesy topping that makes this dish irresistible.
Kitchen Tools and Equipment
Must-Have Utensils
You don’t need a professional kitchen to make great Chicken Parmigiana, but having the right tools can simplify the process:
- Meat Mallet or Rolling Pin – for flattening the chicken
- Mixing Bowls – for the flour, egg, and breadcrumb stations
- Tongs – for safe flipping while frying
- Measuring Cups and Spoons – accuracy matters
Recommended Cookware
A few well-chosen pieces of cookware can elevate your cooking experience:
- Heavy Skillet or Frying Pan – non-stick or cast iron for even heat distribution
- Baking Dish – for baking the chicken with sauce and cheese
- Wire Rack – optional, but useful for draining the chicken after frying
Having these on hand ensures your cooking process is smooth and your final dish turns out restaurant-quality every time.
Preparing the Chicken
How to Properly Pound Chicken Breasts
Pounding the chicken is a critical step that ensures even cooking and a tender texture. Place the chicken breasts between two pieces of plastic wrap or in a zip-top bag. Use a meat mallet, rolling pin, or even a heavy skillet to gently pound them to an even thickness—around 1/2 inch.
This not only helps the chicken cook evenly but also tenderizes the meat, making every bite juicy and delicious. Don’t skip this step—it’s the foundation of a great Chicken Parm.
Seasoning for Maximum Flavor
Before breading, season your chicken generously with salt and pepper. Want to kick it up a notch? Add a pinch of garlic powder, onion powder, or paprika for a flavor boost. Seasoning at this stage ensures that every layer of your dish is packed with flavor, not just the sauce and cheese.
Think of this as building the first layer of your flavor pyramid—every step adds to the final taste, so make each one count.
Breading the Chicken
Step-by-Step Breading Process
A classic breading station setup involves three shallow dishes: one with flour, one with beaten eggs, and one with a mix of breadcrumbs and Parmesan cheese.
Here’s the technique:
- Dredge each chicken breast in flour, shaking off the excess.
- Dip it into the egg mixture, making sure it’s well-coated.
- Press it into the breadcrumb-Parmesan mixture, coating both sides evenly.
Repeat with all the chicken pieces, then let them rest on a plate for 10 minutes—this helps the coating adhere better during frying.
Tips for a Crispy Coating
- Use panko breadcrumbs for extra crunch.
- Don’t overcrowd the pan while frying—work in batches if needed.
- Make sure the oil is hot enough (around 350°F or 175°C) before adding the chicken. Too cool, and the breading will absorb oil and get soggy; too hot, and it’ll burn.
Fry until golden brown on both sides, about 3–4 minutes per side, then transfer to a paper towel-lined plate.
Cooking the Chicken to Perfection
Pan-Frying the Chicken Cutlets
Now that your chicken is beautifully breaded, it’s time to get that golden-brown crust that’s key to a perfect Chicken Parmigiana. Heat a few tablespoons of olive oil in a heavy skillet over medium-high heat. You want enough oil to generously coat the bottom of the pan, but not so much that the chicken is swimming.
Place the chicken cutlets in the pan, being careful not to overcrowd. Fry for about 3-4 minutes on each side, or until the coating is golden and crisp and the internal temperature reaches 165°F (75°C). Use tongs to flip them gently, ensuring you don’t disturb the crust.
Once cooked, transfer them to a wire rack or paper towel-lined plate to drain any excess oil. This keeps your crust crisp, not soggy.
Tips for Moist and Tender Chicken
- Don’t overcook: Use a meat thermometer to ensure perfect doneness.
- Let the meat rest a few minutes after frying: This helps retain juices.
- Avoid pressing down with a spatula: You’ll lose that crispy texture and squeeze out the moisture.
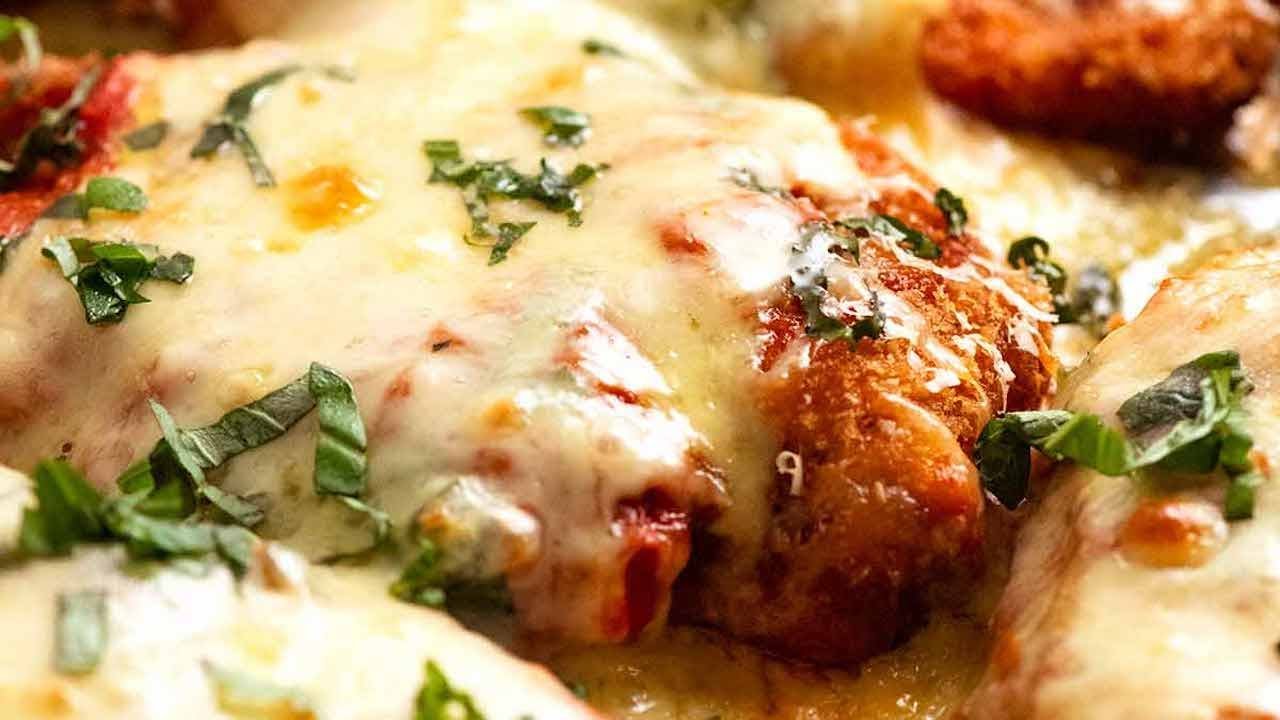
Assembling the Chicken Parmigiana
Layering for Ultimate Flavor
This is where everything comes together—the crispy chicken, the savory sauce, and the gooey cheese.
Start by spreading a thin layer of marinara sauce at the bottom of your baking dish. Place the fried chicken cutlets on top, then spoon more sauce over each piece—enough to cover but not drown them. Next, sprinkle shredded mozzarella cheese generously over the top, followed by a dusting of Parmesan.
Want to take it over the top? Add a few fresh basil leaves or a sprinkle of Italian seasoning on top before baking.
Cheese Options and Alternatives
- Mozzarella: For that classic melt and stretch.
- Parmesan: Adds salty depth.
- Provolone or Fontina: Adds richness if you want to experiment.
Use a combination to suit your taste, and don’t be afraid to go heavy on the cheese—after all, that’s one of the stars of this dish.
Baking the Chicken Parmigiana
Oven Temperature and Time
Preheat your oven to 375°F (190°C). Bake the assembled Chicken Parmigiana for about 20-25 minutes, or until the cheese is melted and bubbly with some golden spots.
If you love an extra crispy top, broil for the last 2-3 minutes. Just keep an eye on it—cheese can go from perfectly golden to burnt in seconds.
Final Touches Before Serving
Let the dish sit for about 5 minutes after baking. This resting period helps everything settle and makes it easier to serve. Sprinkle freshly chopped parsley or basil over the top for a burst of freshness and color.
Serving Suggestions for Chicken Parmigiana
Classic Pairings
- Spaghetti or Fettuccine: Tossed in olive oil or more marinara.
- Garlic Bread: Perfect for soaking up leftover sauce.
- Caesar Salad: A crisp contrast to the rich chicken.
These traditional sides balance the heaviness of the dish and make for a complete, satisfying meal.
Creative Serving Ideas
- Chicken Parm Sandwich: Tuck a cutlet into a hoagie roll with extra sauce and cheese.
- Chicken Parm Pizza: Slice and layer on a cheesy pizza base.
- Low-Carb Version: Serve over zucchini noodles or a bed of greens.
Chicken Parmigiana is versatile—don’t be afraid to think outside the plate.
Storing and Reheating Chicken Parmigiana
How to Store Leftovers Properly
Got leftovers? Lucky you! Chicken Parmigiana stores well and can make a fantastic second meal. Here’s how to keep it fresh:
- Refrigerator: Place leftover chicken in an airtight container. It will stay good for up to 3-4 days.
- Freezer: Wrap each piece individually in plastic wrap and then foil, or use a freezer-safe container. This method preserves quality for up to 2 months.
Be sure to let the chicken cool completely before storing to prevent condensation, which can make the breading soggy.
Best Reheating Methods
To retain the crispy texture and melty cheese, reheating with care is key:
- Oven: Preheat to 375°F (190°C), place the chicken on a baking sheet, and cover loosely with foil. Heat for 15-20 minutes, or until warmed through.
- Air Fryer: Great for maintaining crispiness. Reheat at 350°F (175°C) for about 8-10 minutes.
- Microwave: Quick but less ideal. Use only if you’re in a rush, and expect a slightly soggier texture.
Avoid reheating too many times, as this can dry out the chicken and make the cheese rubbery.
Common Mistakes to Avoid
Overcooking the Chicken
Overcooked chicken is dry and tough—two words you never want to associate with your Chicken Parm. Always check internal temperature and aim for 165°F (75°C). Remember, it continues to cook slightly after being removed from heat.
Using Too Much Sauce or Cheese
While it’s tempting to drown your chicken in marinara and bury it in cheese, balance is key. Too much sauce makes it soggy, and an overload of cheese can overpower the other flavors. Aim for a harmonious blend where every component shines.
Skipping the Rest Time
Letting the chicken rest after frying and after baking helps keep the juices in and allows flavors to meld. It’s a simple step that makes a big difference in taste and texture.
Tips and Variations for a Unique Twist
Adding a Spicy Kick
If you like heat, there are easy ways to spice up your Chicken Parmigiana:
- Add red pepper flakes to the breadcrumb mixture.
- Mix hot sauce into the egg wash.
- Use spicy marinara or pepper jack cheese.
It adds a little punch without overpowering the dish.
Making It Healthier
Looking for a lighter version? Try these adjustments:
- Bake Instead of Fry: Brush breaded chicken with oil and bake at 400°F (200°C) for 20 minutes.
- Use Low-Fat Cheese: You’ll still get that cheesy goodness with fewer calories.
- Serve with Veggies: Swap pasta for roasted vegetables or a side salad.
Healthy doesn’t have to mean flavorless—these tweaks keep it tasty and satisfying.
FAQs about Chicken Parmigiana Recipe
Q1: What is Chicken Parmigiana made of?
Chicken Parmigiana, or “Chicken Parm,” is made with breaded chicken breasts, marinara sauce, and melted mozzarella and Parmesan cheese. It’s baked to bubbly perfection and often served with pasta or a fresh salad.
Q2: Is Chicken Parmigiana Italian or American?
Chicken Parmigiana has Italian roots but was popularized in Italian-American kitchens. It’s a delicious fusion—born from classic eggplant Parmigiana but reinvented with chicken for heartier appetites.
Q3: Can I make Chicken Parmigiana ahead of time?
Absolutely. You can bread and fry the chicken, then refrigerate it. When you’re ready to eat, add the sauce and cheese, then bake. It’s a weeknight hero waiting in your fridge.
Q4: What’s the best cheese to use for Chicken Parmigiana?
Mozzarella is the classic choice for that gooey stretch. Pair it with freshly grated Parmesan for that salty kick. Want to level up? Try provolone or even a little fontina for extra melt appeal.
Q5: Can I make Chicken Parmigiana without frying?
Yes! For a healthier spin, bake the breaded chicken in the oven or use an air fryer. You still get the crunch without the oil—health goals met without sacrificing flavor.
Q6: What sides go well with Chicken Parmigiana?
Pasta with marinara is a no-brainer. But don’t sleep on garlic bread, roasted veggies, or even a crisp Caesar salad. Keep it simple, but keep it tasty.
Q7: Can Chicken Parmigiana be frozen?
Yep. Freeze it before baking, fully assembled but not cooked. When needed, bake it straight from the freezer—just add 10–15 minutes to your cooking time. Perfect for meal prep or lazy Sundays.
Conclusion
Chicken Parmigiana isn’t just a recipe—it’s a celebration on a plate. From the juicy, breaded chicken to the bubbling cheese and robust marinara, it’s a dish that hits every comfort food note. Whether you’re cooking for family, hosting a dinner party, or just treating yourself, this step-by-step guide ensures your Chicken Parm is nothing short of spectacular.
Take your time with each layer, season generously, and don’t be afraid to make it your own. Once you master this dish, you’ll understand why it’s such a beloved classic. Happy cooking!


