Best Brownies Recipe: There’s something universally comforting about brownies. Maybe it’s the gooey, fudgy center that sticks to your teeth in the best way. Or maybe it’s the crispy top layer that gives that satisfying crack when you cut into it. Whatever the reason, brownies hold a beloved spot in the dessert hall of fame. They’re chocolatey, they’re chewy, and they work for almost any occasion—be it a birthday party, a casual get-together, or just a Tuesday night craving.
Brownies are also ridiculously versatile. Want to throw in walnuts? Go ahead. Prefer them more cakey than fudgy? You can do that too. They’re the kind of dessert you can tweak and still end up with something delicious. But while brownies seem simple, nailing that perfect batch every single time takes a little bit of know-how. That’s where this guide comes in.
What Makes a Brownie “The Best”?
Not all brownies are created equal. Some are dry and crumbly. Others are too dense or overly sweet. So what actually makes a brownie the best? It’s a balance of a few critical elements:
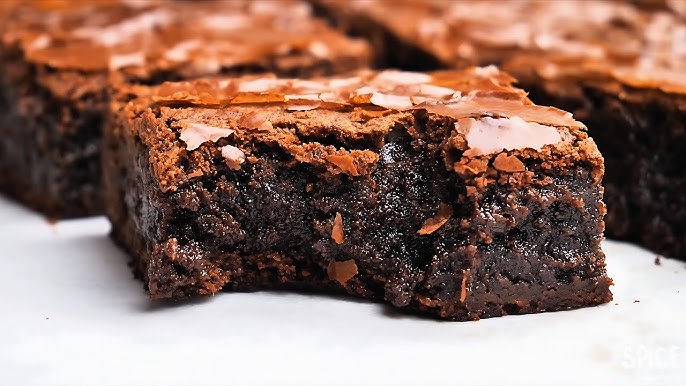
- Texture: The ideal brownie has a fudgy center with slightly crisp edges.
- Flavor: Deep, rich chocolate flavor without being overly sweet or bitter.
- Moisture: You want them moist but not underbaked.
- Consistency: Every bite should taste the same—no dry corners or overly gooey centers.
A good brownie hits all these notes like a perfect symphony. And the good news? You don’t need to be a pastry chef to make it happen.
Ingredients Needed for the Best Brownies
Choosing Quality Chocolate
Chocolate is the soul of your brownies. So it makes sense to choose wisely here. You’ve got a couple of options:
- Unsweetened cocoa powder: Great for a rich, classic chocolate flavor. Use Dutch-processed for a smoother taste.
- Dark chocolate bars (60–70%): These add depth and richness. Always go for baking-grade chocolate over candy bars.
- Chocolate chips: Not ideal for melting, but they’re excellent for folding into the batter for added texture.
If you’re using cocoa powder, pair it with melted butter to bloom the cocoa—this brings out the intense flavor. For bar chocolate, melt it gently over a double boiler with butter to avoid scorching it.
Essential Pantry Items
Here’s your shopping list for the best-ever brownies:
- Butter: Unsalted, so you control the saltiness.
- Granulated sugar: Creates that shiny, crackly top.
- Brown sugar (optional): Adds moisture and a hint of caramel.
- Eggs: Bind everything and give structure.
- All-purpose flour: Keep it minimal for fudginess.
- Salt: Just a pinch enhances the chocolate.
- Vanilla extract: Adds warmth and depth.
- Baking powder or soda (optional): Use sparingly if you like them more cakey.
Having the right ingredients on hand sets you up for success—and skipping just one could mess up your brownie bliss.
Tools You’ll Need
Must-Have Kitchen Tools for Brownies
Making brownies doesn’t require fancy gadgets, but some tools are non-negotiable:
- Mixing bowls: At least one large and one medium.
- Whisk and spatula: For mixing wet and dry ingredients.
- 8×8 or 9×9 baking pan: Metal pans work best for even baking.
- Measuring cups and spoons: Precision matters here.
- Parchment paper: Makes removal and cleanup a breeze.
Using the right tools helps you bake with more confidence—and prevents those rookie mistakes like stuck brownies or uneven baking.
Optional Tools That Make Baking Easier
While not essential, these tools make the process smoother:
- Electric mixer: Useful for creaming butter and sugar.
- Digital scale: For precise measurements.
- Oven thermometer: Not all ovens are honest about their temp.
- Cooling rack: Helps avoid soggy-bottom syndrome.
If you’re serious about baking, investing in these can elevate your entire kitchen game.
Step-by-Step Instructions to Make Brownies
Step 1: Preheat Your Oven and Prepare the Pan
Start by preheating your oven to 350°F (175°C). This ensures your brownies start baking immediately when they go in, which helps create that delicious crust on top. While the oven heats, grab your baking pan. Line it with parchment paper, leaving some overhang on the sides. This “sling” makes it easy to lift the brownies out later without sticking.
You can also grease the pan lightly with butter or non-stick spray, especially if you’re skipping the parchment paper. But for the easiest cleanup, parchment is your best friend.
Step 2: Melt the Butter and Chocolate
Now it’s time to get into the heart of the flavor: melting the butter and chocolate together. Use a heatproof bowl set over a pot of simmering water (a makeshift double boiler), or microwave the mixture in short bursts—15 to 30 seconds—stirring in between. Be careful not to overheat or burn the chocolate; it should melt smoothly into a glossy pool.
This step is critical for flavor and texture. Melting the butter and chocolate together blends fat and cocoa solids perfectly, creating that velvety smoothness that makes brownies so addictive. Once melted, set it aside for a couple of minutes to cool slightly before adding the other ingredients. This avoids scrambling the eggs when you mix them in next.
Step 3: Add Sugar and Eggs
In a separate bowl, whisk together your eggs and sugars (both granulated and brown if you’re using both). The key here is to beat the mixture until it’s thick and slightly pale. This incorporates air and gives your brownies structure while still keeping them dense and fudgy.
Add in your slightly cooled chocolate and butter mixture to the egg and sugar bowl, stirring gently until fully combined. This is when you start to see the batter take on that classic glossy, chocolatey look.
Don’t forget the vanilla extract here—it’s a small ingredient with a big job. Just a teaspoon boosts the chocolate flavor and adds complexity.
Step 4: Stir in the Dry Ingredients
Time to bring in the flour, salt, and any leavening agent if you’re using one. Sift them together first to prevent clumps and ensure even distribution. Then gently fold the dry ingredients into your wet batter using a spatula. The folding method helps maintain that air you incorporated earlier.
Be cautious not to overmix at this point. Overmixing develops the gluten in the flour, which can lead to tough, cakey brownies. Stir just until no streaks of flour remain. If you’re adding extras like chocolate chips, nuts, or swirls of caramel or peanut butter, now is the time.
Step 5: Pour, Bake, and Cool
Pour your batter into the prepared pan and spread it out evenly. Use a spatula to get every bit out—this stuff is too good to waste. Tap the pan gently on the counter to release any trapped air bubbles.
Bake in the preheated oven for 25–35 minutes. Ovens vary, so start checking around 25 minutes. Insert a toothpick in the center—if it comes out with moist crumbs (not raw batter), they’re done. If it’s bone dry, you’ve gone too far. Remember, brownies continue to cook a bit as they cool.
Once out of the oven, let them cool in the pan for at least 30 minutes. Then lift them out using the parchment and cool completely before slicing. It’s tempting to dig in right away, but letting them set gives you those clean, bakery-style edges.
Tips for Perfect Brownies Every Time
Don’t Overmix the Batter
It’s tempting to beat everything until it looks ultra-smooth, but when it comes to brownie batter, less is more. Overmixing once the flour is added activates the gluten, which can turn your fudgy dreams into chewy disappointments. Use a gentle folding motion and stop the moment the flour disappears.
Also, don’t whip the eggs and sugar too much either. While a bit of air helps, you’re not making cake—you want density and richness.
Timing Is Everything
Underbake your brownies just slightly for a fudgy center; overbake and you’ll end up with something more like a dry chocolate cake. Here are a few signs they’re perfectly done:
- Edges are firm and slightly pulled from the pan.
- Top is shiny and cracked.
- Toothpick test shows moist crumbs (not raw batter or clean).
Another crucial tip: Let your brownies cool completely before slicing. If you cut them too soon, you’ll get gooey, messy squares. Patience pays off with perfectly set brownies that look as good as they taste.
FAQs about Best Brownies Recipe
1. What makes brownies fudgy vs. cakey?
Fudgy brownies have more fat (butter or chocolate) and less flour, while cakey brownies use more flour and sometimes baking powder for a lighter texture.
2. Can I use cocoa powder instead of baking chocolate?
Yes, but adjust the fat and sugar. Use 3 tablespoons of cocoa powder plus 1 tablespoon of butter to replace 1 ounce of baking chocolate.
3. How do I know when brownies are done?
Insert a toothpick—if it comes out with moist crumbs (not raw batter), they’re ready. Don’t overbake or they’ll turn dry!
4. Can I make brownies without eggs?
Absolutely. Try substitutes like mashed bananas, applesauce, yogurt, or a commercial egg replacer—just note the texture may vary.
5. Should brownies be refrigerated?
Not necessary. Store them in an airtight container at room temperature for 3–4 days, or refrigerate for up to a week for extra chewiness.
6. How do I get clean cuts when slicing brownies?
Use a sharp knife dipped in hot water and wiped clean between cuts—your brownies will look bakery-perfect every time.
Conclusion
Remember, great brownies are a blend of technique, patience, and passion. Don’t be afraid to tweak the recipe to your taste. Add nuts for crunch, swirl in cream cheese for tang, or toss in some espresso powder to deepen the chocolate flavor. The possibilities are endless once you’ve mastered the basics.
So the next time someone asks, “Where did you buy these?” you’ll smile and say, “I made them.” Because now, you’ve got the best brownies recipe in your back pocket.


