Beef Broth Recipe: Beef broth is a savory liquid made by simmering beef bones, meat, and vegetables in water for several hours. The result? A rich, flavorful base that forms the foundation for many beloved dishes like soups, stews, and sauces. But it’s more than just a flavor booster—it’s packed with nutrients and collagen that are great for your gut, skin, and joints. This ancient comfort food has stood the test of time because of its taste and versatility.
Why Make Homemade Beef Broth?
Sure, you can grab a box of beef broth off the grocery store shelf—but nothing beats the depth and complexity of homemade broth. When you make it yourself, you control the ingredients, the salt content, and the flavor intensity. No preservatives, no artificial flavors—just pure, honest-to-goodness broth that fills your kitchen with warmth and your belly with comfort. Plus, it’s a great way to use up leftover bones and vegetable scraps. Economical, nutritious, and downright delicious.
Essential Ingredients for Beef Broth
Choosing the Right Beef Bones
The bones you choose will make or break your broth. For a rich and gelatinous broth, opt for a mix of marrow bones, knuckle bones, oxtail, and meaty bones like shank or short ribs. Marrow bones add a deep flavor, while knuckle bones are loaded with collagen, giving your broth a silky, luxurious texture. If you want a more robust, meaty flavor, throw in a few pounds of beef neck bones or chuck roast. Local butchers are usually more than happy to help you pick the perfect combination.
Vegetables and Herbs to Enhance Flavor
Vegetables add layers of flavor and nutrition to your beef broth. The holy trinity for broth-making includes onions, carrots, and celery. Add garlic for a punch of flavor, and toss in herbs like thyme, bay leaves, and parsley for aroma. Peppercorns and a touch of apple cider vinegar help balance the richness of the bones. Don’t go overboard—simplicity is key. These aromatics should complement, not overpower, the beefy essence of your broth.
Tools You’ll Need
Kitchen Equipment Checklist
Before diving into the cooking process, make sure you have the right tools on hand:
- Large Stock Pot (at least 12 quarts) or a slow cooker
- Roasting Pan (for bones and veggies)
- Strainer or Cheesecloth
- Tongs and Ladle
- Airtight Containers or Mason jars for storage
Having the right gear makes the process smoother and more enjoyable. You don’t need fancy equipment—just the basics and a bit of patience.
Step-by-Step Guide to Making Beef Broth
Step 1: Roasting the Bones
Preheat your oven to 425°F (220°C). Spread the beef bones in a single layer on a roasting pan. Roast them for about 30-45 minutes, turning once to ensure even browning. This step caramelizes the bones and adds a deep, roasted flavor that’s impossible to replicate. It’s not mandatory, but it transforms a good broth into a great one.
Step 2: Preparing the Vegetables
While the bones are roasting, roughly chop your vegetables—no need to peel. Leave the skins on onions and garlic for added depth. Sauté them lightly or roast alongside the bones for extra caramelization. This sets the stage for a complex flavor profile.
Step 3: Simmering the Broth
Transfer the roasted bones and vegetables into your stockpot. Cover with cold water—enough to submerge everything completely. Add vinegar (2 tablespoons) to help extract minerals and collagen from the bones. Bring the pot to a gentle boil, then immediately reduce to a low simmer. Skim off the foam that rises to the top—this ensures clarity and removes impurities.
Let it simmer for at least 8 hours, ideally 12-24 hours for maximum flavor and nutrition. Keep the heat low and steady. Don’t rush this process; good things take time.
Step 4: Skimming and Seasoning
Throughout the simmering process, keep an eye on the surface of your broth. You’ll notice a layer of foam and fat forming—skim this off using a ladle or spoon. This helps achieve a cleaner-tasting and more aesthetically pleasing broth. Once you’ve hit the 10-hour mark, you can start seasoning lightly with salt and pepper. Be cautious not to over-season now—you can always adjust the flavor later when using the broth in recipes.
A trick to enhance the flavor during simmering is adding a few herb sprigs or a parmesan rind in the last couple of hours. It creates a umami depth that elevates the broth from simple to sublime.
Step 5: Straining and Storing the Broth
Once the broth has simmered to your satisfaction (typically between 12-24 hours), it’s time to strain it. Remove the large solids using tongs or a slotted spoon. Then, pour the broth through a fine-mesh strainer or cheesecloth into another large pot or heatproof bowl. This step removes any lingering bits and results in a smooth, golden liquid.
Allow the strained broth to cool to room temperature. Transfer it into airtight containers or mason jars, leaving some headspace for expansion if freezing. Once refrigerated, a layer of fat will solidify on top—this acts as a natural seal. You can choose to remove it or stir it back in before reheating.
Beef broth keeps for:
- Up to 5 days in the fridge
- 3-4 months in the freezer
Label your containers with the date so you always know how fresh your stash is.
Tips for the Best Homemade Beef Broth
How Long to Simmer for Optimal Flavor
The longer you simmer, the richer your broth. While 8 hours can yield a decent result, simmering for 12 to 24 hours draws out all the nutrients, collagen, and flavor from the bones and vegetables. A slow, low heat ensures a clear, concentrated broth without cloudiness or bitterness.
If you’re short on time but still want depth, using a pressure cooker or Instant Pot can help reduce cooking time to about 2-3 hours without sacrificing too much flavor.
Freezing and Storing Your Broth
Freeze your beef broth in a variety of sizes. Ice cube trays are great for quick, small portions, while quart-sized containers are perfect for soups and stews. Always leave headroom to prevent breakage.
Label each container with the type (beef), date, and portion size for easy access. When ready to use, thaw overnight in the fridge or defrost gently over the stove. Avoid microwaving in plastic containers—transfer to a heatproof bowl first.
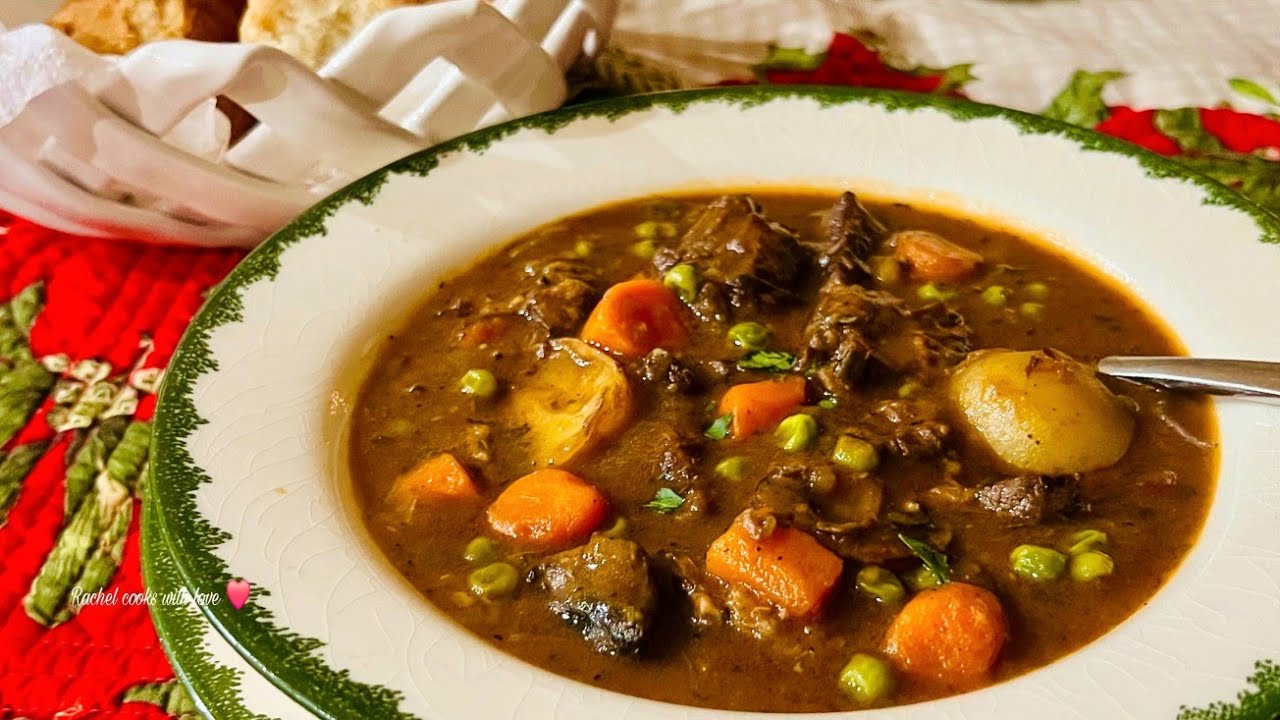
Uses of Beef Broth in Cooking
Soups, Stews, and Sauces
Beef broth is the cornerstone of countless recipes. Here’s how you can use it:
- Soups: French onion soup, beef barley, and pho are classics that depend on rich broth.
- Stews: Braised short ribs, beef bourguignon, and chili benefit from broth’s deep umami base.
- Sauces: Deglaze a pan with beef broth to create gravies, reduction sauces, or enrich a tomato base.
- Grains and Rice: Use beef broth instead of water to cook quinoa, couscous, or rice for added flavor.
- Marinades and Brines: Mix with herbs and acid to create tenderizing marinades for meat.
Think of beef broth as your culinary secret weapon—it enhances just about anything it touches.
Nutritional Benefits of Beef Broth
Homemade beef broth isn’t just delicious—it’s a nutritional powerhouse. Simmering bones for hours draws out vital nutrients like collagen, gelatin, and minerals that support gut health, joint function, and immune resilience.
Here are some key benefits:
- Rich in Collagen: Collagen from bones and connective tissue turns into gelatin when cooked, which supports skin elasticity, joint lubrication, and gut health.
- High in Minerals: It contains calcium, magnesium, phosphorus, and potassium—essential for bone strength and energy production.
- Supports Digestion: The gelatin in beef broth binds with water in your digestive tract, helping food move smoothly and aiding in nutrient absorption.
- Boosts Immunity: Beef broth includes amino acids like arginine, glycine, and proline, which have anti-inflammatory and healing properties.
- Hydration and Electrolytes: Broth is hydrating and replenishes lost electrolytes, making it excellent for recovery after illness or workouts.
Drinking a warm mug of broth can feel like a hug from the inside out—it’s that comforting and beneficial.
FAQs About Beef Broth Recipe
Q1. Can I use store-bought broth instead of making it from scratch?
Absolutely! Store-bought broth is a quick and convenient substitute. However, homemade beef broth delivers deeper flavor and richer nutrients, especially if you simmer it low and slow with bones and aromatics.
Q2. What bones are best for beef broth?
A mix of marrow bones, knuckle bones, and meaty bones like oxtail or short ribs work great. Roasting them beforehand boosts the flavor even more.
Q3. How long should I simmer beef broth?
For maximum flavor and collagen extraction, simmer it at least 6–8 hours. For a richer, gelatinous broth, some people go up to 24 hours.
Q4. Can I freeze beef broth?
Oh yes—you totally should! Let it cool, then freeze in airtight containers or ice cube trays for easy portioning. It’ll last up to 3 months in the freezer.
Q5. Why is my broth cloudy?
Cloudy broth is still safe and tasty! It might happen if you boil instead of simmer, or skip skimming the scum. For clearer broth, keep the heat low and skim regularly.
Q6. How do I make my broth more flavorful?
Roast the bones, use onions, garlic, carrots, celery, and toss in herbs like thyme or bay leaves. Add a splash of vinegar to help draw out minerals from the bones.
Q7. Is beef broth the same as beef stock?
Not quite. Beef broth is usually seasoned and sometimes made with more meat, while beef stock is made primarily from bones and left unseasoned so it’s more versatile.
Q8. Can I reuse the bones for a second batch?
Technically yes, but the second batch will be much lighter in flavor and nutrients. Some folks call it a “remouillage”, or second wash.
Conclusion
Homemade beef broth is more than just a kitchen staple—it’s a tradition, a nutritional remedy, and a culinary treasure. From the aroma that fills your home to the first sip of a perfectly balanced broth, making it yourself is incredibly rewarding. You get a broth that’s cleaner, richer, and better suited to your taste and health needs than any store-bought version.
With a few simple ingredients and some patience, you can transform basic bones and veggies into liquid gold. Use it to deepen the flavor of your favorite recipes, or sip it solo for a comforting, nutrient-dense drink. Once you make your own, you’ll never go back to the boxed stuff.