Basic Waffle Recipe: Let’s be honest—there’s something downright magical about biting into a golden, crispy waffle that’s fluffy on the inside and slightly crunchy on the outside. It’s a breakfast classic that never gets old, whether you’re indulging in a slow Sunday morning feast or whipping up a quick weekday treat. And guess what? Making waffles at home is way easier than you think.
Gone are the days when waffles were just a diner or brunch-spot luxury. With a few basic ingredients and a waffle maker, you can recreate that delicious breakfast comfort in your own kitchen—no culinary degree required. Plus, once you’ve nailed the basics, you can jazz things up with endless toppings, mix-ins, and creative twists.
In this step-by-step guide, we’re going to break it all down: from the simple pantry staples you’ll need, to cooking tips that’ll guarantee that perfect waffle texture. Let’s dive in and learn how to make waffles that’ll knock your slippers off.
Ingredients You’ll Need
Before you start mixing and pouring, you need to gather all the ingredients. One of the best things about waffles is how simple and accessible the recipe is. Chances are, you already have most of these in your kitchen.
Dry Ingredients:
- 2 cups of all-purpose flour – The foundation of your batter. You can substitute half with whole wheat flour if you want to make it healthier.
- 1 tablespoon of baking powder – Helps the waffles rise and become fluffy.
- 1 tablespoon of sugar – Just a touch of sweetness for balance.
- ½ teaspoon of salt – Enhances the overall flavor.
Wet Ingredients:
- 2 large eggs – Essential for structure and texture.
- 1¾ cups of milk – Whole milk gives the best richness, but any milk works.
- ½ cup of melted butter – Adds flavor and ensures crispiness.
- 1 teaspoon of vanilla extract – For that warm, sweet aroma.
Optional Add-ins:
- A handful of chocolate chips
- Fresh blueberries or bananas
- A sprinkle of cinnamon or nutmeg
The beauty of a basic waffle recipe is its flexibility. Once you’ve got the foundational ingredients, feel free to experiment!
Tools and Equipment Required
You don’t need a fancy kitchen setup to make great waffles, but a few reliable tools can make the job easier.
Waffle Iron
This is obviously a must. Whether it’s a traditional square waffle iron or a trendy Belgian-style maker, make sure it’s non-stick and easy to clean.
Mixing Bowls
You’ll need at least two—one for dry ingredients, one for wet. Choose bowls with enough space for mixing without spilling.
Whisk and Spatula
A good whisk helps blend ingredients evenly without overmixing. A rubber spatula is perfect for folding batter and scraping down sides.
Measuring Cups and Spoons
Precision matters, especially with baking. Don’t eyeball your flour or baking powder—use proper measurements for the best results.
These basic tools will have you well on your way to making perfect waffles in no time.
Step-by-Step Instructions to Make Waffles
Now that your ingredients are ready and your tools are in place, it’s time to bring it all together. Follow these simple steps, and you’ll have warm, crispy waffles ready before you know it.
Step 1 – Preheat Your Waffle Iron
Before you even mix the batter, turn on your waffle iron. Preheating is key to achieving that crispy golden crust. Most waffle makers have an indicator light to show when they’re ready—don’t skip this step!
Step 2 – Mix the Dry Ingredients
In a large bowl, sift together your flour, baking powder, sugar, and salt. Sifting isn’t absolutely necessary, but it helps prevent lumps and makes for a lighter batter. Stir everything with a whisk to make sure it’s evenly combined.
This dry base is what gives your waffles structure and fluff. Getting this right sets the tone for everything that comes next.
Step 3 – Whisk the Wet Ingredients
In a separate bowl, crack in the eggs and beat them lightly. Then add in the milk, melted butter, and vanilla extract. Whisk until everything is well combined and smooth.
The melted butter adds richness and helps crisp the waffle’s outer layer, while the vanilla gives that nostalgic homemade flavor. If your butter is still hot when you add it, make sure to whisk quickly to prevent it from cooking the eggs. This mixture should be silky and cohesive before you proceed.
Step 4 – Combine Wet and Dry Mixtures
Now comes the magic moment—bringing the wet and dry ingredients together. Pour the wet mixture slowly into the dry ingredients, gently stirring with a rubber spatula or wooden spoon. Mix just until you don’t see any visible streaks of flour.
Here’s a key tip: Don’t overmix the batter. A few lumps are totally fine. Overmixing develops the gluten in the flour and leads to dense, chewy waffles. And no one wants that, right?
If you’re adding any extras like chocolate chips or berries, now is the time to fold them in gently.
Step 5 – Cook the Waffles
Once your batter is ready and your waffle iron is hot, it’s go time.
- Grease the waffle iron lightly with non-stick spray or a brush of oil/butter, especially if it’s your first batch or your waffle iron isn’t truly non-stick.
- Ladle in the batter—about ½ to ¾ cup depending on your waffle iron size. Spread it gently to the edges if needed.
- Close the lid and cook according to your waffle maker’s instructions. Usually, it takes 4 to 5 minutes. You’ll know it’s done when steam stops escaping from the sides and the waffle is golden brown and crisp.
Avoid the temptation to peek early—lifting the lid too soon can tear your waffle apart and mess with the cook time.
Once cooked, carefully lift the waffle out with a fork or silicone spatula and place it on a wire rack (not a plate) to maintain crispness while you cook the rest.
Tips for the Perfect Waffle
Let’s be real—nailing that perfect waffle takes more than just following a recipe. These pro tips will elevate your waffle game to expert status:
- Don’t skip preheating. A cold waffle iron results in soggy waffles.
- Use room temperature ingredients. Cold milk or eggs can make your batter seize up and reduce fluffiness.
- Keep it crisp by placing cooked waffles in a 200°F (93°C) oven on a wire rack while you make more. This keeps them warm and crispy instead of letting them go soggy on a plate.
- Avoid stacking fresh waffles. The steam gets trapped and softens them. Spread them out individually.
- Butter matters. Real melted butter adds a depth of flavor and helps achieve that golden crunch.
- Use a light hand when mixing. The less you stir, the lighter the texture.
Mastering these little techniques can turn a good waffle into a great one.
Serving Suggestions
You’ve made beautiful golden waffles—now let’s talk about how to serve them up like a pro. The fun part is all the topping options that turn a basic waffle into a breakfast masterpiece.
Classic Toppings
- Maple syrup and butter: Can’t go wrong with the timeless combo.
- Whipped cream and fresh berries: Light and refreshing.
- Powdered sugar and cinnamon: A quick sprinkle adds sweetness without the mess.
Creative Ideas
- Nut butter and banana slices: A protein-packed twist.
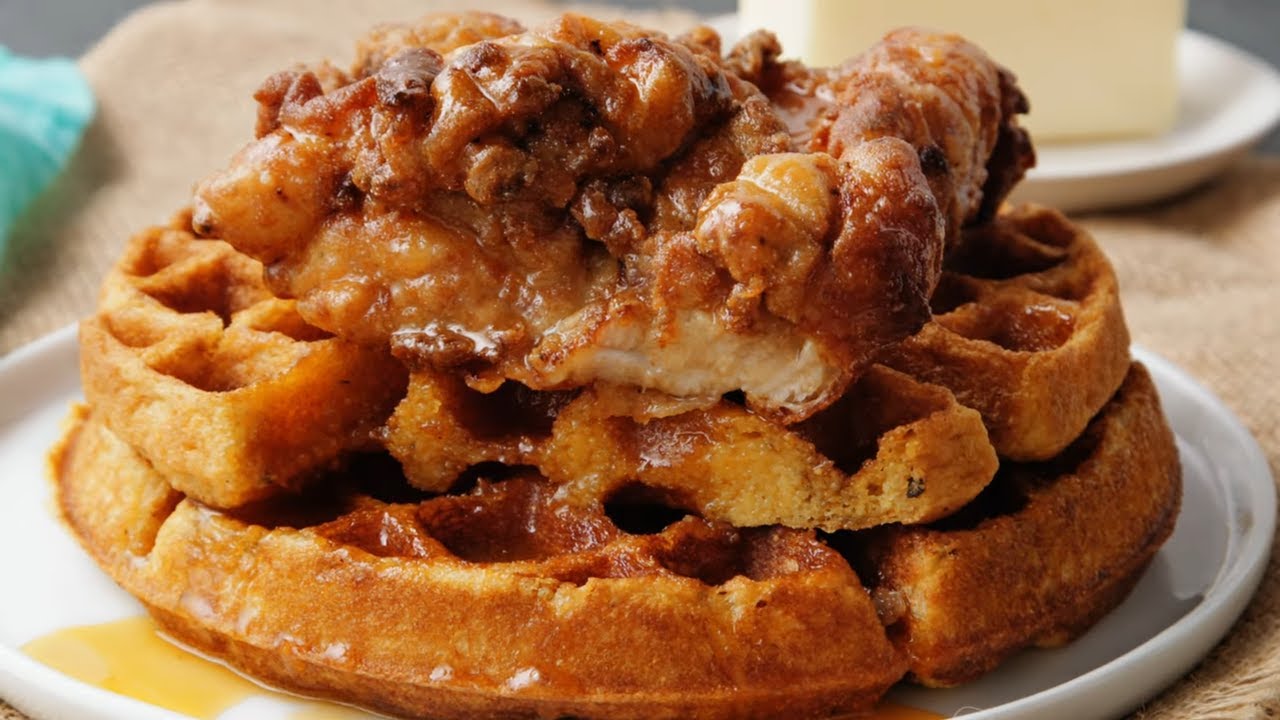
- Fried chicken: The Southern soul-food classic—sweet meets savory.
- Ice cream and caramel sauce: Dessert for breakfast? Yes, please.
Want to go even further? Set up a waffle bar for brunch with toppings like yogurt, honey, granola, chocolate chips, and fruits so everyone can customize their own.
How to Store and Reheat Leftovers
Got a few waffles left? Don’t toss them out—waffles store and reheat beautifully.
Storing:
- Fridge: Keep waffles in an airtight container for up to 3 days.
- Freezer: Let them cool completely, then place them in a single layer on a baking sheet to freeze. Once frozen, transfer to a zip-lock bag. They’ll keep for up to 3 months.
Reheating:
- Toaster: Best for getting back that crispiness.
- Oven: Bake at 350°F (175°C) for 5-10 minutes until warmed through.
- Avoid microwaving—you’ll end up with limp, rubbery waffles.
Having frozen waffles on hand is a life-saver for busy mornings. Just pop them in the toaster, and you’ve got breakfast in under 5 minutes.
Variations of the Basic Waffle Recipe
Once you’ve nailed the classic waffle recipe, the possibilities for customization are endless. From sweet to savory, healthy to indulgent—there’s a waffle variation for every taste and dietary need. Let’s dive into some popular options that you can try the next time you whip up a batch.
Chocolate Chip Waffles
Chocolate lovers, this one’s for you. Simply fold in a half cup of mini chocolate chips into the batter after mixing the wet and dry ingredients. The chips melt slightly while cooking, creating gooey pockets of sweetness in every bite.
Pro tip: Sprinkle a few extra chips on top of the batter just before closing the waffle iron for a more chocolate-loaded experience.
Whole Wheat or Gluten-Free Waffles
Looking to make your waffles a bit healthier or cater to dietary restrictions? You’ve got options.
- Whole Wheat Waffles: Replace all or part of the all-purpose flour with whole wheat flour. This adds fiber and a slightly nutty flavor. If you go 100% whole wheat, consider adding an extra tablespoon of milk for moisture.
- Gluten-Free Waffles: Use a 1:1 gluten-free flour blend. These usually contain xanthan gum to mimic the structure of gluten. You might also want to add a tablespoon of cornstarch for extra crispiness.
Savory Waffles
Who says waffles have to be sweet? For a savory twist:
- Omit the sugar and vanilla from your basic batter.
- Add shredded cheese, chopped herbs, cooked bacon bits, or even diced jalapeños.
- Serve with fried eggs, avocado, or gravy for a full-on brunch experience.
Pumpkin Spice Waffles
A fall favorite that works any time of year. Add ½ cup of pumpkin puree to the wet ingredients and spice things up with 1 tsp cinnamon, ½ tsp nutmeg, and ¼ tsp cloves.
These variations keep the breakfast game fresh and let you cater to different palates and occasions. Waffles really are the Swiss Army knife of breakfast foods!
FAQs about Basic Waffle Recipe
1. Can I make waffle batter ahead of time?
Yes! You can prep the batter and store it in the fridge for up to 2 days. Just give it a good stir before using.
2. What’s the difference between waffle and pancake batter?
Waffle batter usually has more fat (like butter or oil) and sometimes extra sugar to create that crispy golden edge pancakes don’t have.
3. Why are my waffles soggy and not crispy?
They might need more time in the waffle maker. Also, avoid stacking them hot—lay them flat on a wire rack to keep them crisp.
4. Can I freeze homemade waffles?
Absolutely! Let them cool, then pop them in a freezer bag. Reheat in a toaster or oven for a quick, crunchy breakfast.
5. Can I make waffles without a waffle iron?
Technically, yes—you can cook the batter like pancakes in a skillet. But for those signature grooves and crispiness, a waffle iron is your BFF.
6. How do I know when my waffle is done?
Most waffle makers have an indicator light or beep. If yours doesn’t, wait until no more steam escapes—usually 5–7 minutes.
7. Can I make this recipe dairy-free or gluten-free?
Yes! Use plant-based milk and dairy-free butter for a dairy-free version. For gluten-free, use a 1:1 gluten-free flour blend.
Conclusion
There you have it—everything you need to know to master the perfect waffle from scratch. Whether you stick to the basics or dive into creative variations, one thing’s for sure: homemade waffles are an absolute game changer. They’re simple to make, delicious to eat, and endlessly customizable.
With this step-by-step guide, you’re not just learning how to make waffles; you’re creating the kind of breakfast that makes mornings worth waking up for. So preheat that waffle iron, grab your favorite toppings, and start your own breakfast tradition.
And remember—waffles aren’t just for breakfast. With the right twist, they make a killer brunch, lunch, or even dessert.