Whipped Cream Frosting Recipe: Whipped cream frosting is the dream topping for cakes, cupcakes, pies, and even fresh fruit. Unlike dense buttercream or overly sweet fondant, whipped cream offers a light, airy texture with a fresh dairy flavor that melts in your mouth. It’s perfect for those who prefer a less sugary option without compromising on looks or taste. What’s even better? It’s super simple to make with just a few ingredients and a little bit of technique.
Whether you’re prepping a birthday cake or adding a professional touch to your homemade pastries, learning how to make whipped cream frosting can transform your baking game. This step-by-step guide breaks everything down into easy-to-follow instructions with pro tips to make your frosting fluffy, stable, and delicious every time.
Ingredients You’ll Need
Before you start whipping, gather all your ingredients so everything is at your fingertips. Here’s a list of the basics:
Essential Ingredients
- Heavy Whipping Cream (1 cup): This is the foundation of your frosting. Look for cream that has at least 36% fat content for the best texture and stability.
- Powdered Sugar (2-3 tablespoons): This sweetens the cream and also adds a slight thickness. Powdered sugar blends smoothly compared to granulated sugar.
- Vanilla Extract (1 teaspoon): A must for flavor. You can substitute this with almond extract, lemon extract, or even flavored syrups for variety.
Optional Ingredients
- Cream Stabilizer (1-2 teaspoons): Stabilizers like gelatin, cornstarch, or commercial whipped cream stabilizers help your frosting hold up longer, especially in warm weather.
- Food Coloring: If you want colorful frosting, use gel-based food coloring to prevent watering down the cream.
- Flavored Extracts or Cocoa Powder: You can create endless variations like chocolate whipped cream or coffee-flavored frosting.
Having high-quality ingredients makes a significant difference. Opt for organic cream and pure vanilla extract for the richest flavor and best consistency.
Equipment Required
The right tools make all the difference between a whipped cream that peaks beautifully and one that flops flat in a few minutes.
Must-Have Tools
- Electric Mixer (Hand or Stand Mixer): Whipping cream by hand is possible but labor-intensive. An electric mixer ensures consistency and saves your arm.
- Mixing Bowl (preferably metal or glass): A cold bowl helps speed up the whipping process. Avoid plastic bowls as they can retain oils that affect whipping.
- Measuring Cups and Spoons: Accuracy is key for the perfect sweetness and texture.
Optional Tools
- Whisk Attachment or Balloon Whisk: These create more volume in the cream compared to regular beaters.
- Spatula: For scraping down the sides of the bowl and folding in any final flavor additions.
- Piping Bags and Tips: If you want to get decorative, piping tools let you create professional-looking swirls and patterns.
Make sure your tools are clean and grease-free. Even a tiny amount of oil or leftover batter can sabotage your whipped cream.
Step-by-Step Instructions
Let’s walk through each step in detail to make the fluffiest, most stable whipped cream frosting you’ve ever tasted.
Step 1: Chill Your Tools and Ingredients
Temperature matters—A LOT. Start by placing your mixing bowl and beaters or whisk in the fridge or freezer for 10–15 minutes. Also, keep your heavy cream in the fridge until you’re absolutely ready to whip it. Cold cream whips up faster and holds its shape better.
Why chill everything? Because fat whips best when cold. Warm tools or ingredients will make it much harder to achieve stiff peaks, which are essential for frosting.
Step 2: Measure Ingredients Precisely
Don’t eyeball your measurements. Use a proper measuring cup for the cream and measuring spoons for the sugar and extract. Whipped cream frosting doesn’t leave much room for error—too little sugar and it won’t be sweet enough; too much and it may become gritty or too soft.
Place your cold cream in the chilled bowl, then add the powdered sugar and vanilla extract. If you’re using a stabilizer, now’s the time to include it.
If you’re flavoring the cream—like adding cocoa powder for a chocolate version—sift it first to avoid clumps.
Step 3: Begin Whipping on Low Speed
Start your mixer on low speed. This is a critical step that most people skip in a hurry. Whipping cream at high speed right away creates uneven bubbles and an unstable texture.
As you mix on low, you’ll start to see the cream thicken. This usually takes about a minute. At this stage, you’re looking for it to resemble melted ice cream.
Be patient. This gradual approach helps develop fine air pockets that give your whipped cream a silky texture and make it easier to pipe or spread later.
Step 4: Gradually Increase Speed Until Stiff Peaks Form
Once your cream starts thickening and showing soft peaks, it’s time to turn up the speed to medium or medium-high. Now, keep a close eye on the texture—this part happens fast. You’re aiming for stiff peaks, which means when you lift the beaters out, the cream should stand up firmly without drooping.
It usually takes around 3 to 5 minutes in total, depending on the mixer and temperature. If your whipped cream starts to look grainy or like it’s curdling, you’ve gone too far. That’s called overwhipping, and unfortunately, at that point, you’re halfway to making butter.
Pro Tip: Stop and check the consistency every 30 seconds once you reach medium peaks. It’s better to under-whip and touch up later than to over-whip and start over.
Want even more stability? Add a teaspoon of cornstarch or gelatin (bloomed and cooled) right as the soft peaks start forming. This helps your frosting hold up in warm conditions or on cakes that will sit out for a while.
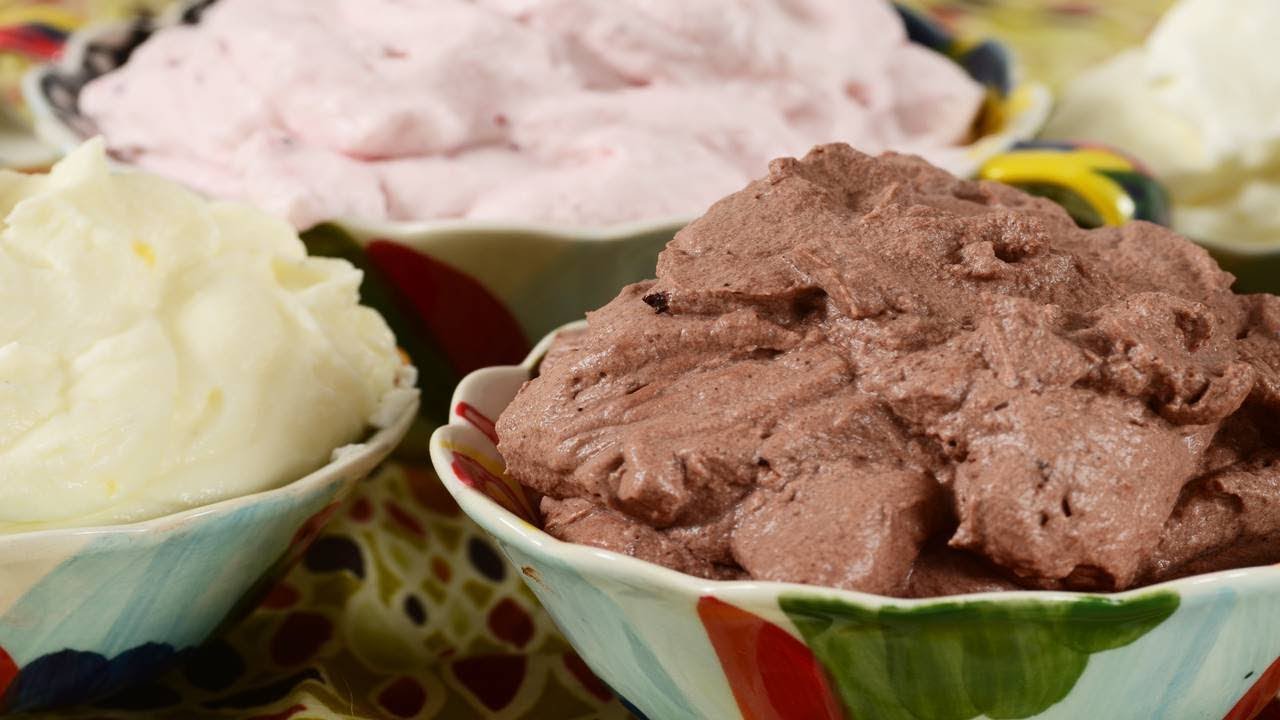
Step 5: Flavor and Color Customizations (Optional)
Once your whipped cream is at stiff peak stage, it’s time to make it your own. Want mocha flavor? Add instant espresso powder. Craving a fruity twist? Stir in a spoon of raspberry jam or citrus zest. You can even fold in a bit of Nutella or peanut butter for a richer taste.
For color, add gel food coloring in small amounts and gently fold it in using a spatula to avoid deflating the cream. Liquid colors work too, but they may loosen the texture if overused.
Remember: Always do customizations after whipping. Adding these extras too early can interfere with the aeration process and flatten your cream.
Tips for the Perfect Whipped Cream Frosting
Getting the technique down is one thing, but mastering whipped cream frosting also means understanding what not to do. These tips will help you avoid common mistakes and elevate your frosting game:
Don’t Overwhip
This is the most important rule. Overwhipping leads to grainy, split cream that can’t be salvaged. Stop whipping the moment you see stiff peaks forming. If in doubt, stop early—you can always whip more.
Use Stabilizers for Structure
If you’re decorating a cake that will sit out for hours or needs to survive warm weather, add a stabilizer:
- Gelatin: Bloom 1 teaspoon in 2 tablespoons cold water, melt it, and let it cool slightly. Drizzle it in while whipping.
- Cornstarch: Add 1 teaspoon with the powdered sugar at the beginning.
- Cream cheese or mascarpone: Adds flavor and a sturdy base.
These help the whipped cream hold up for longer without sacrificing taste or texture.
Work Quickly
Once your whipped cream is ready, use it right away. Don’t let it sit too long in a warm room. If you’re not ready to frost immediately, pop it in the fridge for up to an hour—but rewhip gently before using.
Use a Piping Bag for Precision
For professional-looking decorations, transfer the frosting into a piping bag with a star or round tip. Keep the bag in the fridge between uses to maintain consistency, especially if working in a warm environment.
Storage and Shelf Life
Whipped cream frosting is delicate by nature, so it’s not as shelf-stable as buttercream. But with the right handling, it can last for a couple of days in the fridge.
Short-Term Storage
- Store leftover whipped cream frosting in an airtight container in the refrigerator.
- It stays fresh for about 2–3 days.
- If it starts to separate, just whip it briefly again to restore consistency.
Can You Freeze It?
Technically, yes. You can pipe whipped cream onto a tray lined with parchment paper, freeze until solid, then transfer to a container. Use these dollops to top hot drinks or desserts. However, frozen and thawed whipped cream can lose some of its fluffiness.
Tips for Longevity
- Use stabilizers for extended shelf life.
- Keep your desserts frosted with whipped cream refrigerated until serving.
- Don’t leave whipped cream frosting out at room temperature for more than 2 hours.
Using Whipped Cream Frosting
Now that you’ve nailed the recipe, how can you use it? Let’s talk about where this light, fluffy frosting really shines.
Perfect Pairings
- Cakes: Especially sponge cakes, chiffon, angel food, and layered fruit cakes.
- Cupcakes: Top with a swirl for a bakery-style look.
- Pies: A dollop on pumpkin, chocolate silk, or banana cream pie is heavenly.
- Fruit Trifles: It adds creaminess without overpowering the fruit.
- Pavlova: Whipped cream is practically a requirement.
Creative Decorating Ideas
- Use food coloring to create ombre frosting on cakes.
- Mix in crushed freeze-dried fruit for natural flavor and color.
- Add chocolate curls, sprinkles, or fresh fruit for decoration.
Whipped cream frosting is incredibly versatile. Its lightness pairs well with delicate flavors and textures, unlike heavier butter-based frostings. It’s also less likely to overshadow the star flavors of your dessert.
Troubleshooting Common Issues
Even with the best intentions and techniques, whipped cream frosting can be a bit finicky. Don’t worry—here are the most common problems people run into and how to fix them.
Problem 1: The Frosting Is Watery or Won’t Whip
This usually happens when:
- The cream isn’t cold enough.
- You used light cream instead of heavy whipping cream.
- There’s residue of oil or soap in your bowl or beaters.
Fix:
- Start over with fresh, cold heavy cream.
- Chill your bowl and beaters thoroughly before beginning.
- Make sure everything is squeaky clean and dry.
Pro Tip: If you’ve already started whipping and it just won’t thicken, try adding a tablespoon of powdered milk or cream cheese to salvage the batch.
Problem 2: It’s Too Thick or Grainy
This means you overwhipped the cream. It’s starting to turn into butter—yikes!
Fix:
- Try adding a splash of cold cream (about 1–2 tablespoons) and gently fold it in or whip on the lowest speed for a few seconds to smooth it out.
- If it’s too far gone, unfortunately, you’ll need to start over.
Prevention:
- Monitor the cream closely once it reaches soft peaks.
- Stop every few seconds to check the texture.
Problem 3: Frosting Deflates Quickly
This is typically caused by:
- Not reaching stiff peaks before stopping.
- No stabilizer used.
- Warm weather or a hot kitchen.
Fix:
- Whip again briefly if the frosting softens in the fridge.
- Next time, add a stabilizer to help it hold up.
Keep it cool: Always frost in a cool room and refrigerate finished desserts promptly.
Problem 4: Piping Bag Issues
Whipped cream frosting can be tricky to pipe if it’s too soft or overfilled in the bag.
Fix:
- Don’t overfill the bag. Work in small batches.
- Use a thicker frosting or stabilizer if it’s too runny.
- Keep the piping bag chilled between uses.
FAQs about Whipped Cream Frosting Recipe
1. Can I make whipped cream frosting ahead of time?
Yes, but it’s best used fresh. If you need to make it ahead, store it in the fridge for up to 24 hours. Re-whip lightly before using to restore its fluffiness.
2. Why is my whipped cream frosting runny?
It likely wasn’t whipped long enough or the cream wasn’t cold. Use chilled heavy whipping cream and beat until stiff peaks form—but stop before it turns into butter!
3. Can I use regular milk instead of heavy cream?
Nope! Regular milk won’t whip. You need heavy whipping cream (at least 36% fat) to get that rich, fluffy texture.
4. How do I stabilize whipped cream frosting?
Add a tablespoon of powdered sugar, cornstarch, or instant pudding mix per cup of cream. This helps it hold its shape longer, especially in warm weather.
5. Can I frost a cake with whipped cream frosting?
Absolutely! But keep it refrigerated. Whipped cream frosting is light and airy—perfect for layered cakes, but it melts fast at room temp.
6. Is whipped cream frosting the same as buttercream?
Nope. Whipped cream frosting is lighter, less sweet, and made with cream, not butter. Buttercream is thicker, sweeter, and holds up better for intricate designs.
Conclusion
Whipped cream frosting is one of the simplest yet most elegant toppings you can make. It’s light, airy, and just the right amount of sweet, making it the perfect companion for cakes, cupcakes, pies, and so much more. Plus, it’s incredibly easy to customize with different flavors and colors.
By following the step-by-step guide, using chilled tools, and avoiding common pitfalls like overwhipping, you’ll have a beautiful, fluffy frosting every single time. Whether you’re a beginner baker or a dessert aficionado, this recipe will become one of your go-to favorites. Just remember: the key is in the chill and the peaks. Once you master those, you’ll never look at store-bought frosting the same way again.
Now go ahead, grab your mixer, and whip up a batch of this heavenly frosting!


