Vanilla Icing Recipe: Vanilla icing is that sweet, creamy topping that makes any baked good feel like a celebration. Whether you’re topping cupcakes, drizzling it over cinnamon rolls, or slathering it on a layer cake, this classic icing adds the perfect finishing touch. It’s made from a simple blend of powdered sugar, butter, milk, and vanilla extract. Its texture can range from a thick, spreadable consistency to a thinner, glaze-like pour depending on how you tweak it. Best of all, it’s incredibly versatile—you can dress it up with flavors or keep it delightfully simple.
Why Vanilla Icing is a Kitchen Staple
Think of vanilla icing as the little black dress of the dessert world—it goes with everything. From chocolate cake to sugar cookies, this basic recipe complements almost any baked good. Plus, it’s quick to whip up, uses ingredients you likely already have in your pantry, and can be customized with ease. Whether you’re a seasoned baker or just dabbling in the kitchen, mastering vanilla icing is an essential skill. It also allows you to skip store-bought versions, which often come packed with preservatives or artificial flavors.
Ingredients Needed
Basic Ingredients
To create the perfect batch of vanilla icing, you only need a handful of simple ingredients:
- Unsalted butter (softened): ½ cup (1 stick)
- Powdered sugar: 2 to 3 cups
- Milk or heavy cream: 2 to 3 tablespoons
- Pure vanilla extract: 1 to 2 teaspoons
- Salt (optional): a pinch to balance the sweetness
Each component plays a vital role. The butter gives the icing richness, the sugar sweetens and thickens, the milk helps with consistency, and the vanilla is the flavor star of the show.
Optional Add-ins for Extra Flavor
Want to take things up a notch? Try adding:
- Almond extract for a nutty twist.
- Maple syrup for depth and warmth.
- Lemon or orange zest for a citrusy zing.
- Vanilla bean paste instead of extract for more intense vanilla flavor.
These extras can make your vanilla icing feel gourmet with minimal effort.
Equipment You’ll Need
Mixing Tools
You don’t need a full chef’s kitchen to make stellar vanilla icing. Here’s what you’ll need:
- Hand mixer or stand mixer: A hand mixer works fine for smaller batches, while a stand mixer is great for making larger quantities.
- Mixing bowl: A medium to large bowl depending on your batch size.
Measuring Essentials
Accuracy is key for getting the right texture. Be sure to have:
- Measuring cups and spoons
- Rubber spatula to scrape down the sides
- Sifter for powdered sugar if needed (helps prevent lumps)
How to Make Vanilla Icing – Step-by-Step
Step 1: Gather Your Ingredients
First, make sure all your ingredients are measured and ready to go. Soften your butter by leaving it at room temperature for about 30 minutes. Don’t microwave it, or you risk melting it, which can affect your icing’s texture.
Step 2: Mix the Butter and Sugar
Place the softened butter into your mixing bowl and beat it on medium speed until it’s creamy—about 2-3 minutes. Slowly add the powdered sugar, one cup at a time, mixing thoroughly after each addition. This prevents a sugar cloud from taking over your kitchen and ensures a smooth blend.
Step 3: Add the Vanilla Extract and Milk
Add in your vanilla extract and a tablespoon of milk or cream. Mix again. At this point, you can decide how thick or thin you want your icing. For thicker icing, stick to less liquid. For something more spreadable or pourable, add more milk a little at a time.
Step 4: Whip Until Fluffy and Smooth
Crank up the mixer to high and let it whip for another 2-3 minutes. The icing should be light, fluffy, and free of any sugar granules. Scrape down the sides of the bowl at least once to ensure everything is well incorporated.
Tips for the Perfect Vanilla Icing
If you’re aiming for bakery-quality vanilla icing at home, a few insider tips can make all the difference. First, always use room-temperature butter. Cold butter won’t blend well, and melted butter will make your icing runny. Second, sift your powdered sugar before adding it to the bowl. This ensures a smoother consistency without any pesky lumps.
Next, don’t skip the whipping stage. Many novice bakers under-mix their icing, resulting in a flat, heavy texture. Whipping incorporates air, giving you that fluffy, cloud-like finish. Taste as you go—some folks like it extra sweet, others prefer a more balanced flavor. Adjust the sugar or milk until you hit that sweet spot.
Lastly, consistency is key. If your icing is too thick, add a teaspoon of milk at a time. Too runny? More powdered sugar will do the trick. And if you want your icing to hold shape for piping, make sure it’s on the firmer side.
Common Mistakes and How to Fix Them
Even experienced bakers mess up icing now and then. One of the most common issues is icing that’s too runny. This usually happens when you add too much milk or start with butter that’s too soft. To fix it, simply mix in more powdered sugar a tablespoon at a time until the consistency thickens.
Another mistake? Icing that’s too thick or hard to spread. This can result from using cold butter or not enough liquid. Loosen it up by mixing in small amounts of milk—just a teaspoon at a time.
If your icing tastes overly sweet and you’re trying to tone it down, a tiny pinch of salt can balance the flavor. Be cautious here—too much salt will ruin the batch.
Sometimes, the issue is purely aesthetic—grainy or lumpy icing. This is usually from not sifting your powdered sugar or not whipping it long enough. Always sift, and beat until completely smooth.
How to Store Vanilla Icing
Homemade vanilla icing is best when fresh, but that doesn’t mean it can’t be stored. If you have leftovers, scoop the icing into an airtight container and refrigerate it. It will last about 5 to 7 days in the fridge. Before using, let it come to room temperature and give it a quick whip to revive the fluffiness.
For longer storage, freezing is also an option. Just place it in a freezer-safe container, and it’ll keep for up to 2 months. When you’re ready to use it, thaw it overnight in the fridge and re-whip to bring back its original texture.
Remember, icing exposed to air will form a crust. Always keep it sealed tightly with a lid or plastic wrap pressed directly onto the surface to prevent this.
Variations of Vanilla Icing
Vegan Vanilla Icing
Whether you’re plant-based or baking for someone who is, you can easily swap out traditional ingredients. Replace the butter with vegan margarine or coconut oil, and use any plant-based milk like almond, oat, or soy. Just make sure your powdered sugar is vegan (some are processed with bone char).
The result? Still creamy, still delicious, and totally dairy-free.
Vanilla Bean Icing
Want to upgrade your basic vanilla icing into something fancy? Use vanilla bean paste or scraped vanilla bean pods instead of extract. This adds a deeper, more robust flavor and those beautiful specks that scream “gourmet.” Vanilla bean icing is perfect for elegant desserts and adds that extra wow factor.
Best Uses for Vanilla Icing
Cakes
Nothing beats a classic vanilla icing on a layer cake. Whether it’s a yellow cake, chocolate cake, or even a red velvet, this icing complements every bite. You can use it as both a filling and a topping.
Cupcakes
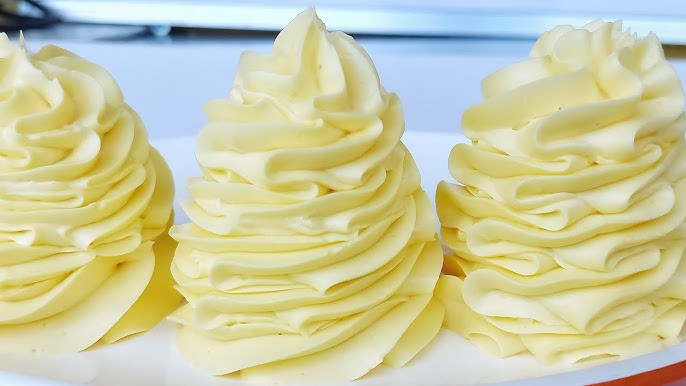
Swirl it high on top of cupcakes for that Instagram-worthy look. Vanilla icing pipes beautifully, especially when you’ve got the consistency just right. Add sprinkles for a pop of color and fun.
Cookies
Vanilla icing isn’t just for cakes and cupcakes. Use it to decorate sugar cookies or sandwich it between two soft cookies for a sweet surprise. For drizzling on cookies, just thin the icing with a little extra milk.
Nutritional Information
Here’s a general breakdown for one serving (about 2 tablespoons) of vanilla icing:
| Nutrient | Amount |
|---|---|
| Calories | 140–160 kcal |
| Total Fat | 7–8g |
| Saturated Fat | 4.5g |
| Carbohydrates | 20–22g |
| Sugar | 19–21g |
| Protein | 0g |
| Sodium | 10–20mg |
Please note these values can vary based on the specific ingredients used, especially when making vegan or flavored variations.
FAQs about Vanilla Icing Recipe
Q1: Can I make vanilla icing without butter?
Yes, you can substitute butter with margarine, shortening, or even cream cheese depending on the texture and flavor you prefer.
Q2: How do I thicken runny vanilla icing?
To thicken it, gradually add more powdered sugar or a small amount of cornstarch until you reach your desired consistency.
Q3: Can I make vanilla icing in advance?
Absolutely! Store it in an airtight container in the fridge for up to 5 days. Let it come to room temperature and re-whip before using.
Q4: Is vanilla icing the same as frosting?
They’re similar, but icing is usually thinner and glossier, while frosting is thicker and fluffier. Vanilla icing is perfect for drizzling over cakes and cookies.
Q5: What’s the best way to color vanilla icing?
Use gel food coloring for vibrant shades without changing the icing’s texture. Add a little at a time and mix well.
Conclusion
Vanilla icing is more than just a sweet topping—it’s the finishing touch that transforms your baked goods from basic to bakery-style. Whether you like it fluffy, glossy, vegan, or rich with real vanilla bean, the beauty of this icing is in its simplicity and versatility. With just a few ingredients and a little technique, you’ll be able to whip up batches of creamy, dreamy vanilla icing in no time.


