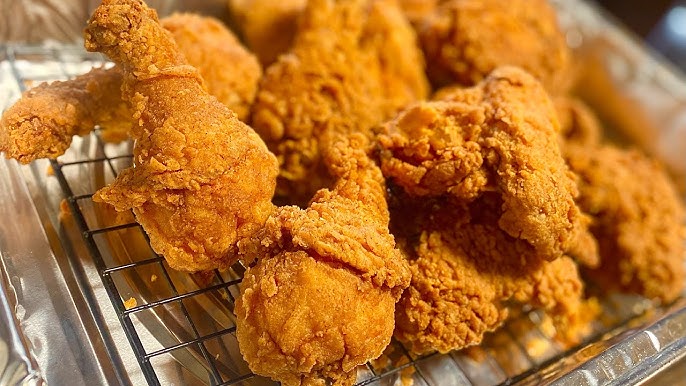
Simple Fried Chicken Recipe: Who doesn’t love a good piece of fried chicken? That golden, crispy crust hugging tender, juicy meat is a comfort food classic for a reason. Whether it’s served hot with a drizzle of honey, nestled beside a pile of mashed potatoes, or eaten cold the next day, fried chicken has earned its place as a household favorite across the globe.
This simple fried chicken recipe is for anyone who wants restaurant-style results right from their own kitchen. No complicated marinades, no deep fryer required—just straightforward steps, pantry staples, and some kitchen love. From prepping your poultry to achieving that perfect crunch, this guide walks you through every step so even beginners can fry like a pro.
Let’s roll up our sleeves and get into it.
Ingredients You’ll Need
The magic of fried chicken starts with the right ingredients. Keeping it simple doesn’t mean sacrificing flavor—you just need the essentials in the right balance.
Main Ingredients:
- 1 whole chicken (cut into 8–10 pieces) or 2 pounds of bone-in chicken pieces (drumsticks, thighs, wings, etc.)
- 2 cups buttermilk (for marination)
- 2 cups all-purpose flour (for coating)
- 1 tablespoon salt
- 1 tablespoon black pepper
- 1 teaspoon paprika
- 1 teaspoon garlic powder
- 1 teaspoon onion powder
- 1/2 teaspoon cayenne pepper (optional, for heat)
- 2–3 cups vegetable oil (for frying)
Optional Add-ins:
- 1 teaspoon dried herbs (like thyme or oregano) for extra depth
- 1 tablespoon hot sauce (mixed into the buttermilk if you like heat)
- Cornstarch (optional, mix 1:1 with flour for a crispier crust)
Substitutions:
- No buttermilk? Mix 2 cups of milk with 2 tablespoons of lemon juice or white vinegar and let sit for 10 minutes.
- Prefer boneless? Use boneless thighs or tenders, just adjust cook time accordingly.
These ingredients are affordable and likely already in your pantry. What matters most is how you use them—which brings us to the preparation.
Preparing the Chicken
Before you even think about the fryer, prepping the chicken correctly is key. It affects flavor, texture, and how evenly it cooks.
Step 1: Clean and Cut
Start with clean chicken. Pat each piece dry with paper towels. If you’re working with a whole bird, cut it into traditional pieces: 2 breasts, 2 thighs, 2 drumsticks, and 2 wings. For even cooking, try to keep sizes similar—cut large breasts in half if needed.
Avoid washing the chicken in water (a common myth); instead, simply pat it dry and handle it safely to prevent any bacteria spread. Always sanitize your cutting board and utensils afterward.
Step 2: Marinate for Flavor
The secret to juicy, flavorful fried chicken? A good marinade. Buttermilk isn’t just tradition—it tenderizes the meat and helps the coating stick. Place the chicken pieces in a large bowl or zip-top bag, pour in the buttermilk, and add salt, pepper, and a splash of hot sauce if desired.
Cover and refrigerate for at least 2 hours, or ideally overnight. The longer it sits, the more flavorful and tender the meat becomes.
Making the Perfect Coating
The crust is where the magic really happens. You want it to be crispy, seasoned, and able to hold up to the juicy chicken underneath. Here’s how to build that ideal coating.
Step 1: Dry Mix
In a large bowl, combine your all-purpose flour, salt, pepper, paprika, garlic powder, onion powder, and cayenne pepper. Feel free to get creative—add herbs or even a little cornstarch for that signature crunch.
Step 2: Double Dredge Method (Optional)
For an extra-thick, craggy crust, try this: after marinating, remove the chicken and let the excess buttermilk drip off. Dredge each piece in the flour mix, then dip it back into a separate bowl of buttermilk, and dredge once more in the flour. This double-dip builds texture and crispiness.
Tips for Success:
- Shake off excess flour, but don’t pat it completely clean.
- Let the coated chicken rest on a wire rack for 10–15 minutes before frying—this helps the coating stick better.
- Want it spicy? Add chili powder to the flour. Sweet? Try a pinch of brown sugar.
By now, your kitchen should smell like anticipation. Next stop: the frying pan.
Frying the Chicken – Step by Step
Frying can be intimidating, but with the right technique, it’s surprisingly easy—and totally worth it.
Step 1: Choose Your Oil
Use an oil with a high smoke point. Vegetable oil, canola oil, or peanut oil are all great choices. You need enough oil to submerge at least half the thickness of each chicken piece.
Step 2: Heat It Right
Temperature is everything. Heat your oil to 325°F–350°F (163°C–177°C). Use a thermometer for accuracy—too hot and the outside burns while the inside stays raw; too cool and you’ll get greasy, soggy chicken.
Step 3: Fry in Batches
Don’t overcrowd the pan—fry 3–4 pieces at a time. Gently lower the chicken into the hot oil and let it fry undisturbed for the first few minutes. This allows the crust to set.
- Bone-in pieces take 12–15 minutes, turning once halfway through.
- Boneless takes slightly less—about 8–10 minutes total.
Use tongs or a slotted spoon to remove the chicken, and place it on a wire rack over paper towels to drain excess oil.
Common Mistakes to Avoid:
- Skipping the rest time before frying (your coating may fall off).
- Flipping too soon or too often.
- Using wet utensils or crowding the oil.
With crispy, golden-brown pieces resting on your rack, you’re almost ready to serve up a meal worth bragging about.
Serving Suggestions
So you’ve mastered the art of frying chicken—now it’s time to serve it up in style. Fried chicken is delicious on its own, but the right sides and extras can elevate your meal to the next level.
Classic Sides That Never Fail
- Mashed Potatoes & Gravy: Creamy, buttery mashed potatoes with rich gravy pair perfectly with crispy fried chicken.
- Coleslaw: The crunch and tanginess of a vinegar or mayo-based slaw offer a refreshing contrast to the hot, savory chicken.
- Cornbread or Biscuits: Whether sweet or savory, these southern staples make a great accompaniment.
- Macaroni and Cheese: Gooey, cheesy mac and cheese is comfort food royalty alongside fried chicken.
Healthier Alternatives
If you want to balance out the indulgence of fried chicken:
- Steamed Vegetables like broccoli, green beans, or carrots add color and nutrients.
- Mixed Green Salad with a light vinaigrette can refresh your palate.
Dipping Sauces
While your chicken should be flavorful enough on its own, sauces can be fun:
- Honey mustard
- Ranch
- Spicy sriracha mayo
- Classic ketchup or hot sauce
Fried chicken is versatile—perfect for picnics, family dinners, or game day feasts. Don’t be afraid to mix and match your sides based on the occasion.
Tips for Storing and Reheating Fried Chicken
So, what do you do with leftovers? If you’re lucky enough to have any, proper storage and reheating can help you enjoy fried chicken just as much the next day.
Storing Tips
- Refrigerator: Store fried chicken in an airtight container or wrap it in foil. It stays good for up to 3–4 days.
- Freezer: For longer storage, wrap individual pieces in foil or plastic wrap, then place them in a freezer bag. Fried chicken can be frozen for up to 2 months.
Always let the chicken cool completely before storing to avoid soggy coating from trapped steam.
Reheating Tips
Microwaving fried chicken is quick—but often leaves you with limp skin. Here’s a better way:
- Oven Method: Preheat to 375°F (190°C), place chicken on a wire rack over a baking sheet, and bake for 10–15 minutes. This method keeps the outside crispy and the inside hot.
- Air Fryer Method: Reheat at 350°F for 5–8 minutes—fast and keeps the crunch!
- Avoid frying again unless you want to double up on oil.
Proper reheating makes all the difference in enjoying your leftovers without disappointment.
Fried Chicken Variations to Try
One of the best things about fried chicken is how easy it is to customize. Once you’ve nailed the basic recipe, here are some tasty variations to explore:
Spicy Nashville Hot Chicken
After frying, brush your chicken with a mix of cayenne pepper, paprika, brown sugar, garlic powder, and hot oil. Serve on white bread with pickles for an authentic Southern kick.
Korean Fried Chicken
This variation uses a lighter, crispier batter (often with cornstarch or rice flour) and is double-fried for extra crunch. Toss it in a sweet and spicy gochujang-based sauce for that signature Korean flavor.
Buttermilk Ranch Chicken
Add dried dill, parsley, chives, and ranch seasoning to the flour mix. Dip in buttermilk seasoned with garlic and onion powder. The result? Herbaceous and deeply savory bites.
Gluten-Free Fried Chicken
Use a gluten-free flour blend or almond flour with cornstarch. Make sure your seasonings are gluten-free too, and you won’t miss out on any of the crunch or flavor.
Get creative with spices, coatings, and sauces—fried chicken is your canvas.
Troubleshooting Common Fried Chicken Issues
Even the best cooks run into problems. Let’s tackle some common issues and how to fix them.
Problem 1: Soggy Crust
Why it happens: Chicken was too wet before coating, or oil was too cool.
Fix: Pat chicken dry, rest coated pieces before frying, and maintain oil temperature.
Problem 2: Undercooked Inside
Why it happens: Oil too hot; the outside browns before the inside cooks.
Fix: Use a thermometer to ensure oil stays around 325–350°F. Check internal temp of chicken (165°F minimum).
Problem 3: Coating Falls Off
Why it happens: Coating didn’t stick properly, or chicken was moved too much during frying.
Fix: Let dredged chicken rest before frying. Don’t touch it for the first few minutes in the oil.
Problem 4: Greasy Chicken
Why it happens: Oil was not hot enough or chicken was overcrowded in the pan.
Fix: Fry in small batches and let chicken drain on a wire rack, not paper towels, to stay crisp.
With a little practice and these fixes, your fried chicken game will level up fast.
Health Considerations and Lighter Alternatives
Let’s be honest—fried chicken isn’t exactly a diet food. But that doesn’t mean you can’t enjoy it in moderation or find ways to lighten it up without losing all that crispy goodness.
Baked “Fried” Chicken
Want the crispy texture without the deep fry? Baking is your best friend.
- How to do it: After coating your marinated chicken with seasoned flour, spray it with a bit of oil and bake at 400°F (200°C) on a wire rack over a baking sheet. Flip halfway through.
- Pro tip: Use crushed cornflakes or panko for extra crunch.
Air-Fried Chicken
The air fryer gives a golden, crispy finish using very little oil.
- Prep: Follow your usual coating steps.
- Cook: Place in a single layer in the air fryer at 375°F for 20–25 minutes, turning halfway.
Health Tips:
- Use skinless chicken to reduce fat.
- Opt for lean cuts like chicken breast.
- Drain well after frying and avoid adding extra salt.
Moderation is key. Pair it with fresh veggies, eat smaller portions, and you can enjoy fried chicken guilt-free once in a while.
Best Oils for Frying Chicken
Oil can make or break your fried chicken. Choosing the right one affects flavor, texture, and even health.
Top Oil Choices
- Peanut Oil – High smoke point (450°F), neutral taste, and great for crispiness.
- Canola Oil – Affordable, widely available, and light on flavor.
- Vegetable Oil – A common go-to with a decent smoke point.
- Sunflower Oil – Clean, light, and good for higher temperatures.
What to Avoid
- Butter or olive oil: Low smoke points mean burnt chicken and bitter taste.
- Reusing oil too many times: It breaks down and adds off-flavors.
Pro Tips:
- Strain and reuse oil up to 3 times if it hasn’t burned.
- Store used oil in a cool, dark place.
- Use a thermometer to control the heat accurately.
Right oil = perfect golden brown crust + less grease = happy belly.
Kid-Friendly Fried Chicken Version
Kids love fried chicken, but you might want to tweak the spice and portion sizes for smaller appetites and gentler taste buds.
Adjusting for Little Ones
- Use boneless cuts like chicken tenders or thighs for easier eating.
- Skip the heat: Omit cayenne, paprika, or hot sauce.
- Make it mini: Cut chicken into nuggets and fry them up bite-sized.
- Serve with kid-friendly dips like honey mustard or BBQ sauce.
Fun Serving Ideas:
- Chicken strip cones wrapped in wax paper for a fun dinner.
- Pair with sweet corn, fries, or apple slices for a balanced plate.
You can even get kids involved in dredging and seasoning (just keep them away from the hot oil). Cooking together turns it into a fun family activity.
Cultural Variations of Fried Chicken
Fried chicken is a global phenomenon. Every region adds its own flair, and exploring those styles is a delicious journey.
American Southern Style
Thick, peppery coating and marinated in buttermilk—it’s the OG of fried chicken. Usually served with biscuits and gravy or collard greens.
Japanese Karaage
Small boneless pieces marinated in soy sauce, ginger, and garlic, then coated with potato starch and deep-fried. Served with lemon and mayo.
Filipino Fried Chicken
Often marinated in calamansi juice, soy sauce, and garlic. Light, crispy, and super flavorful.
Indian Fried Chicken
Heavily spiced with turmeric, garam masala, chili powder, and ginger. Can be deep-fried or cooked in tandoori style then flash-fried.
Ghanaian Fried Chicken
Usually marinated in herbs, onions, and spices, then boiled before frying. It’s served with jollof rice or plantains.
Trying these global takes on fried chicken is a great way to mix things up and expand your culinary skills.
FAQs about Simple Fried Chicken Recipe
1. What is the best cut of chicken for frying?
Bone-in pieces like drumsticks, thighs, and wings are popular for fried chicken because they stay juicy and flavorful. However, boneless breasts or tenders also work well if you prefer quicker cooking.
2. How long should I marinate the chicken before frying?
For the best flavor, marinate the chicken in buttermilk or seasoned brine for at least 1 hour, or overnight if possible.
3. What kind of oil is best for frying chicken?
Use oils with a high smoke point like vegetable oil, peanut oil, or canola oil to get that crispy, golden crust without burning.
4. How do I keep my fried chicken crispy?
After frying, place the chicken on a wire rack over a baking sheet instead of paper towels. This allows air to circulate and keeps the crust crisp.
5. Can I fry chicken without buttermilk?
Yes! You can use milk with a splash of vinegar or lemon juice as a buttermilk substitute, or simply coat the chicken with seasoned flour and egg wash.
6. How do I know when the chicken is done?
Use a meat thermometer—chicken is safe to eat when the internal temperature reaches 165°F (74°C). The outside should be golden brown and crunchy.
7. Can I store leftover fried chicken?
Absolutely. Store in an airtight container in the fridge for up to 3 days. Reheat in the oven to restore crispiness.
Conclusion
There’s something universally satisfying about biting into a crispy, juicy piece of fried chicken. With this simple recipe and step-by-step guide, you now have all the tools to make restaurant-quality fried chicken in your own kitchen. From seasoning the flour just right to getting that oil temperature spot-on, you’ve learned the secrets to golden, crispy perfection.
Whether you’re cooking for family, hosting a party, or just indulging your cravings, this recipe has your back. Remember, fried chicken isn’t just food—it’s a memory-maker, a soul-soother, and a delicious labor of love.
Go on—grab your skillet, heat up that oil, and make some magic.


