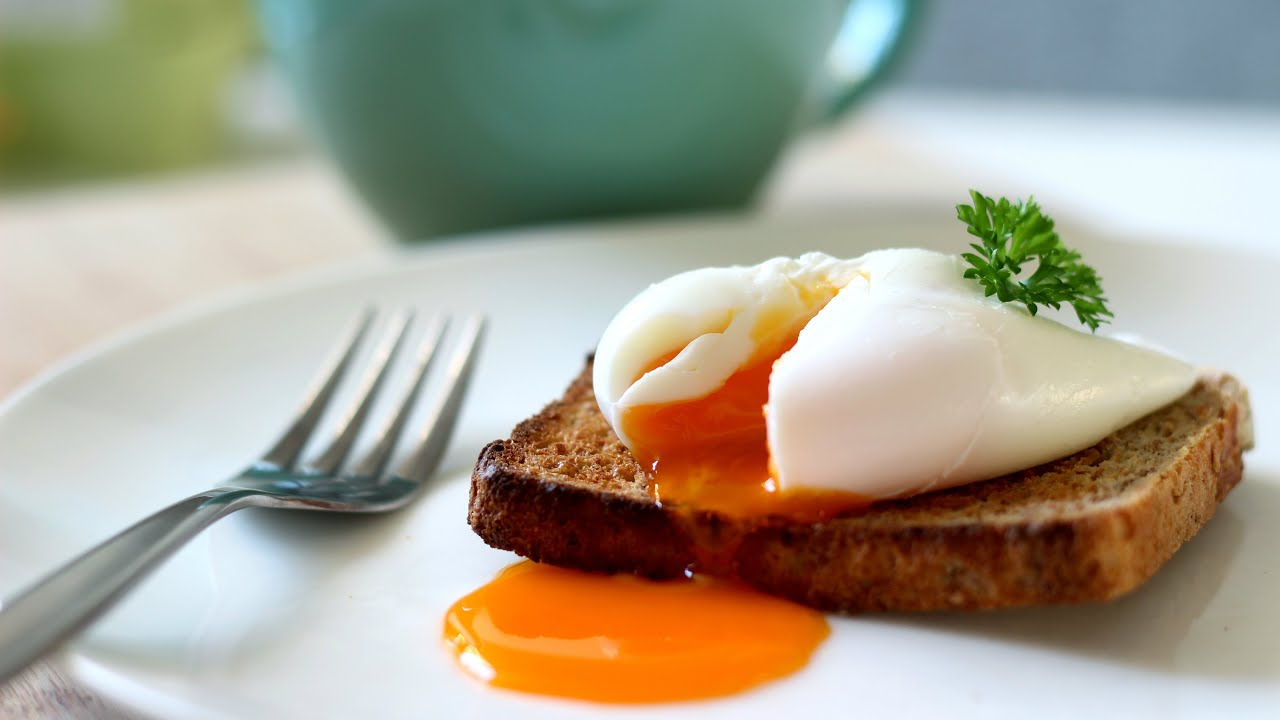
Poached Egg Recipe: A poached egg is simply an egg that’s been cooked outside its shell in simmering water. The white is delicately set around a golden, runny yolk—creating a soft, cloud-like texture that’s irresistibly creamy and tender. Unlike fried eggs, there’s no oil involved, making them lighter. Unlike boiled eggs, there’s no shell to peel. It’s a minimalist approach that lets the egg’s pure flavor shine. Think of it as a perfectly timed magic trick in the kitchen. When done right, it adds elegance to any meal, whether you’re tossing it over toast, salad, or ramen.
Why Learn to Poach Eggs?
So, why bother learning how to poach an egg? Because it’s the kind of simple culinary skill that transforms your everyday dishes into restaurant-quality meals. Once you master it, you can whip up a healthy, protein-rich breakfast in under 10 minutes. And let’s not forget presentation—poached eggs just look fancy. Want to impress a date? Host brunch at home? Fuel your day with a high-protein, low-fat breakfast? This one skill covers all that and more. Plus, there’s just something satisfying about pulling off a perfect poach with a silky yolk that oozes like golden lava.
Ingredients and Tools You Need
Basic Ingredients for Poached Eggs
Before diving into the steps, let’s gather our essentials. You really don’t need much to poach an egg:
- Fresh eggs (as fresh as possible)
- Water
- A splash of white vinegar (optional but helpful)
- Salt (optional, for seasoning after cooking)
That’s it! No fancy ingredients, no long list. The beauty of poached eggs is their simplicity. Still, each of these plays a role. Fresh eggs are key—older eggs tend to spread out in the water and make a mess. Vinegar helps the whites coagulate quickly, reducing wispy strands. And while salt doesn’t go in the water (it can break down the whites), a sprinkle afterward enhances the flavor.
Essential Tools for Poaching
Now, for the tools. Here’s what you’ll want ready before you start:
- Medium saucepan or deep skillet
- Slotted spoon
- Small bowl or ramekin (for cracking the egg)
- Paper towels (for draining)
- Timer or watch
These simple kitchen tools help you control the process. The slotted spoon makes it easy to lift the egg without breaking the delicate white. Using a bowl to crack the egg avoids accidentally breaking the yolk directly over the hot water (a beginner’s mistake!). And trust us—timing matters. Even 30 seconds too long can overcook the yolk.
Preparing to Poach
Selecting Fresh Eggs
When it comes to poached eggs, freshness isn’t just a preference—it’s a necessity. A fresher egg has a firmer white that clings tightly to the yolk, helping it stay together as it cooks. To check an egg’s freshness, try the water test: place the egg in a bowl of cold water. If it sinks and lies flat, it’s fresh. If it stands up or floats, it’s older. Use the freshest ones for poaching, and save the rest for baking or hard-boiling.
Farmer’s market eggs or local organic options are often fresher than grocery store cartons. If you crack an egg and the white is watery and spread out, it’s not ideal for poaching. Stick with those tighter whites for that perfect round poach.
The Importance of Water Temperature
The temperature of the water is a make-or-break factor. You want your water to be simmering, not boiling. Boiling water is too aggressive and will shred your egg. Simmering water, around 180°F to 190°F (82°C to 88°C), is just right—it gently envelops the egg, allowing it to set softly.
How do you spot a simmer? Look for small bubbles forming around the sides of the pot, but no rolling bubbles on the surface. If you see aggressive bubbling, turn the heat down. Too cold? Your egg will spread too much and take forever to cook. Hit the sweet spot, and you’re golden.
Step-by-Step Instructions to Poach Eggs
Step 1: Heat the Water
Fill your pot or deep skillet with about 3 inches of water. Place it over medium heat and let it come to a simmer—not a full boil. This usually takes about 5–7 minutes. Once simmering, reduce the heat slightly to maintain that gentle bubble.
Step 2: Add Vinegar to the Water
Adding about 1–2 teaspoons of white vinegar helps the egg white coagulate faster, creating a neater poach. Don’t worry—it won’t make your egg taste vinegary. If you’re sensitive to flavor, you can skip it, but it really helps the shape hold.
Step 3: Crack the Egg into a Bowl
Crack your egg into a small bowl or ramekin. This gives you more control when adding it to the water and reduces the risk of breaking the yolk. It also lets you easily spot and remove any shell fragments.
Step 4: Create a Gentle Whirlpool
Using a spoon or spatula, stir the water in a circular motion to create a whirlpool. This helps the egg white wrap around the yolk as it cooks. This step is especially useful if you’re poaching just one egg at a time.
Step 5: Slide the Egg into the Water
Carefully lower the bowl close to the water and gently slide the egg into the center of the whirlpool. Avoid dropping it from a height—it can break the yolk or cause the whites to scatter.
Step 6: Poach the Egg for 3–4 Minutes
Set your timer. For a runny yolk, 3 minutes is perfect. For a slightly firmer yolk, go up to 4 minutes. Don’t stir or disturb the egg during this time. Let it do its thing.
Step 7: Remove with a Slotted Spoon and Drain
Gently lift the poached egg out of the water with a slotted spoon. Let the excess water drain off, and place it on a paper towel to blot. You can trim any wispy edges with a spoon for a cleaner look.
Tips for the Perfect Poached Egg
How to Avoid Common Mistakes
Poaching eggs may seem easy, but it’s also easy to mess up. Here are some of the most common mistakes—and how to dodge them like a pro:
- Using old eggs: Freshness matters! Older eggs have runny whites that spread out in the water. Always choose the freshest eggs available.
- Boiling the water: Poaching is a gentle cooking method. Boiling water will tear the egg apart. Keep it at a low simmer—just a few small bubbles should rise.
- Dropping the egg from too high: This will cause the egg to break or disperse in the water. Always crack the egg into a bowl first and gently slide it in.
- Skipping the vinegar: While not absolutely essential, vinegar helps the whites coagulate quickly and neatly. A teaspoon or two is all you need.
- Overcooking: Timing is key. Set a timer for 3–4 minutes. A few seconds too long, and you’ve lost that gorgeous runny yolk.
You’ll find that a lot of your success comes down to practice. The first egg might not be perfect, and that’s okay. With each attempt, you’ll get better. It’s like riding a bike—once you get the feel for it, you’ll never forget.
How to Poach Multiple Eggs at Once
Want to poach eggs for two or more people? It’s totally doable with a little planning:
- Use a wide, shallow pan so you have space to work with.
- Crack each egg into its own ramekin or small bowl.
- Once the water is at a gentle simmer, slide the eggs in one at a time, spaced a few inches apart.
- Skip the whirlpool when poaching multiple eggs—it’s better for just one.
- Start a timer the moment the first egg goes in.
- Be patient and use a slotted spoon to remove them one by one, allowing each to drain on a paper towel.
Pro tip: Want to save time during brunch prep? Poach the eggs ahead of time and store them in cold water in the fridge. When ready to serve, just reheat them in warm water for 30 seconds. Boom—perfect poached eggs on demand.
Serving Suggestions
Classic Pairings with Poached Eggs
Poached eggs shine when paired with simple, delicious ingredients. Here are a few timeless combinations that never fail:
- Eggs Benedict: The most famous poached egg dish—served on an English muffin with Canadian bacon and rich hollandaise sauce.
- Avocado Toast: Top your mashed avocado toast with a poached egg, a sprinkle of chili flakes, and a drizzle of olive oil.
- Smoked Salmon & Greens: Serve over baby spinach, arugula, or mixed greens with thin slices of smoked salmon and a squeeze of lemon.
- Sautéed Mushrooms on Toast: Earthy mushrooms and herbs topped with a silky poached egg? A vegetarian dream.
- Hash Browns or Sweet Potatoes: Add a poached egg to your breakfast bowl or hash for extra richness and protein.
These classics are just the beginning. A poached egg can elevate just about any dish—from burgers to grain bowls to pasta.
Healthy Meal Ideas Featuring Poached Eggs
Poached eggs aren’t just delicious—they’re incredibly nutritious. Here’s how to include them in health-conscious meals:
- Poached Egg Buddha Bowl: Combine quinoa, roasted veggies, greens, and avocado with a poached egg on top.
- Low-Carb Breakfast Plate: Poached egg served alongside sautéed spinach, grilled tomatoes, and turkey sausage.
- Poached Egg over Zoodles: Toss zucchini noodles in a bit of pesto and top with a poached egg for a fresh, low-carb lunch.
- Savory Oatmeal: Add a poached egg, a dash of soy sauce, and chopped scallions to your oats for a savory twist.
- Cauliflower Rice Stir Fry: Stir-fried cauliflower rice with vegetables and a poached egg turns it into a satisfying, low-calorie meal.
Each of these meals is high in protein, packed with nutrients, and super satisfying—all thanks to that magical poached egg.
FAQs About Poached Egg Recipe
1. What is the easiest way to poach an egg?
The easiest way is to crack an egg into a small bowl, slide it gently into simmering water with a splash of vinegar, and cook for 3–4 minutes until the whites are set but the yolk is still runny.
2. Do I need vinegar to poach an egg?
Yes, adding a little vinegar helps the egg white coagulate faster, keeping it from spreading in the water. It’s optional, but very helpful for beginners.
3. How do I keep the egg from spreading in the water?
Use the whirlpool method: stir the simmering water to create a gentle vortex before adding the egg. Also, ensure the egg is as fresh as possible—fresh eggs hold their shape better.
4. Can I poach more than one egg at a time?
Yes, but it takes practice. Use a large pan and crack each egg into a separate cup before gently sliding them in one at a time, spaced apart.
5. What’s the ideal water temperature for poaching eggs?
Keep the water at a gentle simmer—around 180°F to 190°F (82°C to 88°C). Avoid boiling, as rapid bubbles can break apart the egg.
6. How long should I poach an egg?
Poach for 3 to 4 minutes for a runny yolk and slightly longer for a firmer center.
7. Can I poach eggs in advance?
Absolutely! After poaching, place the eggs in ice water to stop cooking. Store them in cold water in the fridge for up to two days. Reheat in hot (not boiling) water for 30 seconds before serving.
8. Why are my poached eggs rubbery?
They were likely overcooked. Stick to 3–4 minutes of cooking time, and make sure the water is gently simmering—not boiling.
9. Are poached eggs healthy?
Yes! Poached eggs are cooked without oil or butter, making them lower in calories and fat compared to fried eggs.
10. What dishes can I serve with poached eggs?
They’re perfect on toast, avocado toast, salads, grain bowls, or the classic Eggs Benedict. They’re a great way to level up breakfast or brunch.
Conclusion
Mastering the poached egg might seem intimidating at first, but once you get the technique down, it’s a total game-changer in the kitchen. It’s quick, healthy, and turns even the simplest dish into something special. Whether you’re preparing brunch for guests or just making a solo breakfast, poached eggs are always a good idea. With fresh eggs, gentle simmering water, and a few pro tips, you’re just minutes away from breakfast bliss.
So go ahead—give it a try, and don’t be afraid to mess up the first few. Practice makes perfect, and once you nail it, you’ll never look back.


