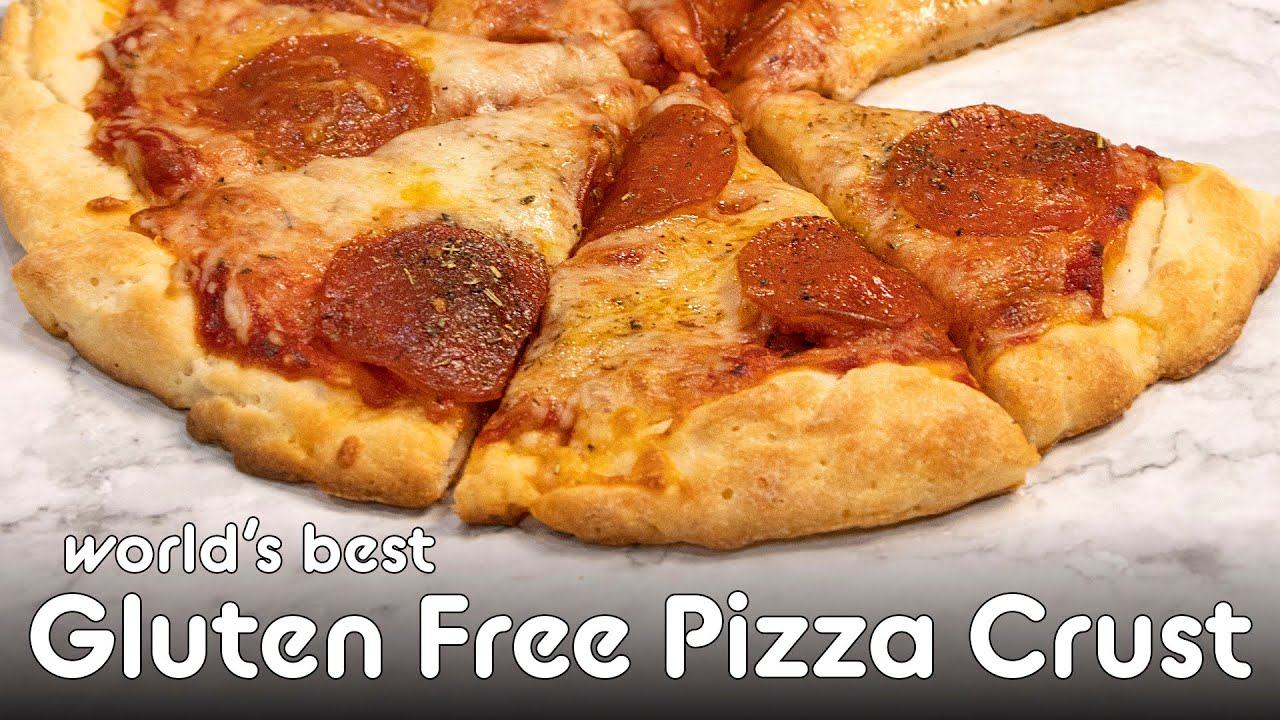
Gluten Free Pizza Crust Recipe: Pizza night doesn’t have to end when you go gluten-free. In fact, it gets even more exciting when you discover how incredible a homemade gluten-free pizza crust can taste! Whether you’re celiac, gluten-sensitive, or just looking for a lighter alternative, this guide is your new best friend.
Why Go Gluten-Free?
There are tons of reasons to try a gluten-free lifestyle—some for medical reasons, others by choice. Gluten is a protein found in wheat, barley, and rye that some people can’t tolerate. But going gluten-free doesn’t mean saying goodbye to comfort food favorites like pizza. With the right recipe, gluten-free pizza crust can be just as crispy on the outside and soft on the inside as its traditional counterpart.
The Secret to a Delicious Gluten-Free Crust
Let’s be honest: gluten-free baking can be tricky. The lack of gluten often leads to dough that’s dry, crumbly, or too dense. But this recipe fixes all that. With the perfect blend of gluten-free flours and a few game-changing techniques, we’re bringing you a crust that’s crispy, chewy, and flavorful—everything a pizza should be.
Ingredients You’ll Need
Every great recipe starts with quality ingredients, and this one is no different. The secret sauce here is picking the right flour mix and adding ingredients that enhance texture and taste.
Choosing the Right Flour
Not all gluten-free flours are created equal. You’ll want to use a pre-made gluten-free flour blend that includes a mix of rice flour, potato starch, and tapioca starch. These mimic the texture of wheat flour and are usually fortified with xanthan gum, which helps bind the dough.
Here’s what you’ll need:
- 2 cups of gluten-free all-purpose flour (with xanthan gum included)
- 1 tbsp olive oil
- 1 packet (2 ¼ tsp) active dry yeast
- 1 tsp sugar (helps activate the yeast)
- ¾ cup warm water (about 110°F)
- ½ tsp salt
Optional Add-ins for Flavor and Texture
Want to upgrade your crust? Add these:
- 1 tsp garlic powder
- 1 tsp Italian seasoning
- 1 tbsp grated Parmesan (for richness)
- ½ tsp baking powder (for a fluffier texture)
These are not mandatory, but they take your crust from basic to artisan-level.
Tools and Equipment Required
Before you dive into the dough, make sure you’ve got the right tools ready. You don’t need anything fancy, but having the right gear will make your life easier and your pizza crust better.
Kitchen Tools to Make Your Life Easier
- Large mixing bowl
- Measuring cups and spoons
- Wooden spoon or rubber spatula
- Plastic wrap or a clean towel
- Rolling pin (optional)
- Pizza pan or baking stone
- Parchment paper
Step-by-Step Gluten Free Pizza Crust Recipe
Now, let’s get our hands a little dirty (in a good way) and make some dough! This process is easy, fun, and totally doable—even for beginners.
Step 1: Prepping the Ingredients
Start by proofing the yeast. In a small bowl, combine warm water, sugar, and yeast. Let it sit for about 5–10 minutes until it gets frothy. This means your yeast is alive and ready to do its job—making that crust rise!
While the yeast is doing its thing, mix your dry ingredients in a large bowl. Combine the gluten-free flour, salt, and any optional spices or cheese. Stir well to evenly distribute everything.
Step 2: Mixing the Dough
Once the yeast is frothy, add it to the dry ingredients along with olive oil. Mix with a spoon or spatula until the dough starts to come together. Gluten-free dough won’t feel exactly like regular dough—it’ll be a bit stickier and wetter, and that’s totally normal.
If it’s too dry, add water one tablespoon at a time. If it’s too wet, dust in a little more flour. Aim for a consistency similar to cookie dough—soft but workable.
Step 3: Letting the Dough Rest
This is a step you don’t want to skip. Even gluten-free dough needs time to relax and hydrate. Cover the bowl with plastic wrap or a clean kitchen towel and let it rest for about 30 minutes at room temperature. While it’s not going to rise a ton like regular dough, resting allows the flour to fully absorb the moisture and makes the dough easier to shape.
Don’t rush this—think of it like giving the dough a spa day. The texture will improve significantly, and the finished crust will have a better bite and chewiness.
If your kitchen is cold, you can place the bowl in your oven (turned off) with the light on to create a cozy resting environment. Just don’t forget it in there!
Step 4: Shaping the Crust
Now comes the fun part—shaping your pizza crust! Preheat your oven to 425°F (220°C) so it’s ready when you are.
Place a piece of parchment paper on your pizza pan or baking stone and lightly dust it with gluten-free flour. Transfer the rested dough onto the paper. Sprinkle a bit more flour on top and use your hands (or a rolling pin) to gently press it into a round pizza shape.
Pro tip: Keep your hands slightly oiled or floured to prevent sticking. Aim for about ¼-inch thickness for a balance of crispiness and chewiness.
If you like a thicker, doughier crust, shape it a little thicker. Want it thin and crispy? Press it out even more. The beauty of homemade pizza is making it exactly how you like it.
Step 5: Pre-baking the Crust
Here’s the real game-changer—pre-baking your gluten-free crust before adding toppings. This keeps the crust from getting soggy and gives it structure.
Slide your shaped crust into the preheated oven and bake for 10–12 minutes, just until it starts to firm up and lightly brown around the edges. It should be solid enough to lift with a spatula, but not fully cooked yet.
Once it’s pre-baked, pull it out and get ready to add your favorite sauce, cheese, and toppings. You can even store the pre-baked crust for later use—perfect for busy weeknights!
Baking and Topping Tips
A good crust deserves great toppings. Whether you’re into classic pepperoni or vegan BBQ jackfruit, it all starts with how you bake and layer.
Best Baking Practices
After adding your toppings, return the pizza to the oven and bake for another 10–15 minutes. Keep an eye on it—when the cheese is bubbly and golden and the edges of the crust are crispy, it’s done!
For an ultra-crispy bottom, use a pizza stone or place your pizza pan directly on the lowest oven rack. And remember: every oven is different, so don’t be afraid to adjust the time slightly based on your experience.
Creative Topping Ideas for All Diets
Classic Combo: Tomato sauce, mozzarella, pepperoni, mushrooms
Vegan Delight: Cashew cheese, bell peppers, spinach, olives
BBQ Chicken: BBQ sauce, cooked chicken, red onion, cilantro
Breakfast Pizza: Scrambled eggs, bacon bits, cheddar, green onion
Dessert Style: Nutella, banana slices, crushed almonds (use a sweetened crust variation)
Feel free to go wild and customize each half for picky eaters, or make mini pizzas for a fun family dinner!
Storage and Reheating Tips
Once you’ve tasted this pizza, you’re gonna want leftovers. Here’s how to make sure they still taste great tomorrow.
How to Keep the Crust Fresh
If you have extra dough, wrap it tightly in plastic and refrigerate for up to 3 days, or freeze for up to 1 month. For pre-baked crusts, stack them with parchment paper between layers and store in a freezer-safe bag.
Reheating Without Losing Texture
To reheat leftover slices, avoid the microwave if possible. Instead, pop them in a toaster oven or regular oven at 375°F (190°C) for about 8–10 minutes. This keeps the crust crispy instead of rubbery.
Another option? Heat a slice in a skillet over medium heat for a few minutes. Cover the pan to help melt the cheese, and enjoy a slice that tastes almost freshly baked.
FAQs About Gluten-Free Pizza Crust Recipe
1. What is gluten-free pizza crust made of?
Gluten-free pizza crust is typically made using alternative flours like rice flour, almond flour, tapioca flour, or a gluten-free flour blend. These ingredients are free from wheat and safe for people with gluten intolerance or celiac disease.
2. Does gluten-free pizza crust taste like regular pizza crust?
While the texture may vary slightly, a well-made gluten-free pizza crust can be just as delicious as traditional crust. It’s often slightly crispier and can carry flavors from the flour blend used.
3. Is yeast required in gluten-free pizza crust recipes?
Some gluten-free crust recipes include yeast for a rise and more traditional pizza flavor. However, there are also yeast-free options for quicker prep and a flatbread-style base.
4. How do I make the crust less crumbly?
Adding binders like xanthan gum or psyllium husk helps hold the crust together. Using eggs or flax eggs also improves texture and reduces crumbliness.
5. Can I freeze gluten-free pizza dough?
Yes! You can freeze gluten-free dough after shaping it into a crust or even after pre-baking it. Just wrap it tightly and store for up to a month. Thaw before topping and baking.
6. Is gluten-free pizza healthier?
Gluten-free doesn’t always mean healthier—it depends on the ingredients. Many gluten-free crusts are lower in fiber, so balance your diet accordingly. However, for those with gluten intolerance, it’s the best option.
7. Can I make it dairy-free and vegan too?
Absolutely! Use dairy-free milk, oil instead of butter, and flax or chia seeds instead of eggs to make the crust vegan and dairy-free.
8. How do I get a crispy gluten-free pizza crust?
For extra crispiness, pre-bake the crust before adding toppings, use a pizza stone or baking steel, and make sure the oven is fully preheated.
Conclusion
So there you have it—your complete step-by-step guide to making the best gluten-free pizza crust at home. It’s not just a substitute; it’s a celebration of flavor, texture, and creativity. You don’t need to be a professional chef or own fancy equipment to pull this off. Just a few pantry staples, some patience, and a love for good pizza.
Next time you’re craving a slice, skip the store-bought frozen versions or overpriced gluten-free takeout. Instead, whip up this simple, satisfying crust and top it with whatever your heart (or belly) desires.
Your pizza night just got a major upgrade.


