Fudge Brownie Recipe: There’s something undeniably comforting about a thick, gooey, chocolatey fudge brownie. Whether you’re baking for a party, a family treat, or a late-night craving, this classic dessert never disappoints.
Let’s break down the ultimate step-by-step guide to make rich, fudgy brownies that taste like they came straight out of a bakery—only better, because you made them!
Introduction to Fudge Brownies
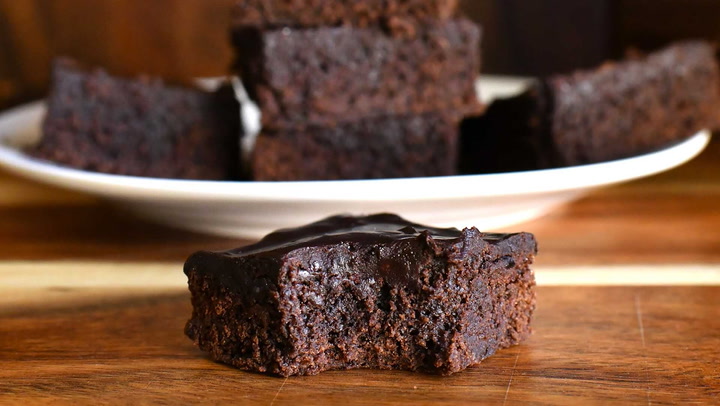
Fudge brownies are the holy grail for chocolate lovers. Unlike cakey brownies, these are moist, dense, and have a deep chocolate flavor. Think of them as the love child between a chocolate truffle and a chewy cookie. What makes fudge brownies unique is the high fat-to-flour ratio, usually thanks to butter and chocolate, giving them that melt-in-your-mouth texture.
The brownie has roots going back to the late 1800s in the United States. While the origin story varies, one of the earliest published recipes appeared in a Sears catalog in 1897. Over time, variations flourished, but the fudge brownie has stayed a beloved staple for generations. And guess what? You don’t need to be a pro baker to whip up the perfect batch. All it takes is good-quality ingredients, the right steps, and a little love.
Ingredients You’ll Need
Here’s a breakdown of everything you need to make these magical squares of chocolate joy:
Main Ingredients
- 1 cup (2 sticks) unsalted butter – Gives richness and a smooth texture.
- 2 cups granulated sugar – Adds sweetness and helps form that signature shiny top.
- 1 cup brown sugar – For a deep, molasses-like undertone.
- 1 ½ cups all-purpose flour – The structure base of your brownies.
- 1 cup unsweetened cocoa powder – The key to intense chocolate flavor.
- 4 large eggs – For structure and binding.
- 2 teaspoons vanilla extract – Enhances the chocolate flavor.
- ½ teaspoon salt – Balances the sweetness.
Optional Add-ins
- 1 cup chocolate chips or chunks – For extra gooey bites.
- ½ cup chopped nuts (walnuts or pecans) – Adds crunch and depth.
- A pinch of espresso powder – Intensifies the chocolate.
Pro tip: Use high-quality cocoa and chocolate. It makes a big difference in flavor!
Tools Required for Making Fudge Brownies
Before diving into baking, make sure your kitchen is armed with these essential tools:
Must-Have Tools
- Mixing bowls – At least two: one for wet and one for dry ingredients.
- Whisk and spatula – A whisk for blending, a spatula for folding.
- 8×8 or 9×9 inch square baking pan – For perfectly thick brownies.
- Parchment paper – To prevent sticking and help lift out the brownies.
- Oven thermometer (optional) – Ensures accurate baking temp.
If You’re in a Pinch
- No whisk? Use a fork, but make sure to mix thoroughly.
- No parchment paper? Grease your pan generously with butter or use aluminum foil.
Don’t skip prepping your tools. A little organization before you start makes the process smooth and stress-free.
Step-by-Step Instructions to Make Fudge Brownies
Now, for the fun part: baking! Follow these steps carefully and you’ll end up with insanely good brownies that’ll make everyone ask for your recipe.
Step 1: Preheat Your Oven and Prep Your Pan
Start by preheating your oven to 350°F (175°C). Proper preheating ensures your brownies bake evenly. Then, line your baking pan with parchment paper, leaving some overhang on the sides so you can easily lift the brownies out later. If you don’t have parchment paper, grease the pan well with butter or cooking spray.
Step 2: Melt the Butter and Chocolate
In a microwave-safe bowl or on the stovetop, melt the butter. Once it’s melted, whisk in the cocoa powder and brown sugar. This step gives your brownies that rich, fudgy base. If you’re adding any chocolate chips, you can melt a portion here for extra depth.
Step 3: Whisk in Sugar and Eggs
Add the granulated sugar and vanilla extract to the chocolate mixture and whisk until fully combined. Then, add the eggs one at a time, whisking well after each addition. This helps to emulsify the batter and contributes to the shiny, crinkly top everyone loves in brownies.
Step 4: Mix in Flour, Cocoa, and Salt
In a separate bowl, mix the flour, additional cocoa powder, and salt. Gradually fold this dry mixture into the wet ingredients using a spatula. Be gentle—overmixing can make your brownies tough. Mix just until you don’t see any dry flour.
Step 5: Fold in Optional Add-ins
At this point, gently fold in any extras like chocolate chunks or chopped nuts. These additions give texture and pockets of melted chocolate that take the brownies to the next level.
Baking the Perfect Brownie
Alright, now that your brownie batter is ready and your oven is preheated, it’s time to get baking. This step might seem straightforward, but it’s where many brownie dreams go sideways—either too gooey or too dry. So let’s dial in on how to bake the perfect fudge brownie.
Time and Temperature Tips
The sweet spot for fudge brownies is usually 350°F (175°C) for 30 to 35 minutes. But here’s the thing—every oven is different. Some run hot, some cold. That’s why an oven thermometer can be your secret weapon. If your brownies come out undercooked in the middle or overbaked around the edges, your oven might be lying to you.
You’re aiming for a slightly underbaked center. That’s what gives it that iconic gooey texture. When in doubt, lean toward the shorter baking time. You can always add a couple more minutes if needed, but you can’t unbake them!
How to Check Doneness
Forget the toothpick test you’re used to from cakes. For fudge brownies, it’s different. Insert a toothpick about two inches from the edge. If it comes out with a few moist crumbs (not wet batter), you’re good to go. The center will continue to firm up as it cools, so don’t panic if it seems soft right out of the oven.
Brownie hack: If you want a firmer texture for slicing, pop the pan into the fridge for 30 minutes after it’s fully cooled. It firms them up beautifully without sacrificing the fudgy interior.
Cooling and Cutting Your Brownies
So your kitchen smells like heaven, your brownies are out of the oven… now what? Cooling them properly and slicing them cleanly are crucial steps if you want those Instagram-worthy squares.
Tips to Avoid Crumbling
Let them cool in the pan for at least 30 minutes on a wire rack. Rushing this step can lead to gooey, crumbling messes. If you lined the pan with parchment paper, once they’re mostly cool, lift them out gently using the paper and set them on a flat surface to cool completely.
Here’s a tip from bakery chefs: cool your brownies for an additional hour or chill them in the fridge before slicing. It helps the texture set, making clean cuts a breeze.
Making Clean Cuts
Want those perfect bakery-style squares? Here’s how:
- Use a sharp knife (serrated works best).
- Run it under hot water, wipe dry, and slice.
- Wipe the blade clean between every cut.
Cut them into 9, 12, or even 16 pieces depending on how generous you’re feeling. For a clean presentation, serve with a dusting of powdered sugar or a drizzle of chocolate syrup. Chef’s kiss!
Storage Tips to Keep Brownies Fresh
If you’ve managed not to devour the entire tray in one sitting (impressive!), here’s how to store them to keep that fudgy magic alive.
Room Temperature vs. Refrigeration
Brownies can sit out at room temperature in an airtight container for 3–4 days. Just keep them in a cool, dry place. Want to stretch that timeline? Toss them in the fridge—they’ll last up to 7 days.
Note: Cold brownies are denser. If you prefer that melt-in-your-mouth softness, zap them in the microwave for 10–15 seconds before serving. Pair with a scoop of vanilla ice cream and—boom—you’ve got dessert heaven.
Freezing Brownies
Yes, you can freeze brownies! Once fully cooled, cut them into squares and wrap each piece in plastic wrap, then foil. Pop them in a zip-top bag and freeze for up to 3 months.
To thaw, leave them at room temp for 1–2 hours or microwave for 30 seconds. They’re just as delicious as fresh!
Common Mistakes and How to Avoid Them
Even seasoned bakers mess up brownies sometimes. But knowing what not to do can save your batch.
Overmixing the Batter
Once you add the flour, mix just until combined. Overmixing activates gluten, leading to tough, cake-like brownies. We want moist and chewy, not bread!
Overbaking
The #1 brownie sin. Overbaking dries them out and ruins the texture. Always err on the side of slightly underdone.
Wrong Pan Size
An 8×8 or 9×9 inch square pan is ideal. Using a larger pan makes thinner brownies and messes up the baking time. Too small? You risk underbaked centers and burnt edges.
Skipping the Cooling Step
Brownies need time to set. Cutting too soon = messy squares. Patience pays off here—promise.
Variations on Classic Fudge Brownies
Want to shake things up? There are endless ways to customize your brownies to suit your cravings.
Nutty Brownies
Add chopped walnuts, pecans, or almonds to the batter. Toast them first for extra flavor. They add crunch and balance the sweetness.
Peanut Butter Swirl Brownies
Drop spoonfuls of peanut butter over the batter and swirl with a knife before baking. Chocolate + peanut butter = a match made in dessert heaven.
Salted Caramel Brownies
Drizzle caramel sauce over the top before or after baking and sprinkle with sea salt. The salty-sweet combo is next level.
Mint Chocolate Brownies
Add a few drops of peppermint extract to the batter or top cooled brownies with mint frosting. A refreshing twist!
Serving Suggestions
You’ve baked the perfect batch of fudge brownies—now it’s time to serve them up in style. While these brownies are fantastic on their own, a little presentation magic can take them from everyday treat to gourmet dessert.
Toppings to Try
Here are some irresistible ways to top off your brownies:
- Powdered sugar – A light dusting adds elegance without overpowering flavor.
- Chocolate ganache – Pour a glossy layer over cooled brownies for double decadence.
- Frosting – Chocolate buttercream, cream cheese frosting, or even a thin glaze can dress up your squares.
- Ice cream – A warm brownie with a scoop of vanilla ice cream and a drizzle of hot fudge? Yes, please.
Perfect Pairings
Want to elevate your dessert game? Pair brownies with:
- Fresh berries – Strawberries, raspberries, or blueberries add a fresh contrast to the richness.
- Coffee or espresso – The bitterness of coffee balances the sweetness beautifully.
- Whipped cream – A dollop of lightly sweetened cream on top is a classic move.
Serving for Events
Hosting a party or holiday gathering? Try:
- Mini brownie bites – Use a mini muffin tin to make poppable portions.
- Brownie sundaes – Set up a DIY sundae bar with toppings and let guests customize.
- Gift boxes – Wrap individual brownies in parchment and tie with a ribbon for a sweet homemade gift.
Whether it’s a casual weekday snack or a fancy dinner dessert, brownies can be styled to fit any vibe.
FAQs about Fudge Brownie Recipe
Q1: What makes a brownie fudgy instead of cakey?
A fudgy brownie has a higher fat-to-flour ratio—think more butter and chocolate, less flour. Cakey brownies use more flour and baking powder for a lighter texture.
Q2: Can I use cocoa powder instead of chocolate?
Yes, but it changes the richness. Cocoa powder gives a deep flavor but less moisture than melted chocolate. For ultimate fudginess, use both.
Q3: How do I know when my brownies are done?
Stick a toothpick in the center—if it comes out with a few moist crumbs (not wet batter), they’re ready. Don’t overbake unless you’re team “chewy edges.”
Q4: Can I make brownies without eggs?
Absolutely! Use egg substitutes like mashed banana, applesauce, or a flaxseed mix. Just know the texture may be slightly different but still delicious.
Q5: How should I store homemade brownies?
Keep them in an airtight container at room temp for up to 4 days. For long-term love, freeze them—wrap individually and stash in a freezer bag.
Q6: Why did my brownies sink in the middle?
It’s likely from overmixing or underbaking. Brownies are a bit moody—gentle folding and proper baking time are key to that perfect, level square.
Q7: Can I add extras like nuts or chocolate chips?
Heck yes! Fold in walnuts, pecans, white chocolate chunks, or even a swirl of peanut butter. Make it your own masterpiece.
Conclusion
Fudge brownies are more than just a dessert—they’re a mood, a comfort food, and a surefire way to impress anyone with a sweet tooth. With this step-by-step guide, you’re fully equipped to make brownies that are thick, fudgy, rich, and totally irresistible.
Remember, it’s all about quality ingredients, not overmixing, and just the right bake time. Follow these steps, avoid the common pitfalls, and don’t be afraid to get creative with mix-ins and toppings. Trust me—once you master this recipe, you’ll never want to go back to boxed mixes again.
Happy baking, and may your brownies always be gooey in the middle and crinkly on top!


