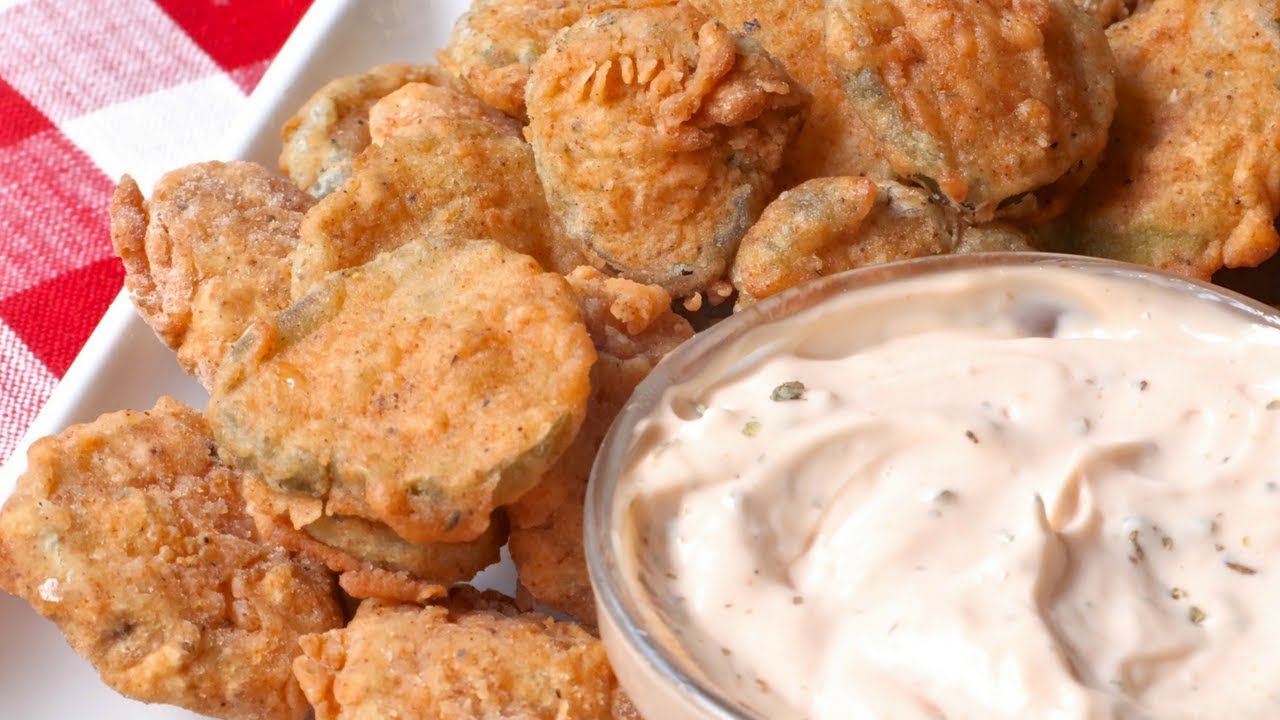
Fried Pickle Recipe: Fried pickles are exactly what they sound like—crispy, crunchy slices of pickles deep-fried to golden perfection. This snack might sound like a quirky Southern dish, but it has become a comfort food staple across the United States. The contrast between the tangy, juicy inside and the crunchy, savory coating on the outside creates a flavor bomb in every bite. Whether you’re at a state fair, watching a game, or just craving something salty and crispy, fried pickles are the kind of snack that delivers every time.
Originating in the American South, fried pickles were first introduced to the public in the early 1960s and quickly became a hit. Their appeal lies in their simplicity and how they transform the humble pickle into something unexpectedly delightful. From spears to chips, there are various ways to enjoy this crunchy treat.
Why Fried Pickles Are So Popular
There’s a reason fried pickles have made their way from obscure fair food to restaurant menus nationwide. First, they’re incredibly addictive. That satisfying crunch paired with the vinegar tang of pickles hits all the right flavor notes. Plus, they’re super easy to make at home with just a few ingredients.
Their versatility adds to their charm—you can dip them in ranch, pair them with burgers, or enjoy them solo. They’re great as appetizers, party snacks, or even as a side dish when you’re feeling a little adventurous. And let’s not forget, fried pickles are the ultimate crowd-pleaser. Put a bowl of them on the table, and they’ll be gone in minutes.
Ingredients You’ll Need
Essential Ingredients for Classic Fried Pickles
To make restaurant-style fried pickles at home, you’ll only need a handful of ingredients. Here’s what you’ll want to grab before you start:
- Pickles: Dill pickle chips or spears work best; chips are easier to fry evenly.
- Flour: All-purpose flour helps create a base for the breading.
- Cornmeal or Breadcrumbs: For that extra crunch and texture.
- Eggs: Used to bind the coating to the pickles.
- Milk or Buttermilk: Adds richness to the batter.
- Seasonings: Salt, pepper, garlic powder, paprika, and cayenne for a little kick.
- Oil for Frying: Use vegetable, canola, or peanut oil for best results.
Keep your ingredients cold before using—especially the pickles—as it helps with a crispier fry.
Optional Add-ins and Variations
Want to spice things up a bit? Here are some variations you can try:
- Spicy Version: Add hot sauce to the egg wash or mix chili powder into the flour blend.
- Gluten-Free: Use almond flour or gluten-free breadcrumbs.
- Vegan: Swap the egg and milk with plant-based alternatives like flax egg and almond milk.
- Cheesy Coating: Mix a bit of grated Parmesan into the flour for extra flavor.
The recipe is super flexible. Don’t be afraid to experiment with different seasonings or try a beer batter for a pub-style crunch.
Tools and Equipment Required
Kitchen Tools for Making Fried Pickles at Home
Fried pickles don’t need fancy equipment, but having the right tools makes things easier:
- Deep Fryer or Heavy-Bottomed Pot: For even heat distribution and safe frying.
- Tongs or Slotted Spoon: To handle hot pickles without splashing oil.
- Wire Rack or Paper Towels: For draining excess oil and keeping pickles crispy.
- Mixing Bowls: You’ll need at least two—one for the wet batter and one for the dry mix.
- Thermometer: Optional, but useful for checking oil temperature (aim for 350°F / 175°C).
These tools help streamline the cooking process and ensure your pickles come out perfectly crispy, not soggy.
How to Make Fried Pickle – Step-by-Step Instructions
Step 1 – Pickle Prep
Start by draining your pickles and patting them completely dry with paper towels. This is crucial. Moisture is the enemy of a crisp coating—too much liquid can make the batter slide off or cause oil splatter during frying. If you’re using spears, slice them evenly so they cook at the same rate. For chips, make sure they’re not too thin or they might burn quickly.
At this stage, you can even chill the pickles in the freezer for 15 minutes to firm them up. This small step helps them keep their shape and crunch better during frying.
Step 2 – Make the Breading Mix
Now it’s time to whip up the coating that gives fried pickles their signature crunch. Grab two mixing bowls—one for your wet ingredients and one for your dry ingredients.
In the wet bowl, whisk together:
- 1 or 2 large eggs
- ½ cup of milk or buttermilk
- Optional: a few dashes of hot sauce for a spicy kick
In the dry bowl, combine:
- 1 cup of all-purpose flour
- ½ cup of cornmeal or breadcrumbs
- 1 teaspoon of garlic powder
- ½ teaspoon of paprika
- ¼ teaspoon of cayenne pepper (optional)
- Salt and black pepper to taste
The goal here is to season every layer of the coating. Don’t be afraid to taste-test a pinch of your dry mix—yes, even raw flour!—to make sure it’s flavorful. The last thing you want is bland fried pickles. A little seasoning goes a long way in giving them a deep, savory bite.
If you’re feeling experimental, this is also where you can toss in some Parmesan cheese or dried herbs like oregano or dill to amp up the flavor.
Step 3 – Dredge and Coat
Here comes the fun (and messy) part—breading the pickles! This step determines how crispy your final product will be, so don’t rush it.
- Take a pickle slice and dip it into the flour mixture to give it a light, dry base.
- Next, dunk it into the egg wash. Make sure it’s fully coated so the breadcrumbs stick properly.
- Finally, coat it in the breadcrumb or cornmeal mix, pressing lightly so the crumbs stick well.
Repeat with all your pickles. It helps to do this in batches—five or six at a time—so you’re not overwhelmed. If you want an extra-thick coating, you can double dip: back into the egg and then the flour again. Just keep in mind that a thicker coating means longer frying time.
Pro tip: Let the coated pickles rest on a baking sheet for 10–15 minutes before frying. This helps the breading “set” and stick better during frying.
Step 4 – Frying to Perfection
Get ready to fry! Pour oil into a deep fryer or heavy-bottomed skillet until it’s about 2 inches deep. Heat it to 350°F (175°C)—you can use a kitchen thermometer for accuracy.
Once the oil is hot:
- Gently drop a few pickles at a time into the oil using tongs or a slotted spoon. Don’t overcrowd the pan.
- Fry for 2 to 4 minutes or until golden brown and crispy, flipping halfway if needed.
- Remove with a slotted spoon and place on a wire rack or paper towel-lined plate to drain excess oil.
The key is maintaining oil temperature. If it drops too low, your pickles will absorb oil and turn greasy. If it’s too hot, the outside will burn before the inside gets hot. Keep the heat steady for the best results.
The smell of fried pickles in the kitchen? Absolutely irresistible. You’ll know they’re ready when they have that deep golden crust and a sizzling, crunchy sound when tapped.
Step 5 – Draining and Serving
Once your pickles are fried, don’t skip the draining process. This step ensures they stay crispy instead of getting soggy. Set them on a paper towel-lined plate or cooling rack and give them a minute or two to rest.
While they’re still warm, sprinkle a pinch of salt or a dusting of seasoning on top for an extra flavor boost. If you’re going all out, try a garlic-parmesan blend or a spicy Cajun dusting.
Now, it’s time to serve. Fried pickles are best enjoyed fresh and hot. Pair them with a dipping sauce (more on that below), and watch them disappear in minutes. Whether you’re serving them at a party, game night, or just for yourself, they’re guaranteed to be a hit.
Pro Tips for Perfect Fried Pickles
- Dry Pickles Thoroughly: This step cannot be overstated. Wet pickles = soggy coating.
- Use Cold Pickles: Cold pickles hold their shape better during frying.
- Don’t Overcrowd the Fryer: It drops the oil temperature and leads to uneven cooking.
- Double Dredge for Extra Crunch: A second coating adds texture and helps lock in the flavor.
- Drain on a Rack, Not Just Paper Towels: A rack allows airflow and keeps the underside from getting soggy.
Want next-level pickles? Try adding beer to the batter or using panko for an extra-light crunch.
Serving Suggestions and Dipping Sauces
Fried pickles are incredible on their own, but pair them with the right dipping sauce, and you’ve got a snack worth obsessing over. Here are some favorite combos and serving styles to elevate your fried pickle experience:
Top Dipping Sauces for Fried Pickles:
- Classic Ranch Dressing – Cool, creamy, and tangy—it balances the saltiness of the pickles perfectly.
- Spicy Sriracha Mayo – A blend of mayonnaise, sriracha, and lime juice adds a zesty heat.
- Honey Mustard – Sweet and tangy flavors complement the vinegar in the pickles.
- Garlic Aioli – Rich and garlicky, it brings a gourmet touch to this humble snack.
- Blue Cheese Dip – Especially popular in Southern-style serving platters, this one’s for bold flavor lovers.
You can also make a DIY dipping station if you’re serving fried pickles at a gathering. Set out small bowls of each sauce, and let guests choose their favorite.
Serving Ideas:
- As an Appetizer – Place on a platter with toothpicks and small bowls of dip.
- With Burgers or Sandwiches – Serve alongside for a crunchy, flavorful side.
- On a Snack Board – Add them to a game-day spread with wings, fries, and sliders.
- As a Salad Topper – Believe it or not, a few fried pickles on a salad add an unexpected crunch.
Get creative with your presentation, and don’t forget to serve them hot! The contrast between the crispy crust and cool dips is part of the magic.
Storage and Reheating Instructions
Fried pickles are best enjoyed fresh, but you can still save leftovers and enjoy them later—if you’re lucky enough to have any left!
How to Store Fried Pickles:
- Cool Completely – Let the pickles come to room temperature before storing.
- Use an Airtight Container – Line the bottom with a paper towel to absorb moisture.
- Refrigerate – They’ll last up to 2–3 days in the fridge.
Avoid sealing them while still warm, as the steam will soften the crust and turn them soggy.
How to Reheat Fried Pickles:
You’ve got a few solid options to reheat and bring back the crunch:
- Air Fryer (Best Option) – Heat at 375°F for 3–4 minutes.
- Oven – Bake at 400°F on a baking sheet for about 10 minutes, flipping halfway.
- Skillet – Pan-fry with a small amount of oil over medium heat for a few minutes each side.
Avoid microwaving—unless you like soft, limp pickles (and who does?).
Common Mistakes to Avoid
Even though fried pickles are simple, there are some common pitfalls that can ruin the crunch or flavor. Avoid these, and you’re golden:
1. Not Drying the Pickles
Skipping this step results in soggy coating that slides right off in the fryer. Always pat them dry.
2. Overcrowding the Pan
Too many pickles at once drops the oil temperature, leading to greasy and unevenly cooked results.
3. Skipping the Rest Time
Letting breaded pickles sit for a few minutes before frying helps the coating stay intact during cooking.
4. Underseasoning the Coating
Fried food needs flavor. Make sure your dry mix is seasoned well to avoid bland bites.
5. Using Cold Oil or Wrong Temperature
If the oil isn’t hot enough (350°F), the pickles will absorb too much oil and come out greasy rather than crispy.
Avoid these rookie mistakes, and you’ll be frying like a pro in no time.
FAQs about Fried Pickle Recipe
What kind of pickles work best for frying?
Dill pickles are the most popular choice for frying because of their bold, tangy flavor. You can use pickle slices, spears, or chips depending on your texture preference.
Can I make fried pickles in an air fryer?
Yes! Air fryer fried pickles are a healthier alternative. Just coat the pickles in batter, spray them lightly with oil, and cook at 400°F for 8–10 minutes, flipping halfway through.
How do I keep fried pickles crispy?
Drain the pickles well before battering to reduce moisture. Also, make sure your oil is hot enough—around 350°F to 375°F—so the batter crisps up quickly without absorbing too much oil.
What dipping sauces go well with fried pickles?
Ranch dressing is a classic, but you can also try spicy mayo, chipotle aioli, or a tangy remoulade for a flavor twist.
Can I make them ahead of time?
Fried pickles are best served fresh. If you must prep ahead, store them in the fridge and reheat in the oven or air fryer to regain crispiness.
Are fried pickles gluten-free?
Only if you use a gluten-free flour or breadcrumb mix in your batter. Always check the ingredients to be sure.
Why is my batter falling off the pickles?
Make sure the pickles are dry before dipping. Also, try dredging them lightly in flour before adding the batter—it helps the coating stick better.
Conclusion
There you have it—a complete, step-by-step guide to making fried pickles at home that are crispy, tangy, and absolutely addictive. Whether you’re cooking for a party, a game night, or just a solo snack session, these golden bites of joy are always a hit.
What makes fried pickles so great is how customizable they are. You can stick with the classic recipe or spice things up with bold flavors and unique dips. Either way, once you master the basics, you’re free to get creative and have fun with it.
So next time you’re in the mood for something crispy and crave-worthy, give these fried pickles a try. One bite, and you’ll understand why they’ve become a cult favorite snack all over the country.


