French Fry Recipe: Who doesn’t love French fries? They’re crispy, golden, and incredibly satisfying. Whether you pair them with a juicy burger or munch on them solo with your favorite dipping sauce, fries are the ultimate comfort food. But let’s face it—store-bought or fast-food fries often come up short when it comes to taste and texture. That’s where homemade French fries come in, and trust me, once you try making them yourself, you might never go back.
The beauty of homemade fries is that you control everything—from the thickness and crispiness to the seasoning and even the type of oil. No more soggy, over-salted disappointments. Plus, there’s something deeply satisfying about turning a humble potato into golden, crunchy perfection. Whether you’re cooking for yourself, family, or guests, homemade French fries are guaranteed to be a hit.
In this step-by-step guide, I’ll walk you through everything you need to know about making perfect French fries right in your kitchen. So, grab your apron and let’s get started.
Ingredients Needed
Before we dive into the process, let’s talk ingredients. One of the best things about French fries is how simple the ingredient list is. You don’t need a ton of fancy items—just the basics will do. Here’s what you’ll need:
Basic Ingredients:
- 4 large russet potatoes (or any starchy variety)
- Vegetable oil for frying (canola or peanut oil works great)
- Salt to taste
Optional Seasonings and Flavor Enhancers:
- Black pepper
- Garlic powder
- Paprika
- Chili powder for a spicy kick
- Grated Parmesan cheese for a cheesy twist
- Fresh herbs like parsley or rosemary
That’s it! These ingredients are either already in your pantry or easily available at any grocery store. You can mix and match flavors later depending on your mood or what’s in the spice rack. But for starters, let’s master the basics first.
Choosing the Right Potatoes
Not all potatoes are created equal, especially when it comes to frying. If you’ve ever wondered why some fries come out soggy while others are wonderfully crispy, the type of potato plays a big role.
Best Potato Varieties for French Fries:
- Russet Potatoes – Hands down the best choice. They have a high starch content and low moisture, which is ideal for achieving that fluffy inside and crispy outside.
- Yukon Gold – These are slightly waxier but can still work if you prefer a creamier interior.
- Maris Piper or King Edward (UK) – Great alternatives with similar starchy profiles.
Why Potato Type Matters:
Starchy potatoes absorb less oil and crisp up better. Waxy potatoes, on the other hand, tend to hold more moisture and can result in limp fries. So, if you want that restaurant-style crunch, go with russets every time.
Pro tip: Try to pick potatoes that are uniform in size and shape. This helps in cutting even fries, which in turn ensures they all cook at the same rate.
Preparing the Potatoes
Once you’ve picked your potatoes, it’s time to prep them. This step might seem straightforward, but a few techniques can really elevate your fry game.
Washing and Peeling:
Start by giving your potatoes a good rinse under cold water to remove any dirt. You can peel them if you prefer classic fries, or leave the skins on for a more rustic, home-style touch. It’s really up to your taste.
Cutting Techniques:
Now comes the slicing. For traditional fries:
- Cut the potato into ¼-inch or ½-inch slices lengthwise.
- Stack the slices and cut them into sticks.
For thinner shoestring fries, go even slimmer. Want steak fries? Keep them thick.
A mandoline slicer or a French fry cutter can make this step much faster and more consistent, but a sharp knife works just fine too. Uniformity in size is key—it ensures all your fries cook evenly.
Once cut, place your fries in a large bowl of cold water. This prevents them from turning brown and starts the starch removal process. Speaking of which…
Soaking the Potatoes
This step might be the most skipped, but it’s absolutely crucial if you want fries that are crisp on the outside and fluffy on the inside.
Why Soaking is Important:
Soaking removes excess starch from the surface of the potatoes. Too much surface starch can lead to gummy, soggy fries. Cold water helps firm them up and keeps them from oxidizing (aka turning brown).
How Long to Soak:
- Minimum: 30 minutes
- Ideal: 1–2 hours
- Pro-level: Overnight in the fridge
If you’re short on time, even a quick 30-minute soak can make a noticeable difference. Just make sure to rinse them again after soaking and pat them completely dry with a clean towel. Moisture and hot oil do NOT mix well.
The First Fry (Blanching)
Now that your potato sticks are prepped and dried, it’s time to start frying—but hold on, we’re not doing the final fry just yet. This first round is what we call blanching, and it’s the secret behind fries that are soft on the inside yet super crispy on the outside.
Why Blanching Matters:
Blanching partially cooks the potatoes at a lower temperature. This helps soften them up inside without developing any color or crispness yet. The idea is to cook the inside first and then hit them with a second, hotter fry to get that signature crunch.
Temperature and Timing:
- Heat oil in a deep fryer or heavy-bottomed pot to 325°F (160°C).
- Fry the potatoes in small batches for about 4 to 5 minutes, or until they start to look a little translucent around the edges.
- Don’t crowd the pot—overcrowding drops the oil temperature and can result in soggy fries.
Once the batch is blanched, lift them out with a slotted spoon and place them on a wire rack or paper towel-lined tray to drain. Repeat until all your fries are blanched.
This step is all about patience. Resist the urge to crank up the heat just yet—your future self will thank you when you’re biting into that perfect French fry.
Cooling and Resting
Think of this step like letting meat rest after cooking. It may seem optional, but it’s absolutely vital for that pro-level fry finish.
How to Cool Properly:
After blanching, let your fries cool completely. Lay them out in a single layer on a wire rack or baking sheet. If you’re in a rush, pop them in the fridge or freezer for 15-30 minutes. This firms them up and preps them for the second fry.
Why It Works:
This cooling period helps set the shape and dries the exterior. Moisture is the enemy of crispiness, so drying them out a bit more after blanching helps get that golden crunch later.
You can even freeze the blanched fries in zip-top bags for future use. Just make sure they’re completely cooled before freezing. They’ll last for up to a month and are ready to go straight into hot oil for that second fry when the craving hits.
The Second Fry (Crisping)
Now for the grand finale—this is where the magic happens. The second fry transforms your pale, soft fries into golden, crispy sticks of joy.
Ideal Temperature for Final Fry:
Crank the heat and bring your oil up to 375°F (190°C). This high temperature crisps up the exterior while keeping the inside fluffy and tender.
How to Know When They’re Done:
- Fry your cooled or frozen fries in small batches for 2 to 3 minutes.
- Look for a golden-brown color and hear that familiar sizzle.
- When they’re floating and have a firm texture, they’re ready to come out.
Use a slotted spoon to transfer them to a paper towel-lined tray to soak up any extra oil. Don’t let them sit in oil too long after they’re done—crispy fries hate sogginess.
Pro tip: While frying, keep an eye on the oil. A thermometer is your best friend here. If it drops below the ideal temperature, pause and let it heat back up between batches.
Draining and Seasoning
You’ve now got beautiful, golden fries—but we’re not quite done. The final touch is seasoning, and timing is everything.
How to Drain Properly:
Once your fries come out of the oil, give them a gentle shake to remove excess oil. Lay them on a cooling rack or paper towels in a single layer. Avoid piling them up, as trapped steam can make them soggy.
Best Time to Season:
Season immediately while they’re still hot and slightly oily. This helps the salt (and any other spices) stick better. Here are some seasoning ideas:
Classic Flavors:
- Sea salt
- Cracked black pepper
- Garlic salt
Next-Level Seasonings:
- Cajun seasoning
- Truffle salt
- Smoked paprika
- Ranch powder
- Old Bay
Feel like being fancy? Toss them in grated Parmesan and fresh parsley or drizzle a bit of truffle oil for gourmet vibes.
Want to spice it up? A pinch of cayenne or chili powder adds heat. The sky’s the limit!
Serving Suggestions
So now you’ve made the perfect batch of fries. What next? Time to serve ’em up like a pro.
Classic Pairings:
- Ketchup – Always a winner
- Mayonnaise – Especially in Europe
- Aioli – For garlic lovers
- Cheese sauce – Because cheese makes everything better
Creative Combos:
- Poutine – Top your fries with gravy and cheese curds
- Loaded fries – Add bacon, sour cream, and scallions
- Taco fries – Think taco meat, salsa, and guac on fries
- Buffalo-style – Toss with hot sauce and blue cheese
You can also serve them alongside:
- Burgers
- Grilled chicken
- Sandwiches
- Wraps
Or enjoy them solo as a snack. Whether it’s movie night or game day, homemade fries are always a hit.
Common Mistakes to Avoid
Even the most basic dishes have their pitfalls, and French fries are no exception. Let’s talk about some common mistakes that can sabotage your golden dreams and how to avoid them like a pro.
1. Overcrowding the Pan:
This is probably the number one culprit behind soggy fries. When you add too many fries at once, the oil temperature plummets, which means instead of crisping up, your fries just soak in oil and turn limp. Always fry in small batches and allow the oil to return to temperature between rounds.
2. Using the Wrong Oil:
Not all oils are created equal. Oils with low smoke points (like olive oil) can break down and taste bitter. Stick to neutral, high-smoke point oils like:
- Canola oil
- Peanut oil
- Vegetable oil
- Sunflower oil
These oils hold up to the high heat needed for frying and won’t overpower the natural potato flavor.
3. Skipping the Soak:
As mentioned earlier, soaking is crucial for removing excess starch. Skipping this step results in fries that are more likely to stick together and cook unevenly.
4. Not Drying the Potatoes:
Water and hot oil don’t mix well. If your fries are wet when they hit the oil, expect splattering and a reduced crisp factor. Dry them completely before the first fry.
5. Not Using a Thermometer:
Eyeballing oil temperature is a gamble. Using a kitchen thermometer helps maintain that sweet spot—around 325°F for blanching and 375°F for crisping. Temperature control = fry perfection.
6. Seasoning Too Late:
Salt sticks best when the fries are still hot and glistening from the oil. Wait too long and your seasoning will slide right off.
Avoid these rookie mistakes and you’ll get restaurant-worthy results right from your kitchen.
Healthier Alternatives
Craving French fries but trying to keep things light? No worries—there are ways to indulge without the guilt. Here are a couple of healthier cooking alternatives that still give you that satisfying crunch.
Air Fryer Method:
The air fryer has revolutionized home cooking for good reason. It gives you a crispy finish with a fraction of the oil. Here’s how to air-fry your fries:
- Prep the potatoes the same way (wash, cut, soak, and dry).
- Toss them in 1 to 2 tablespoons of oil.
- Arrange them in a single layer in the air fryer basket.
- Cook at 375°F (190°C) for about 15–20 minutes, shaking halfway through.
Results? Crispy, golden fries with much less fat. Plus, no oil splatters or lingering fried smells in your kitchen.
Oven-Baked Fries:
No air fryer? No problem. Oven-baking is another solid alternative.
- Preheat your oven to 425°F (220°C).
- Line a baking sheet with parchment paper or foil.
- Toss your potato sticks with oil and seasonings.
- Spread them out evenly and bake for 25–30 minutes, flipping halfway.
For extra crispiness, preheat the baking sheet and give the fries room to breathe.
These methods might not match deep frying 100%, but they come impressively close—and your heart (and waistline) will thank you.
Tips for Extra Crispy Fries
Want your fries to have that perfect shatter when you bite in? Here are some next-level tips to make your fries extra crispy and unforgettable.
1. Double-Fry Like a Pro:
We’ve covered this already, but it’s worth repeating. The first fry cooks them through, the second adds the crunch. Don’t skip it.
2. Use Cornstarch or Rice Flour:
Toss your cut and dried potatoes with a light dusting of cornstarch or rice flour before frying. This creates a super thin coating that crisps up beautifully.
3. Chill Before the Second Fry:
Cool fries = crispier results. If you can, let them rest in the fridge or freezer after the first fry. It helps dehydrate the surface and makes the final texture spot-on.
4. Don’t Salt Too Early:
Salt draws out moisture. If you salt before the final fry, you risk steaming the fries instead of crisping them. Always season after they’re done and hot.
5. Try Vinegar Soak:
A trick used by some pros is soaking the cut potatoes in a mix of water and a bit of vinegar (like white or malt vinegar). The acid helps reinforce the potato structure so they stay firm and crispy.
With these tips, you’ll consistently get fries that are as crunchy as your favorite diner or food truck version.
How to Store and Reheat Leftovers
Leftover fries aren’t common (they’re too good!), but if you find yourself with extras, here’s how to store and reheat them to bring back some of that crispiness.
Storing Leftovers:
- Let the fries cool completely before storing.
- Use an airtight container or resealable bag.
- Line the container with a paper towel to absorb excess oil.
- Store in the refrigerator for up to 3 days.
Reheating Tips:
Avoid the microwave—it’ll only make your fries limp and sad.
Best Methods:
- Oven: Preheat to 400°F (200°C), spread fries on a baking sheet, and bake for 5–10 minutes.
- Air Fryer: Reheat at 375°F for 3–5 minutes.
- Skillet: Heat a non-stick pan and toss the fries for a few minutes until crispy.
Reheated fries won’t be exactly like fresh ones, but these methods will bring them pretty darn close.
FAQs about French Fry Recipe
1. What type of potatoes are best for French fries?
Russet potatoes are the best choice for French fries. They’re starchy, crisp up beautifully, and have that classic golden texture you crave.
2. Should I soak the potatoes before frying?
Yes! Soaking the cut potatoes in cold water for at least 30 minutes removes excess starch. This helps the fries cook more evenly and gives them that irresistible crunch.
3. Can I make French fries without a deep fryer?
Absolutely. You can use a heavy-bottomed pot or a large skillet with enough oil to submerge the fries. An oven or air fryer also works for a healthier version.
4. Why are my fries soggy?
Soggy fries usually happen when the oil isn’t hot enough or the fries aren’t double-fried. For the best results, fry them twice—once to cook, and again to crisp.
5. What’s the ideal oil temperature for frying?
Keep the oil between 325°F (for the first fry) and 375°F (for the second fry). Use a thermometer for accuracy to avoid greasy or undercooked fries.
6. Can I reuse the frying oil?
Yes, you can reuse it 2–3 times if it’s strained and stored properly. Just avoid reusing oil that smells burnt or has turned dark.
7. How do I season French fries for maximum flavor?
Season your fries right after frying while they’re still hot. Classic salt works great, but you can also try garlic powder, paprika, or even parmesan cheese for extra flair.
8. How long do homemade French fries last?
They’re best eaten fresh, but you can store leftovers in the fridge for 2–3 days. Reheat in an oven or air fryer to bring back the crispiness.
9. Are French fries gluten-free?
Yes—potatoes are naturally gluten-free. Just make sure your oil and seasonings are free from cross-contamination.
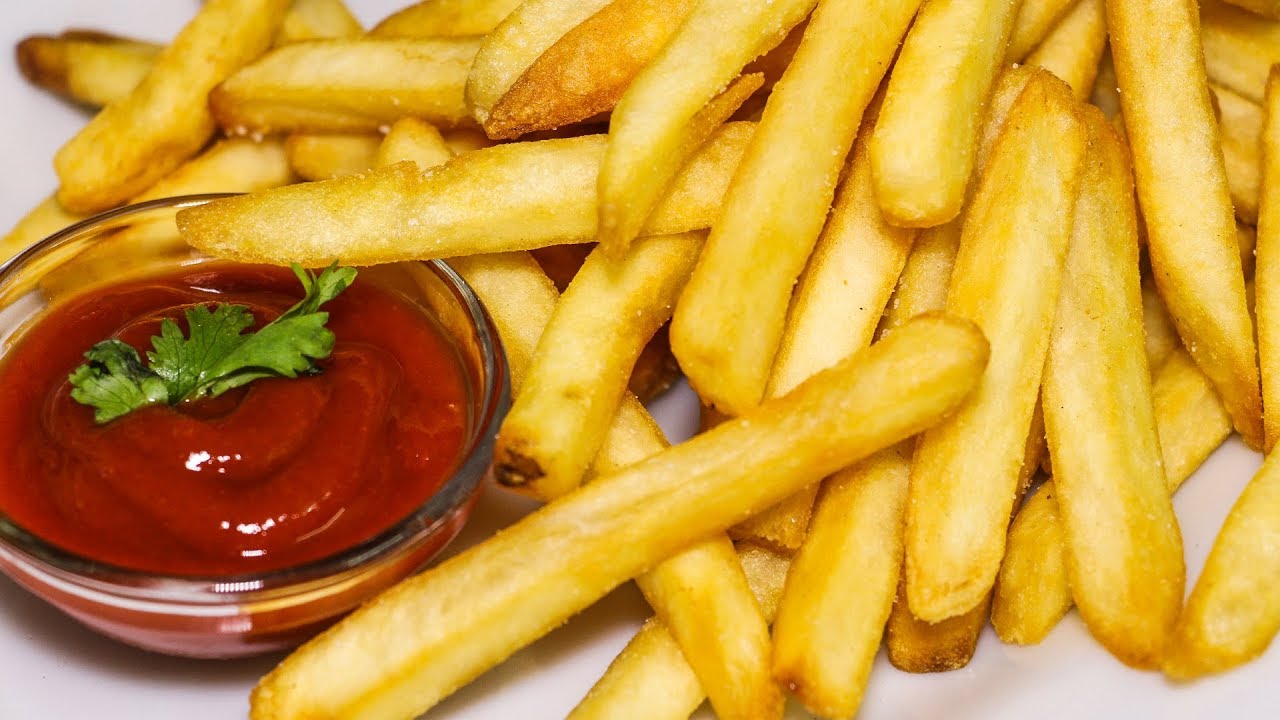
10. What dipping sauces go well with French fries?
Ketchup is a classic, but don’t stop there! Try mayo, garlic aioli, cheese sauce, ranch, or even spicy sriracha for a flavor twist.
Conclusion
The best part about making French fries at home is the control you have over every detail. Want them spicier? Add more chili powder. Prefer a cheesy vibe? Parmesan and herbs have your back. Trying to keep it healthy? Air fryer and baked options let you enjoy guilt-free indulgence.
Remember, even if your first batch isn’t perfect, don’t get discouraged. Frying is an art as much as it is a science, and with a bit of practice, you’ll find your rhythm and flavor preferences. Once you’ve nailed it, you’ll find it hard to go back to store-bought or fast food versions.
Whether you’re serving up a burger night, entertaining friends, or just treating yourself, homemade French fries are always a winning choice. So grab those potatoes and get frying—you’ve got everything you need to make magic happen.


