Cloud Dough Recipe: Imagine squeezing a soft, fluffy cloud in your hands. That’s the magic of cloud dough! Whether you’re a kid or just a kid at heart, cloud dough is a fantastic way to engage your senses. It’s super easy to make, incredibly affordable, and brings endless hours of imaginative fun. Plus, it’s perfect for rainy days, playdates, or simply when you need a fun indoor activity.
Cloud dough stands out because of its unique texture—somewhere between dry sand and silky play dough. It’s crumbly yet moldable, giving it a mesmerizing feel that kids (and adults) can’t resist. Parents love it because it’s non-toxic, and kids love it because it feels amazing!
Essential Ingredients Needed
You don’t need to break the bank to whip up a batch of cloud dough. The beauty of this project lies in its simplicity. Here’s what you’ll need:
- Flour (any kind, though all-purpose works best)
- Baby oil (for the soft, silky feel)
- Optional: Food coloring, essential oils for scents
If you prefer a more natural or edible option (especially for toddlers who like to taste everything), you can substitute vegetable oil or coconut oil for baby oil.
Alternative Ingredient Options:
- Use cornstarch instead of flour for a lighter, fluffier texture.
- Try cocoa powder to make a “chocolate” themed dough.
- Mix in powdered drink mixes like Kool-Aid for color and scent.
Simple, right? Let’s move to the tools you’ll need.
Tools You’ll Need
Gathering the right tools beforehand will make the process smoother and more fun.
Basic Kitchen Tools for Making Cloud Dough:
- Large mixing bowl
- Measuring cups
- Spoon or spatula
- Airtight container for storage
Optional Tools for More Fun:
- Cookie cutters
- Silicone molds
- Small rolling pins
Adding these extras turns your cloud dough time into a creative session, perfect for developing motor skills and inspiring imaginative play.
Step-by-Step Guide to Making Cloud Dough
Ready to get your hands messy? Here’s a foolproof, detailed guide:
Step 1: Gather Your Ingredients and Tools
Set everything up on a flat surface. This minimizes mess and makes the experience stress-free.
Pro Tip: Cover your table with a plastic cloth or newspapers for an easy cleanup later.
Step 2: Mixing the Main Ingredients
In a large bowl, pour 8 cups of flour. Gradually add 1 cup of baby oil. Start mixing gently with a spoon until the flour starts clumping.
Use your hands once it gets a little sticky—this part is seriously therapeutic! Keep mixing until the dough feels soft, silky, and moldable.
Step 3: Adjusting Texture and Consistency
Is the dough too crumbly? Add a little more oil—a tablespoon at a time—until it holds its shape when squeezed.
Is it too greasy? Add a bit more flour. It’s all about finding that perfect balance!
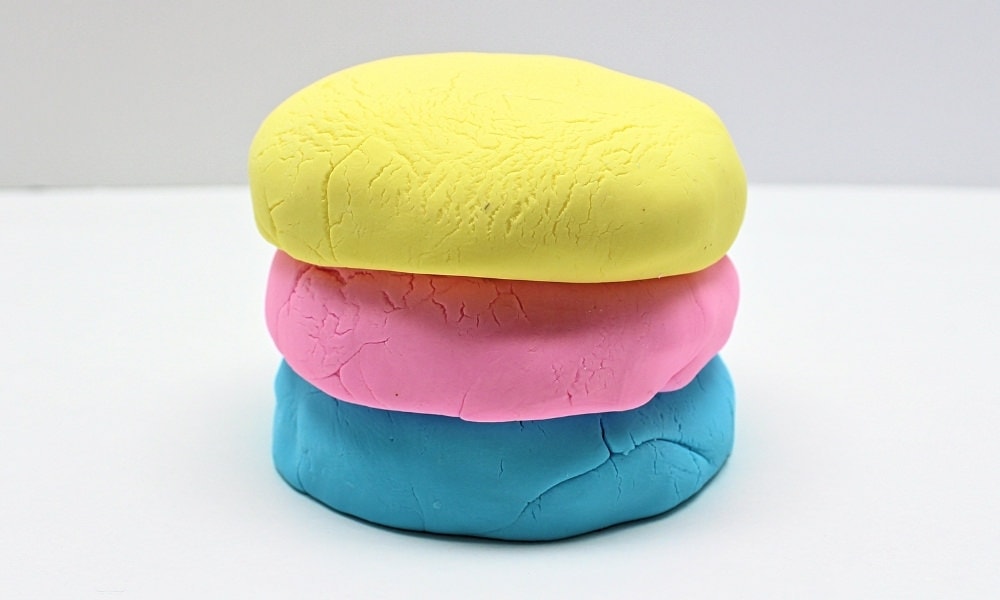
Step 4: Adding Colors and Scents
To make it more fun, divide your dough into smaller batches. Add a few drops of food coloring to each batch and knead well. You can also add a few drops of essential oils (like lavender or lemon) for a scented sensory experience.
Pro Tip: Use gel food coloring for more vibrant shades without altering the dough’s texture.
Step 5: Storage Tips for Longer Use
Store your cloud dough in an airtight container to keep it fresh for months. If it starts to dry out, add a tiny bit more oil and knead again.
Cloud dough can last 3-6 months easily if properly stored!
Pro Tips for the Perfect Cloud Dough
- Always add oil slowly to avoid overly greasy dough.
- Experiment with colors and scents but go easy; too much liquid can ruin the texture.
- If you’re making a big batch for a party, double the recipe but mix in stages for even consistency.
Common Mistakes to Avoid:
- Adding too much liquid at once
- Using cold flour (makes it clump strangely)
- Not kneading enough—kneading is key!
How to Customize Your Cloud Dough: Want sparkly cloud dough? Add fine glitter! Want a beach vibe? Mix in a little clean sand! The possibilities are endless.
Fun Variations of Cloud Dough
The classic cloud dough recipe is amazing on its own, but you can take things up a notch by trying out some creative variations. This is where things really start to get fun, especially if you’re looking to add some personality or flair to your dough-making adventures.
Scented Cloud Dough
Adding scents is an easy way to create a more immersive experience. Essential oils not only make the dough smell amazing, but they can also add calming or energizing benefits depending on what you choose.
Ideas for scents:
- Lavender: calming, great before bedtime
- Peppermint: invigorating and refreshing
- Lemon: clean and cheerful scent
- Vanilla: comforting and warm
Just add 4–5 drops of essential oil per batch. Be sure to mix well, and always check for allergies, especially with young kids.
Glitter Cloud Dough
Who doesn’t love a little sparkle? Adding glitter turns ordinary cloud dough into magical fairy dust. Use fine glitter for a smooth texture and choose from metallics, neon, or holographic for different vibes.
Tip: Choose biodegradable glitter to make it eco-friendly. Mix in a few tablespoons after the dough is fully formed so it spreads evenly.
Edible Cloud Dough for Little Ones
Got a toddler who puts everything in their mouth? No worries—you can still enjoy cloud dough without worry. Swap out the baby oil with vegetable oil or coconut oil, and use flour that’s been heat-treated (to kill bacteria).
To heat-treat flour: Spread it on a baking tray and bake at 300°F (150°C) for 10 minutes. Let it cool before using.
Then mix the flour with oil as usual, maybe add some natural food coloring, and voila—edible cloud dough!
Safety Precautions
While cloud dough is mostly safe, it’s good to keep a few things in mind—especially if young kids or pets are involved.
Keeping It Safe for Young Kids
- Avoid using baby oil if kids are likely to put the dough in their mouths. Instead, go with edible oils like olive or coconut.
- Always supervise toddlers during playtime.
- Store the dough in a secure container out of reach when not in use.
Allergy Considerations
- Gluten-free? Use cornstarch instead of flour.
- Sensitive skin? Choose unscented oils and avoid synthetic coloring.
- Always patch test the ingredients on a small area of skin if trying a new additive.
Cleaning Up After Cloud Dough Play
Let’s be honest—things can get a little messy. But cleanup doesn’t have to be a hassle.
Easy Cleanup Tips
- Use a plastic tablecloth or play mat to catch crumbs.
- Keep a handheld vacuum or broom nearby for quick pickups.
- Use a damp cloth to wipe down surfaces afterward—oil can leave a film.
Best Surfaces to Use
- Kitchen tables
- Plastic trays
- Tiled or hardwood floors (avoid carpet!)
Avoid letting cloud dough touch fabric or rugs—while not permanent, oil can be tricky to remove from soft materials.
Benefits of Playing with Cloud Dough
Aside from just being fun, cloud dough is also incredibly beneficial—both for kids and adults. It’s not just play; it’s therapy in disguise!
Sensory Development
- Builds fine motor skills through squeezing, molding, and pinching.
- Encourages creativity and problem-solving during imaginative play.
- Supports language development as kids describe what they’re making.
Stress Relief for All Ages
- The repetitive kneading and molding motions are naturally calming.
- Great for kids with anxiety, ADHD, or sensory processing needs.
- Adults can use it as a mindfulness tool—like a squishy stress ball but better!
It’s no wonder occupational therapists often recommend sensory play like this!
FAQs about Cloud Dough Recipe
Q1. What is cloud dough made of?
Cloud dough is typically made with just two ingredients: cornstarch and conditioner. It’s soft, fluffy, and super moldable—perfect for sensory play.
Q2. Is cloud dough safe for kids?
Yes, it’s safe for most kids since it’s non-toxic, but always supervise young children to avoid accidental ingestion—especially if you’re using scented conditioner.
Q3. Can I make cloud dough without conditioner?
Absolutely! You can substitute baby oil or even cooking oil if you’re in a pinch, but the texture might be a little different—less creamy, more crumbly.
Q4. How long does homemade cloud dough last?
Stored in an airtight container, cloud dough can last for a few weeks. If it starts to dry out, just knead in a little more conditioner to refresh it.
Q5. Does cloud dough stain hands or surfaces?
Nope! As long as you’re using a white or lightly colored conditioner, it shouldn’t stain. However, some cheap conditioners with strong dyes might leave a trace.
Q6. Can I add color or scents to cloud dough?
Yes! Add a few drops of food coloring or essential oil to level up the sensory fun. Just be sure to mix thoroughly for even color and scent.
Q7. Can cloud dough be used as a learning activity?
Definitely. It’s great for developing fine motor skills, creativity, and even early math (think shapes, volume, and patterns). Education meets playtime!
Conclusion
Cloud dough is one of those magical DIY creations that checks all the boxes: it’s simple, affordable, and endlessly customizable. Whether you’re a parent looking for a fun activity, a teacher adding a sensory station to your classroom, or just someone who loves to craft—you can’t go wrong with cloud dough.
From basic recipes to glittery, scented variations, the options are endless. Plus, with the added benefits of sensory development and stress relief, it’s more than just a fun mess—it’s a meaningful experience.
So roll up your sleeves, grab a bowl, and get ready to create your very own cloud dough. You’re going to love it!


