Classic Sugar Cookie Recipe: Sugar cookies are one of those magical treats that instantly bring back childhood memories. Whether it’s during the holidays or just a spontaneous baking session, these soft, buttery cookies are timeless. Their beauty lies in their simplicity — no need for extravagant ingredients or complicated steps. Just basic pantry staples and a bit of love, and you’ve got yourself a treat that pleases kids, adults, and even the pickiest dessert lovers.
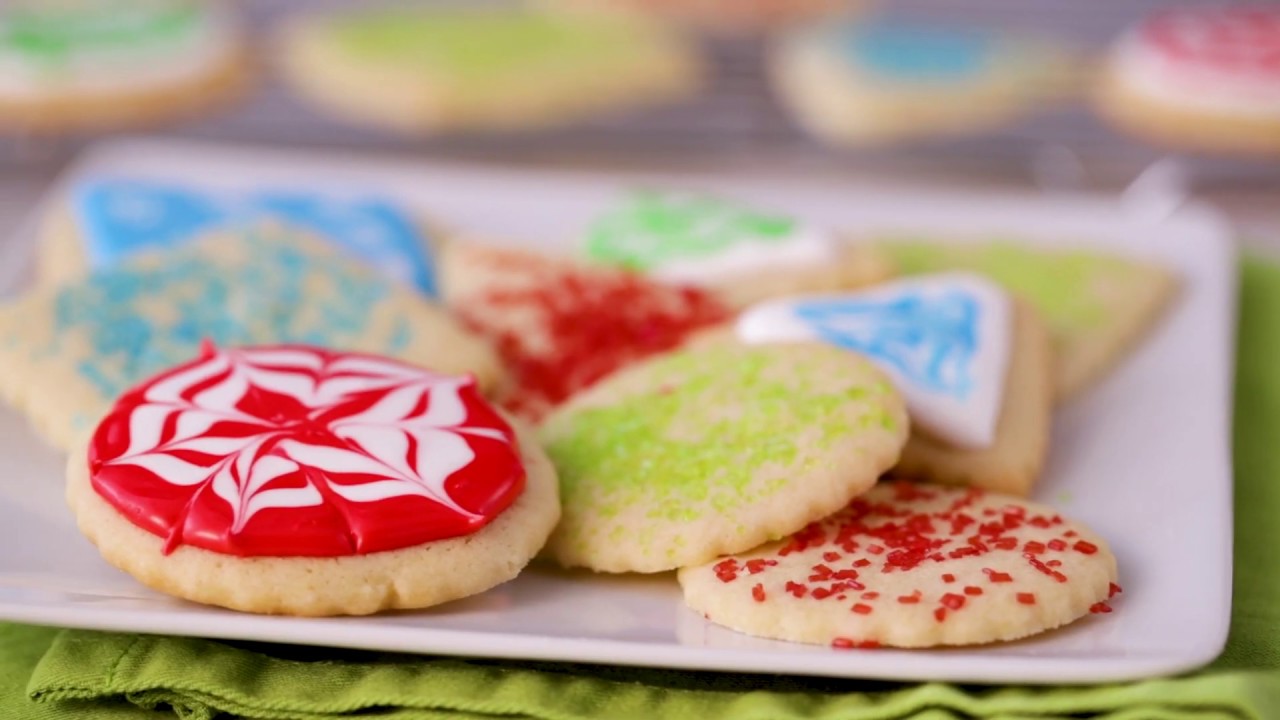
The crisp edges, tender centers, and delicate sweetness make sugar cookies stand out. They are perfect for customizing with colorful icing, fun shapes, or sprinkles, making them a great canvas for creativity. And let’s be honest — who doesn’t love cutting cookies into stars, hearts, or snowflakes?
But even with all the decorative possibilities, sugar cookies shine brightest when they’re simple. A soft, chewy center with that hint of vanilla? Perfection.
Why This Classic Recipe Never Fails
This recipe is tried and true. It’s not just about baking; it’s about creating memories. Whether you’re baking for a party, gifting a batch to a friend, or spending an afternoon with the kids, this recipe works. It’s been tested over and over, and it always delivers — soft, flavorful cookies with just the right amount of crunch on the outside.
And don’t worry if you’re new to baking. This guide breaks everything down into easy, manageable steps so even a beginner can follow along and feel like a pro. You’ll know exactly what tools you need, what to watch out for, and how to fix the little things that might go wrong along the way.
Ingredients You’ll Need
Pantry Staples for Perfect Sugar Cookies
Here’s what you’ll need to get started. The beauty of sugar cookies is that they don’t require anything fancy — just ingredients you likely already have at home:
- 2 ¾ cups all-purpose flour
- 1 teaspoon baking soda
- ½ teaspoon baking powder
- 1 cup unsalted butter, softened
- 1 ½ cups white granulated sugar
- 1 large egg
- 1 teaspoon pure vanilla extract
- ½ teaspoon almond extract (optional for added flavor)
- 3 tablespoons milk (for moisture if needed)
- Pinch of salt
Each of these ingredients plays a role. The butter brings richness and softness. Sugar sweetens and helps give that crisp edge. Baking soda and powder create a perfect rise, while flour holds everything together. Vanilla adds that comforting, classic flavor — and if you want an extra layer of depth, almond extract is your best friend.
Always use real butter (not margarine) and pure vanilla extract when possible. It really makes a difference in flavor.
Optional Add-ins and Substitutions
Want to make it your own? Go ahead and play around:
- Lemon zest: Adds a refreshing twist.
- Cinnamon or nutmeg: A hint of spice for warmth.
- Sprinkles or sanding sugar: Mix into the dough or press on top for color and crunch.
- Gluten-free flour: Use a 1:1 blend to make this recipe gluten-free.
- Vegan substitutions: Swap in plant-based butter and a flax egg (1 tbsp flaxseed meal + 3 tbsp water).
Flexibility is one of the best things about this recipe. You can keep it traditional or make it your own — and it’ll still turn out delicious.
Tools You’ll Need in the Kitchen
Baking Essentials to Get You Started
Before we dive into the dough, make sure you have the right tools on hand. You don’t need a professional kitchen setup, but a few basics will make the process smoother:
- Mixing bowls (at least two sizes)
- Hand mixer or stand mixer
- Measuring cups and spoons
- Rolling pin
- Baking sheets
- Parchment paper or silicone baking mats
- Cooling racks
Your mixer helps cream the butter and sugar into a fluffy base. Mixing bowls keep things organized, while parchment paper ensures your cookies don’t stick. Cooling racks are key — they help your cookies cool evenly and prevent sogginess.
Extra Tools That Make Baking Easier
If you’re going all-in, a few bonus tools can elevate your experience:
- Cookie cutters: Stars, hearts, animals — go wild!
- Cookie scoop: Keeps the size uniform for even baking.
- Sifter: For fluffier flour and more even distribution of baking soda/powder.
- Offset spatula: Handy for lifting cookies and spreading icing.
- Rolling guides or bands: Helps keep dough thickness consistent.
Having the right tools makes baking more fun and less frustrating. Think of it like having the right brushes for a painting — they just help bring your vision to life.
How to Make Classic Sugar Cookie – Step-by-Step Instructions
Step 1 – Preparing the Dough
This is where the magic begins! Start by preheating your oven to 350°F (175°C) and lining your baking sheets with parchment paper.
In a medium bowl, whisk together the flour, baking soda, baking powder, and salt. Set it aside — this is your dry mix.
In a larger bowl, cream together the softened butter and sugar. Beat for about 2-3 minutes until it becomes light and fluffy. This step is crucial — it adds air into the dough, making the cookies soft and tender.
Add in the egg, vanilla extract, and almond extract (if using), then mix until well combined. Gradually mix in the dry ingredients, a bit at a time, until everything is incorporated. If the dough feels too dry, add milk one tablespoon at a time until it comes together.
The result? A smooth, slightly sticky dough that’s ready to be chilled.
Step 2 – Chilling the Dough
Chilling your cookie dough might seem like an annoying extra step, especially when you’re craving something sweet right now. But trust me — this is where the texture magic happens. Letting the dough rest in the fridge for at least 1–2 hours (or even overnight) helps firm it up. Why does this matter? Because chilled dough is easier to roll out, holds its shape better when baked, and results in cookies with crisper edges and chewy centers.
To chill the dough, divide it into two equal portions. Flatten each into a disk, wrap tightly in plastic wrap, and pop them in the fridge. This also helps the flavors meld and develop a richer taste. If you’re short on time, stick the dough in the freezer for about 30 minutes — it’s a decent shortcut, but the fridge is best.
When you’re ready to bake, let the dough sit at room temperature for about 10 minutes so it’s soft enough to roll out without cracking.
Step 3 – Rolling and Cutting
Now comes the fun part — shaping your cookies! Lightly flour a clean surface and roll out one of the dough disks to about ¼ inch thick. Consistency is key here. Too thin and your cookies will be crispy instead of soft; too thick and they might not bake evenly.
Dip your cookie cutters in flour to prevent sticking and press them into the dough. Go for festive shapes during the holidays or keep it classic with circles and hearts. Whatever you choose, place the cut-outs onto your prepared baking sheets, spacing them at least 1 inch apart.
Don’t waste those scraps! Gather them up, re-roll, and keep cutting until you’ve used up every bit of dough.
Pro tip: If you want ultra-clean shapes, chill the cut-out cookies on the baking sheet for another 10 minutes before baking. This helps them hold their form and not puff up or spread too much.
Step 4 – Baking the Cookies
Preheat your oven to 350°F (175°C) if you haven’t already. Slide your trays into the center of the oven and bake for 8–10 minutes. Timing is crucial — you want the edges to be just turning golden while the centers still look a little soft. Don’t wait until the whole cookie is browned; that’s how you end up with a crunchy, overbaked batch.
Every oven is different, so keep an eye on that first tray. If your cookies are browning too quickly, reduce the temperature slightly. If they’re still pale and underdone after 10 minutes, give them another minute or two.
Once done, remove from the oven and let the cookies rest on the tray for about 5 minutes. Then transfer them to a wire rack to cool completely. This stops the cooking process and helps them firm up without drying out.
Step 5 – Cooling and Decorating
Now that your kitchen smells like heaven and your cookies are golden and perfect, it’s time for the final touches. First, make sure your cookies are completely cooled before decorating. Even a little warmth can cause icing to melt or run.
There are endless ways to dress up your sugar cookies:
- Royal icing: Great for detailed designs and dries hard for stacking.
- Buttercream: Soft, creamy, and delicious — though a bit messier.
- Glaze: Made from powdered sugar and milk — simple, shiny, and easy to color.
- Sprinkles: Fun and festive — add them right after icing so they stick!
Use piping bags, squeeze bottles, or even a small spatula to spread and design. Want to keep it easy? A quick dusting of powdered sugar is always a classy move.
If you’re doing fancy decorations, let the icing dry completely before storing or stacking the cookies. Depending on the type of icing, this can take anywhere from a few hours to overnight.
Tips for Baking the Perfect Sugar Cookie
Secrets to Soft and Chewy Cookies
Want your cookies to be the envy of every bake sale? Here’s how to make them soft, chewy, and irresistible:
- Don’t overmix: Once you add the flour, mix just until combined. Overworking the dough can make cookies tough.
- Chill that dough: We’ve said it before, but it’s worth repeating — chilled dough makes all the difference.
- Room temp ingredients: Especially butter and eggs — they blend more evenly for a smooth, creamy dough.
- Keep an eye on the bake time: Pull them out when they look slightly underdone. They’ll continue cooking as they cool on the tray.
- Store them right: Keep cookies in an airtight container with a slice of bread to maintain moisture.
Preventing Common Mistakes
Even experienced bakers mess up sugar cookies sometimes. Avoid these pitfalls:
- Cookies spreading too much: Your butter was probably too warm, or the dough wasn’t chilled long enough.
- Dry, crumbly cookies: You might have added too much flour. Be sure to spoon and level, not scoop straight from the bag.
- Uneven baking: Rotate your baking sheets halfway through for consistent browning.
- Sticky dough: Add a little flour while rolling, but don’t overdo it — excess flour makes the cookies dry.
Master these techniques, and you’ll have sugar cookies that turn heads every single time.
Creative Decorating Ideas
Frosting, Glazes, and Sprinkles
Sugar cookies are like a blank canvas just begging for some color and flair. Whether you’re going all out for the holidays or just making your Tuesday a little sweeter, decorating is half the fun.
Let’s talk frosting first. If you want a soft, creamy topping that tastes just as good as it looks, go for buttercream. It’s easy to flavor with vanilla, almond, or citrus extracts and can be tinted with food coloring for some real pop. Buttercream won’t harden completely, but it’s rich, fluffy, and totally irresistible.
Royal icing, on the other hand, dries hard and smooth. It’s the go-to for professional-looking cookies — especially if you want to stack them or pack them as gifts. While it takes a bit more effort (and drying time), it creates a polished look that’s worth the wait. Outline your cookies first with a thick icing, then flood the center with a thinner version for that glossy, even finish.
Glazes are simpler and perfect for a shiny look without all the fuss. Mix powdered sugar with milk or water, add a drop or two of food coloring, and drizzle away.
And don’t forget the sprinkles! Whether it’s rainbow jimmies, shimmering sugar crystals, or festive nonpareils, they add texture and personality. Press them into the icing before it sets for a perfectly finished touch.
Fun Themes for Every Occasion
Decorating isn’t just about aesthetics — it’s also a chance to celebrate and express creativity. Here are some theme ideas to inspire your next batch:
- Holidays: Snowflakes, reindeer, and candy canes for Christmas; hearts for Valentine’s Day; pumpkins and ghosts for Halloween.
- Birthdays: Spell out the person’s name, age, or favorite things in cookie form.
- Weddings and baby showers: Elegant white icing, gold accents, and soft pastel colors.
- Just for fun: Animals, emojis, flowers, or even your favorite TV show characters.
No matter the theme, have fun with it. There’s no “wrong” way to decorate a sugar cookie — as long as it’s made with love (and maybe a little sugar).
Storage and Shelf Life
Keeping Cookies Fresh Longer
Freshly baked sugar cookies are divine, but we all know they don’t stay that way forever. The good news? With a little storage know-how, you can keep your cookies tasting bakery-fresh for days — or even weeks.
Once your cookies are completely cool and the icing is fully set, place them in an airtight container. You can use wax paper or parchment between layers to keep decorations from smudging. Store the container at room temperature in a cool, dry spot — away from direct sunlight or heat.
They’ll stay fresh and tasty for up to a week this way. If you’ve used buttercream frosting, they’ll last closer to 3–4 days before getting a little too soft.
A little trick? Add a slice of plain white bread to the container. The bread helps retain moisture without making the cookies soggy — keeping them soft and chewy longer.
Freezing for Future Treats
Want to plan ahead or save some for later? Sugar cookies are incredibly freezer-friendly.
You can freeze both the unbaked dough and the baked cookies:
- For dough: Wrap tightly in plastic wrap and store in a freezer bag or container for up to 3 months. Thaw overnight in the fridge before rolling and baking.
- For baked cookies: Once cooled, freeze in layers between parchment in an airtight container. They’ll keep for 2–3 months. Let them come to room temperature before decorating or enjoying.
You can even freeze decorated cookies — just be sure the icing is completely dry. Wrap them individually in plastic wrap and store in a sturdy container to avoid breakage.
Sugar Cookie Variations to Try
Lemon, Almond, and More
The classic vanilla sugar cookie is a tough act to follow, but that doesn’t mean you can’t put your own spin on it. Here are a few variations that add a little zing to your traditional recipe:
- Lemon Sugar Cookies: Add 1 tablespoon of lemon zest and a bit of lemon juice to the dough for a fresh, tangy flavor.
- Almond Sugar Cookies: Increase almond extract to 1 teaspoon for a rich, nutty twist.
- Spiced Sugar Cookies: Add a dash of cinnamon, nutmeg, or even chai spice for warmth and complexity.
- Chocolate Sugar Cookies: Replace ½ cup of flour with unsweetened cocoa powder for a chocolatey upgrade.
These small tweaks make a huge difference in taste, giving your cookies a unique personality.
Gluten-Free and Vegan Options
You don’t have to miss out just because you’re avoiding gluten or animal products. With a few smart swaps, sugar cookies can be inclusive and delicious.
- Gluten-Free: Use a 1:1 gluten-free flour blend (make sure it contains xanthan gum for structure). The texture may vary slightly but still comes out beautifully.
- Vegan: Replace butter with plant-based margarine or vegan butter, and use a flax egg (1 tbsp flaxseed meal + 3 tbsp water) in place of the regular egg.
- Dairy-Free: Swap out milk for any plant-based alternative like almond, soy, or oat milk.
The flavor and fun remain — all you’re missing is the guilt!
FAQs about Classic Sugar Cookie Recipe
Q1: What makes sugar cookies soft and chewy?
Using room temperature butter, the right amount of sugar, and not overbaking are key. A little cornstarch or cream of tartar can also add that perfect softness.
Q2: Can I make sugar cookie dough ahead of time?
Yes! You can chill the dough for up to 3 days in the fridge or freeze it for up to 3 months. Just thaw in the fridge overnight before rolling out.
Q3: Why do my sugar cookies spread too much?
This usually happens if the butter is too warm or the dough wasn’t chilled. Always chill the dough for at least 30 minutes before baking.
Q4: How thick should I roll out sugar cookie dough?
For classic sugar cookies, aim for about ¼ inch thick. It helps them bake evenly without burning the edges.
Q5: Can I decorate sugar cookies before or after baking?
You can do both! Use sprinkles or colored sugar before baking. For icing or royal decorations, wait until the cookies are completely cool.
Q6: How long do sugar cookies last?
Stored in an airtight container, they last 5–7 days at room temperature. For longer storage, freeze them (undecorated) for up to 2 months.
Q7: Do I need to use cookie cutters?
Nope! While cookie cutters make fun shapes, you can also roll the dough into balls and flatten them slightly for a simple version.
Conclusion
Sugar cookies are the ultimate comfort treat — versatile, simple, and absolutely delightful. Whether you’re making them for a special event or just because it’s Tuesday and you need something sweet, this classic sugar cookie recipe has your back. From soft dough to golden perfection and creative decorating, it’s a recipe you’ll return to again and again.
Once you master this base, the possibilities are endless. Add a flavor, switch up the frosting, go wild with the cookie cutters — and don’t forget to share (or not, we won’t judge).
Bake, decorate, enjoy — and most importantly, have fun with it.


