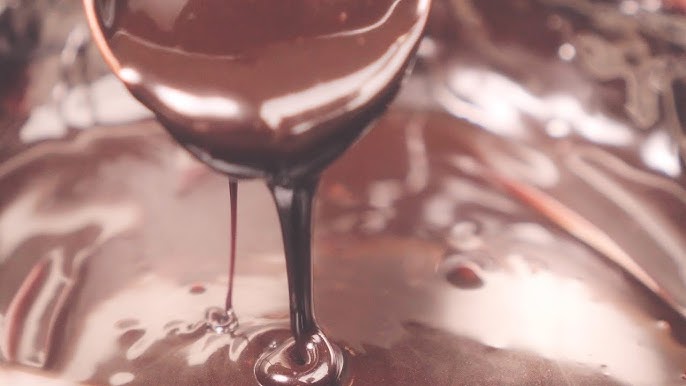
Chocolate Syrup Recipe: Who doesn’t love that smooth, luscious drizzle of chocolate syrup over a scoop of ice cream, pancakes, or a glass of cold milk? It’s a staple in many households, but here’s the thing—most store-bought versions are packed with preservatives, high fructose corn syrup, and artificial flavors. Making it at home? Easy, budget-friendly, and oh-so-worth it.
Let’s dive into the ultimate homemade chocolate syrup recipe that’ll knock your socks off.
Why Make Chocolate Syrup at Home?
Store-bought chocolate syrup might seem convenient, but once you whip up your own batch at home, there’s no going back. First off, it’s incredibly simple—no fancy ingredients, no complicated techniques. Just real, honest flavors you can control. Plus, homemade syrup tastes richer, smoother, and more chocolatey than most commercial brands. Ever checked the label on a syrup bottle? You’ll see words like “high fructose corn syrup” and “preservatives” that you can barely pronounce. When you go homemade, you’re skipping all that and opting for a cleaner, purer, and tastier alternative.
Another major plus is customization. Want it thicker? Add a little more cocoa. Need it less sweet? Reduce the sugar. Prefer a hint of espresso or a dash of vanilla? You’re the boss in your kitchen. This flexibility makes it perfect not just for ice cream but for hot drinks, smoothies, and even baking.
Benefits Over Store-Bought Options
Let’s be real—when it comes to health and taste, homemade always wins. Here’s why:
- No Artificial Preservatives – You know exactly what’s going in.
- Lower Sugar Content – Adjust according to your preference.
- Richer Flavor – Using quality cocoa makes all the difference.
- Cost-Effective – Way cheaper than buying those tiny bottles repeatedly.
- Versatile – Works in multiple recipes, from drinks to desserts.
Ingredients Needed for Chocolate Syrup
Basic Ingredients Breakdown
You won’t need a long list of ingredients—just the basics, many of which are probably already in your pantry:
- Unsweetened Cocoa Powder (1 cup) – The star of the show. Use a high-quality cocoa for best results.
- Granulated Sugar (1 ½ cups) – Adds sweetness and helps thicken the syrup.
- Salt (a pinch) – Enhances the chocolate flavor.
- Water (1 cup) – The base that binds everything together.
- Vanilla Extract (1 tsp) – Adds depth and a smooth finish.
That’s it! Just five core ingredients to make magic happen.
Optional Add-ons for Extra Flavor
Want to take your syrup up a notch? Here are some flavorful twists:
- Espresso Powder (½ tsp) – Intensifies the chocolate flavor.
- Cinnamon (¼ tsp) – Adds a warm, spiced undertone.
- Coconut Extract or Almond Extract (a few drops) – For a unique twist.
- Butter (1 tbsp) – Makes the syrup silkier and richer.
These optional ingredients let you customize your syrup to suit your palate or the dish you’re preparing.
Equipment You’ll Need
Kitchen Tools for Easy Preparation
No need for any special gadgets—this recipe is as straightforward as it gets. Here’s what you’ll need:
- Medium Saucepan – To cook the syrup evenly.
- Whisk – Essential for mixing cocoa powder and sugar without lumps.
- Measuring Cups and Spoons – Precision is key.
- Spoon or Spatula – For stirring during cooking.
- Glass Jar or Airtight Container – To store your finished syrup.
If you’ve got these basics, you’re all set to start syrup-making like a pro.
Step-by-Step Instructions to Make Chocolate Syrup
Step 1 – Gather Your Ingredients
First things first—measure out all your ingredients. This will save you from scrambling mid-recipe and ensures smooth cooking. Make sure your cocoa powder is sifted to prevent lumps. Lay everything out on the counter so you can add them in quickly when the heat is on.
Step 2 – Mix Dry Ingredients
In a medium saucepan, combine your cocoa powder, sugar, and salt. Whisk them together until they’re fully blended. This step is key to preventing lumps once the water hits the pan. A good whisking now means less effort later.
Step 3 – Add Water and Heat
Now, pour in the water slowly while whisking the mixture. Start with a low flame and gradually bring the mixture to a simmer. Stir continuously—don’t walk away! At this stage, the goal is to dissolve the sugar completely and activate the cocoa’s richness.
Step 4 – Simmer and Stir
Once it starts to bubble slightly, reduce the heat and let it simmer gently for 5–7 minutes. Keep whisking. The syrup will begin to thicken, and your kitchen will smell like a chocolate heaven. If you’re adding espresso powder or any optional flavors, this is the moment to stir them in.
Step 5 – Cool and Store Properly
Remove the pan from heat and stir in your vanilla extract. Let the syrup cool for 15–20 minutes. Then, pour it into a clean glass jar or any airtight container. Refrigerate once it’s cool, and it’ll stay fresh for up to 2 weeks.
Tips for Perfect Chocolate Syrup
How to Avoid Lumps
Lumpy chocolate syrup is just sad, let’s be honest. It ruins that smooth drizzle and can mess up your whole dessert vibe. Here’s how to avoid that mess:
- Sift your cocoa powder before mixing it with sugar. Cocoa loves to clump, especially if it’s been sitting in your pantry for a while.
- Whisk dry ingredients thoroughly. Mix the sugar, salt, and cocoa really well before you add water.
- Add water slowly while whisking. Pour a little water at a time and mix it in completely before adding more. This helps create a smooth paste that prevents clumping.
- Use medium-low heat. High heat can cause the cocoa to seize or burn, leading to unwanted textures.
- Whisk constantly while cooking. It’s a bit of a workout, but your biceps and your syrup will thank you.
A smooth chocolate syrup should look glossy and pour like a dream. Follow these steps, and you’ll nail that consistency every time.
Adjusting Consistency and Sweetness
Everyone’s got their own syrup style. Some love it thick and fudgy, others like it thin and pourable. The beauty of homemade syrup is that you’re in control.
To adjust thickness:
- Simmer longer if you want it thicker.
- Add a tablespoon of cornstarch dissolved in a little cold water if you want a super thick version.
- For a thinner syrup, simply add a bit more water after cooking, then stir until smooth.
To adjust sweetness:
- If you prefer it less sweet, reduce the sugar by ¼ to ½ cup. But don’t go too low—it could affect texture.
- Want it richer instead? Swap part of the sugar for brown sugar or maple syrup for a deeper taste.
Creative Uses for Chocolate Syrup
Desserts, Beverages, and More
Think chocolate syrup is just for ice cream? Think again. This versatile delight can jazz up nearly anything. Let’s explore all the ways to use it:
1. Classic Treats
- Drizzle over ice cream – A timeless combo.
- Swirl into milk – For the ultimate homemade chocolate milk.
- Dip strawberries or bananas – Because fruit + chocolate = yes, please.
2. Baked Good Enhancer
- Mix into brownie batter for double the chocolatey goodness.
- Drizzle over cakes, muffins, or cupcakes.
- Use as a filling in layered desserts like trifles or parfaits.
3. Coffee Lover’s Secret Weapon
- Add to your latte or cold brew for a mocha twist.
- Mix into hot chocolate for an extra flavor kick.
4. Breakfast Boost
- Pour over pancakes, waffles, or crepes.
- Stir into oatmeal for a dessert-inspired morning.
5. Savory Surprise (yes, really!)
- Add a teaspoon to chili or barbecue sauce to balance out spice with richness.
There’s really no end to how you can use chocolate syrup. It’s basically the Swiss army knife of the dessert world.
How to Store and Preserve Chocolate Syrup
Shelf Life and Refrigeration Tips
Once you’ve made your syrup, you’ll want to keep it fresh and tasty for as long as possible. Here’s how:
Refrigeration is key
- Store it in a clean, airtight glass jar or squeeze bottle.
- Keep it in the fridge—it’ll stay good for up to 2 weeks.
Want it to last longer?
- Add 1 tsp of light corn syrup or 1 tsp of lemon juice. These act as natural preservatives.
- Always use a clean spoon to scoop it out—no double-dipping!
Freezing chocolate syrup
- You can freeze it, but it might alter the texture.
- If you do freeze it, use an airtight container and leave some space for expansion.
- Thaw in the fridge and stir thoroughly before using.
Keeping your syrup stored right means you can enjoy that homemade richness whenever the craving hits.
Common Mistakes to Avoid
Making chocolate syrup is easy, but some missteps can lead to disappointing results. Here’s what to watch out for:
1. Using low-quality cocoa powder
The flavor of your syrup depends heavily on the cocoa you use. If it tastes bitter or dull, your syrup will too. Opt for 100% unsweetened cocoa—the good stuff.
2. Overheating the mixture
Boiling can make the syrup too thick or even burn the cocoa. Keep it to a gentle simmer and stir continuously.
3. Skipping the salt
That little pinch of salt? It’s not optional. It balances the sweetness and enhances the chocolate flavor. Never underestimate the power of salt in desserts!
4. Improper storage
Leaving it out on the counter for too long or storing it in a leaky container will spoil your syrup faster. Always refrigerate in a sealed jar.
5. Not whisking enough
Undissolved cocoa or sugar = gritty syrup. Whisk like your dessert depends on it (because it kinda does).
Avoid these pitfalls, and you’ll have velvety, restaurant-quality chocolate syrup every single time.
Nutritional Facts of Homemade Chocolate Syrup
Homemade chocolate syrup isn’t just tastier—it’s usually healthier too. Here’s a general idea of what you’re consuming per 2-tablespoon serving:
| Nutrient | Amount |
|---|---|
| Calories | 90–100 kcal |
| Sugar | 18–20g |
| Carbohydrates | 22g |
| Fat | 1g |
| Protein | 1g |
| Sodium | 10mg |
| Fiber | 1g |
These numbers can vary depending on the ingredients used and whether you add extras like butter or sugar substitutes. But compared to store-bought syrups filled with additives and preservatives, this is a far more transparent—and customizable—choice.
Vegan and Sugar-Free Alternatives
Looking to make your chocolate syrup a little healthier or more diet-friendly? Whether you’re cutting back on sugar or avoiding animal products, there are plenty of ways to adapt the recipe to suit your needs.
Vegan Chocolate Syrup
The base recipe is already naturally vegan—no milk, no butter, no animal-based ingredients. Just be mindful of the sugar source, as some processed white sugars may be filtered with bone char.
- Use organic or certified vegan sugar to keep it fully plant-based.
- You can also use maple syrup or coconut sugar as natural alternatives. They’ll add a subtle flavor twist too!
No need for dairy when you’ve got all that deep, rich cocoa flavor holding things down.
Sugar-Free Chocolate Syrup
Trying to reduce sugar? No problem. Here’s how to make a diabetic-friendly or low-carb version:
- Replace sugar with erythritol, monk fruit sweetener, or stevia. These all work well and won’t spike blood sugar.
- For better texture, use a blend of erythritol and allulose or xylitol. This keeps the syrup from crystallizing or becoming gritty.
- Be sure to simmer a bit longer to reach the right consistency since sugar substitutes behave differently.
The result? A delicious, sweet, and smooth chocolate syrup you can enjoy guilt-free. Perfect for keto, paleo, or diabetic diets.
FAQs About Chocolate Syrup Recipe
1. How long does homemade chocolate syrup last?
Homemade chocolate syrup can last up to 2–3 weeks in the refrigerator when stored in an airtight container.
2. Can I use cocoa powder instead of chocolate?
Yes, unsweetened cocoa powder is a great alternative and is commonly used in homemade chocolate syrup recipes for a rich, smooth flavor.
3. Is it necessary to refrigerate chocolate syrup?
Absolutely. Refrigerating extends its shelf life and keeps it fresh. Just reheat slightly if it thickens.
4. Can I use it for hot chocolate or coffee?
Yes! Chocolate syrup works perfectly in hot beverages, adding sweetness and deep chocolate flavor to coffee, hot cocoa, or even milk.
5. Is this syrup suitable for vegans?
Yes, if you use plant-based milk and skip butter, your chocolate syrup can be completely vegan.
6. Can I make it sugar-free?
Definitely! You can use sugar substitutes like stevia, erythritol, or monk fruit sweetener to make a healthier, low-carb version.
7. Why is my syrup too thick or too runny?
This usually comes down to cooking time. Cook a bit longer for thicker syrup, or add a splash of water if it’s too thick after cooling.
8. What’s the best way to store it?
Use a glass jar or squeeze bottle, and always refrigerate after making.
9. Can I double the recipe?
Yes, just make sure to stir consistently and adjust the cooking time slightly to prevent burning.
10. What can I drizzle chocolate syrup on?
Try it on ice cream, pancakes, waffles, cakes, or even fresh fruit for a sweet twist!
Conclusion
Making your own chocolate syrup at home is not only fun—it’s rewarding. With just a handful of ingredients and a few simple steps, you can create a rich, luscious syrup that’s tailor-made to your tastes. No preservatives, no high-fructose junk—just real, honest flavor. Whether you’re drizzling it over a scoop of ice cream, swirling it into a steamy mug of milk, or sneaking a spoonful straight from the jar (no judgment!), this homemade treat is pure magic.
From classic indulgence to creative twists, your syrup can go wherever your imagination takes it. Plus, the ability to adjust the sweetness, thickness, and flavor makes it ideal for all kinds of dietary preferences—from vegan to sugar-free.
So next time you think about grabbing a bottle at the store, don’t. Go grab that saucepan instead. You’ve got this.


