Best Macaroni and Cheese Recipe: Who doesn’t love a steaming bowl of creamy, cheesy macaroni and cheese? Whether you’re making it for a weeknight dinner, a holiday gathering, or just to satisfy a comfort food craving, this ultimate mac and cheese recipe has got you covered. We’ll take you step by step through each part of the process so that you get it perfect every single time.
Introduction to the Ultimate Comfort Food
Macaroni and cheese has become a staple in kitchens all over the world, but did you know its roots go all the way back to 13th-century Italy? Early versions used sheets of pasta layered with grated cheese, baked to bubbly perfection. Fast forward a few hundred years, and it’s now an iconic dish—especially in the U.S., where it’s often found on dinner tables, restaurant menus, and even school lunch trays.
But what makes mac and cheese so irresistible? It’s the perfect balance of soft pasta, rich cheesy sauce, and often a crispy topping. It’s versatile, customizable, and hits that nostalgic spot like few other meals can. Whether it’s homemade or from a box, mac and cheese has comfort written all over it. And the best part? It’s super easy to make from scratch—and once you do, you’ll never go back.
Ingredients You’ll Need
Let’s talk ingredients. The magic of mac and cheese lies in its simplicity, but that doesn’t mean every ingredient isn’t important.
Core Ingredients:
- Elbow macaroni (or your preferred pasta): 2 cups dry
- Butter: 4 tablespoons (unsalted is best)
- All-purpose flour: 2 tablespoons
- Milk: 2 cups (whole milk is ideal)
- Heavy cream: 1/2 cup for richness
- Cheddar cheese: 2 cups shredded (sharp cheddar for full flavor)
- Salt and pepper: To taste
Optional Add-ins:
- Paprika or mustard powder for a bit of kick
- Mozzarella, Gruyère, or Parmesan for complexity
- Breadcrumbs or crushed crackers for topping
- Cooked bacon, jalapeños, or even lobster for a gourmet twist
The quality of ingredients can make a big difference. Go for real block cheese and shred it yourself—pre-shredded cheeses are coated with anti-caking agents that don’t melt as well.
Choosing the Right Cheese
Not all cheeses are created equal, especially when it comes to melting. Your cheese should be flavorful, creamy, and melt beautifully into a sauce.
Best Cheeses to Use:
- Sharp cheddar: Classic, tangy, and bold
- Gruyère: Nutty and rich, excellent for depth
- Fontina: Melts smoothly and has a subtle flavor
- Mozzarella: Gooey and stretchy
- Cream cheese: Adds creaminess and smooth texture
The trick to unforgettable mac and cheese is using a combination of cheeses. Try a 70/30 mix—70% sharp cheddar for the familiar flavor, and 30% something creamier or funkier like Gruyère or Fontina for extra depth.
Avoid cheeses that don’t melt well, like feta or goat cheese, unless you’re going for a specific taste or texture.
Pasta Selection Matters
While elbow macaroni is the go-to for this dish, don’t feel boxed in (pun intended). The goal is to use a pasta that holds sauce well, offering both chew and coverage.
Best Pasta Shapes:
- Elbow macaroni: Classic and reliable
- Cavatappi: Corkscrew shape catches more cheese
- Shells: Great for trapping sauce inside
- Penne: Firm and sturdy, adds bite
Cook your pasta al dente (just slightly firm) because it will continue cooking when you bake or mix it with the hot sauce. Overcooked pasta turns to mush quickly and won’t hold its structure when baked.
Preparing the Perfect Roux
Here’s where your creamy cheese sauce begins—don’t skip this step! A roux is a mixture of fat and flour used as a thickening agent. In this case, we’re using butter and flour.
Steps to Make a Roux:
- In a saucepan over medium heat, melt 4 tablespoons of butter.
- Whisk in 2 tablespoons of all-purpose flour.
- Cook, whisking constantly, for 1-2 minutes. The flour should bubble and slightly brown but not burn.
- Slowly add the milk and cream while whisking. This helps prevent lumps.
The key is low and slow—rushing through the roux can give your sauce a gritty texture or cause it to separate. Once the roux is smooth and golden, you’re ready to turn it into a cheesy masterpiece.
Making the Cheese Sauce
Once your roux is ready, it’s time to turn that silky base into a rich, velvety cheese sauce. This is the heart and soul of any great mac and cheese. Get this part right, and you’re halfway to mac and cheese heaven.
Step-by-Step Guide to Cheese Sauce:
- Add milk slowly: After your roux is bubbling, gradually pour in 2 cups of milk and 1/2 cup of heavy cream, whisking continuously. This ensures a lump-free mixture and even texture.
- Simmer and thicken: Let the mixture simmer gently for about 5–7 minutes until it thickens to a consistency that coats the back of a spoon.
- Season it up: Add salt, pepper, and a pinch of mustard powder or paprika for a subtle kick. This step adds a new layer of flavor that balances out the richness.
- Cheese it up: Turn off the heat and gradually add your shredded cheeses while whisking. Start with cheddar and then layer in your second cheese of choice. The key here is to add cheese little by little to avoid clumping and get a smooth, glossy sauce.
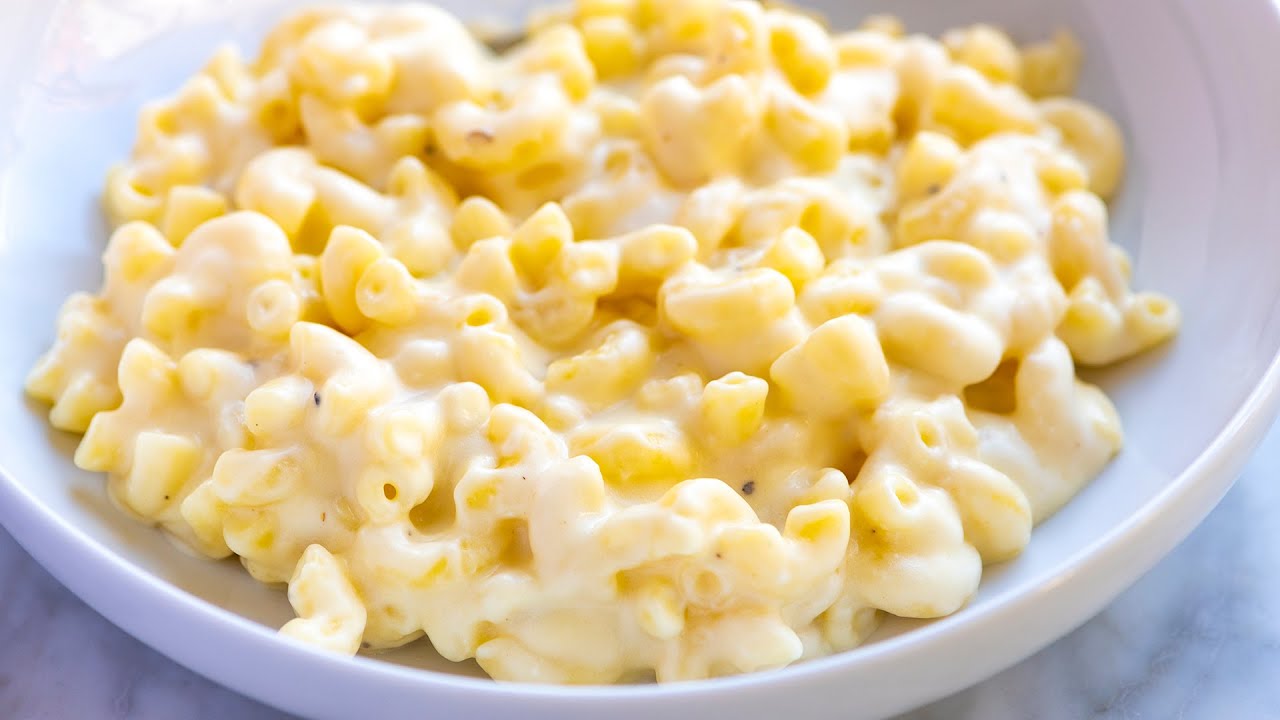
By now, your kitchen should smell like a dream. This cheese sauce should be creamy, not runny, with a satisfying thickness that clings to your spoon.
Combining Pasta and Sauce
Now that you have both cooked pasta and luscious cheese sauce, it’s time to bring them together. This step might seem easy, but there’s a method to it.
Best Practices for Mixing Pasta and Sauce:
- Drain well: After boiling your pasta, drain it thoroughly. Avoid rinsing—it removes the starch that helps the sauce cling better.
- Warm combo: Add the hot pasta to the cheese sauce while both are still warm. The heat helps everything meld perfectly together.
- Fold, don’t stir: Use a spatula to gently fold the pasta into the sauce. Stirring too hard can break the pasta and make it mushy.
Make sure every piece is fully coated—there’s nothing sadder than dry mac and cheese with sauce pooled at the bottom. If the sauce thickens too much while mixing, add a splash of warm milk to loosen it up.
Baking vs. Stovetop
This is one of the biggest debates in the mac and cheese world. Should you serve it creamy and gooey straight from the pot, or pop it in the oven for that crispy, golden topping?
Stovetop Mac and Cheese:
- Pros: Quick, creamy, ultra-cheesy
- Perfect for: Weeknight meals, picky kids, and purists who love that saucy texture
Baked Mac and Cheese:
- Pros: Crispy top, structured texture, holds up better for serving
- Perfect for: Potlucks, holidays, and when you want a fancier presentation
How to Bake It:
- Preheat oven to 375°F (190°C).
- Pour your mac and cheese into a buttered baking dish.
- Sprinkle the top with breadcrumbs, Parmesan, or extra shredded cheese.
- Bake uncovered for 20–25 minutes or until bubbly and golden brown.
If you can’t decide, do both: make it on the stovetop, then broil it for 3–5 minutes to get that crispy top without drying out the sauce.
Topping Ideas for Extra Crunch
Toppings take your mac and cheese from “yum” to “holy moly.” A crispy, flavorful top adds contrast to the creamy interior and gives your dish that extra wow factor.
Topping Options:
- Classic breadcrumbs: Toasted with butter for golden perfection
- Crushed Ritz or saltine crackers: Buttery and salty—amazing!
- Parmesan cheese: Adds a sharp, nutty note and great crust
- Bacon bits: Smoky, crunchy, irresistible
- Fried onions or jalapeños: For a Southern or spicy kick
Pro Tip:
Mix breadcrumbs with a bit of melted butter and herbs like thyme or parsley before sprinkling on top. This ensures even browning and an added flavor boost.
Mac and Cheese Variations
While classic mac and cheese is always a hit, sometimes it’s fun to mix things up. You can get creative with add-ins and flavor combinations that completely transform this comfort dish into something new and exciting.
1. Bacon Mac and Cheese
Bacon makes everything better, right? Dice and fry thick-cut bacon until crispy, then fold it into the cheesy pasta before baking. You can even sprinkle extra bacon on top for a smoky, savory finish. The saltiness of the bacon pairs beautifully with the creamy cheese sauce.
2. Spicy Jalapeño Mac
Want to kick up the heat? Add finely chopped jalapeños (fresh or pickled) into the mix. You can also stir in some cayenne pepper or chili flakes. Top with pepper jack cheese to drive that spice level up a notch. This version is a crowd-pleaser for those who like it hot.
3. Lobster Mac and Cheese
Feeling fancy? Fold in chunks of cooked lobster meat right before baking. Add a touch of garlic or truffle oil for an extra gourmet flair. This is a decadent, rich version that’s perfect for special occasions or romantic dinners.
4. Buffalo Chicken Mac
Mix in shredded rotisserie chicken tossed in buffalo sauce. Then drizzle extra buffalo sauce and a bit of blue cheese or ranch dressing on top before baking. It’s tangy, spicy, and ridiculously good.
These variations are easy to experiment with once you’ve mastered the base recipe. The possibilities are endless, and you can tailor them to suit your mood or menu.
Tips for Making It Extra Creamy
Creaminess is the holy grail of mac and cheese. No one wants a dry or gritty dish. Here are some expert tips to ensure your mac and cheese stays lusciously smooth and creamy from the first bite to the last.
Secrets for Ultimate Creaminess:
- Use whole milk and heavy cream: Skimping on fat leads to thinner, less satisfying sauce. Whole milk and a splash of cream make all the difference.
- Grate your own cheese: Pre-shredded cheese has anti-caking agents that can lead to clumpy or grainy sauce. Grating fresh cheese ensures a silky texture.
- Add cream cheese or sour cream: Just a couple of tablespoons folded into the sauce will boost creaminess and add a mild tang that complements the cheddar.
- Don’t overbake: Baking too long can dry out your mac and cheese. Bake just until golden and bubbly, not until it’s a brick.
- Warm your milk before adding: Cold milk straight from the fridge can shock the roux, making it harder to blend smoothly. Slightly warm milk combines better for a uniform sauce.
The trick is balance: rich ingredients, the right cheese blend, and careful cooking techniques all work together to keep things creamy and luxurious.
Common Mistakes to Avoid
Even though mac and cheese is fairly simple to make, there are a few common mistakes that can turn your dream dish into a disappointing mess. Let’s make sure that doesn’t happen to you.
1. Overcooking the Pasta
Boil your pasta only until it’s al dente. Remember, it’ll continue cooking when mixed with hot sauce or baked in the oven. Overcooked pasta becomes mushy and loses its texture fast.
2. Using the Wrong Cheese
Not all cheeses melt the same. Hard, aged cheeses like Parmesan don’t melt well on their own. Blue cheese, while flavorful, can overwhelm the dish. Stick to creamy, melty cheeses like cheddar, Fontina, or Monterey Jack.
3. Skipping the Roux
Trying to cheat your way through the sauce by just melting cheese into milk? That usually results in a broken, oily mess. A proper roux stabilizes the sauce and makes it creamy and cohesive.
4. Not Enough Seasoning
Cheese alone isn’t enough. A little salt, pepper, mustard powder, or even a splash of hot sauce can elevate your mac and cheese significantly.
5. Baking Too Long
This is a big one. Overbaking dries out the sauce and ruins the creamy texture. If you’re baking, keep an eye on it—20 to 25 minutes tops!
Avoiding these simple mistakes ensures that your mac and cheese turns out restaurant-worthy every single time.
Storage and Reheating Tips
Mac and cheese makes great leftovers—if you store and reheat it properly. The goal is to preserve the creamy texture and prevent the sauce from drying out or turning grainy.
Storing Leftovers:
- Let it cool to room temperature before storing.
- Place in an airtight container.
- Refrigerate for up to 3–4 days.
Freezing:
You can freeze mac and cheese, but it’s best done before baking. Assemble the dish, cover tightly with foil or plastic wrap, and freeze for up to 2 months. When ready to eat, thaw overnight in the fridge and bake as directed.
Reheating Tips:
- Microwave: Add a splash of milk, cover loosely, and microwave in 30-second intervals, stirring in between.
- Stovetop: Add a little milk or cream to a pan, stir in the mac and cheese, and warm slowly over low heat.
- Oven: Cover with foil and bake at 350°F for 15–20 minutes.
Always add a bit of moisture before reheating to bring that creamy texture back to life.
Pairing Suggestions
Macaroni and cheese is a hearty, filling dish on its own—but that doesn’t mean it can’t shine even brighter with the right pairings. Whether you’re serving it as a main course or a side dish, the right accompaniments can elevate your meal to the next level.
Side Dishes That Work Perfectly:
- Green Salad: A fresh salad with vinaigrette adds a crisp, tangy balance to the creamy richness of mac and cheese.
- Roasted Vegetables: Think broccoli, Brussels sprouts, or carrots. Their earthiness complements the cheesy pasta perfectly.
- Coleslaw: A crunchy, acidic coleslaw provides contrast and cuts through the heaviness.
- Grilled or Fried Chicken: A Southern favorite—mac and cheese and crispy chicken are a match made in comfort food heaven.
- Garlic Bread: Carb overload? Maybe. Worth it? Absolutely.
Drinks That Pair Well:
- White wine: A crisp Chardonnay or Sauvignon Blanc balances the cheese beautifully.
- Beer: Light lagers, pale ales, or even a malty amber can complement the richness.
- Sparkling water or lemonade: For a non-alcoholic option, these refreshing drinks keep your palate fresh.
The goal is contrast. Creamy dishes love crunchy, acidic, or fresh sides and beverages to keep the meal balanced and exciting.
FAQs about Best Macaroni and Cheese Recipe
Q1: What is the best cheese to use for mac and cheese?
The best mac and cheese recipes often use a blend of cheeses for maximum flavor. Cheddar is a classic choice, but mixing in mozzarella, Gruyère, or Monterey Jack adds creaminess and depth.
Q2: Can I make mac and cheese ahead of time?
Yes, you can prepare it ahead and refrigerate for up to 2 days. Just reheat in the oven at 350°F (175°C) covered with foil to keep it moist.
Q3: How do I keep mac and cheese from drying out?
To prevent dryness, use a béchamel sauce base and avoid overbaking. Adding a bit of cream or extra milk before reheating also helps retain moisture.
Q4: Can I use pre-shredded cheese?
While convenient, pre-shredded cheese often contains anti-caking agents that affect the sauce texture. For the best creamy result, shred your own cheese.
Q5: Is mac and cheese freezer-friendly?
Absolutely. Let it cool completely, then wrap tightly before freezing. It keeps well for up to 2 months. Thaw overnight and reheat thoroughly before serving.
Q6: What pasta shape is best for mac and cheese?
Elbow macaroni is traditional, but other shapes like cavatappi, shells, or penne also hold the cheesy sauce beautifully.
Q7: How can I add extra flavor to my mac and cheese?
Try mixing in cooked bacon, garlic, caramelized onions, or a dash of mustard or hot sauce to elevate the flavor profile.
Conclusion
There you have it—the ultimate guide to making the best macaroni and cheese ever. Whether you like it classic and stovetop, baked with a crunchy topping, or jazzed up with gourmet twists, this step-by-step recipe gives you all the tools to make it perfect every single time.
Mac and cheese isn’t just a dish—it’s a warm hug in a bowl. It brings people together, comforts us on cold days, and turns any ordinary dinner into something special. Once you master this recipe, you’ll never reach for the boxed version again.
So grab your cheese, boil that pasta, and let the magic happen. And remember, the best ingredient in any mac and cheese dish is love (and maybe just a touch more cheese).


