Beef Bone Broth Recipe: Bone broth is more than just a trendy health drink—it’s liquid gold for your body. Made by simmering animal bones and connective tissue for hours, it’s a deeply nourishing, collagen-rich broth that dates back centuries. From ancient Chinese medicine to grandma’s kitchen remedies, bone broth has stood the test of time as a healing elixir.
But don’t confuse bone broth with regular stock or broth. The key difference? Bone broth simmers for way longer, allowing all the nutrients from the bones—like marrow, collagen, and minerals—to slowly infuse into the liquid. The result is a rich, deeply flavored broth that’s as good for sipping as it is for cooking.
Why Beef Bone Broth?
Beef bones, especially those from grass-fed cows, are packed with more marrow and nutrients compared to chicken bones. They deliver a bold, meaty flavor that forms the perfect base for stews, sauces, or just a comforting mug on a cold day.
Beef bone broth also tends to produce more gelatin, thanks to the collagen-rich joints and knuckles used in the cooking process. That means more joint-healing goodness and a richer texture. Plus, it’s incredibly versatile—you can flavor it however you like or keep it basic for use in recipes.
Health Benefits of Beef Bone Broth
Nutritional Powerhouse
When you simmer beef bones for 12-24 hours, you unlock a treasure chest of nutrients: collagen, gelatin, amino acids like glycine and proline, and minerals like calcium, magnesium, and phosphorus. These all work together to support bone health, skin elasticity, and gut function.
Collagen, especially, is the MVP here—it’s what gives the broth that jiggly, gelatinous texture when cooled. It’s also what your body uses to repair skin, joints, and connective tissue. And since collagen production decreases with age, sipping on beef bone broth can help fill in the gaps.
Healing and Recovery Support
Bone broth is a favorite among athletes, nutritionists, and even doctors for its healing benefits. It’s soothing for your gut, thanks to gelatin and glutamine, which help repair the intestinal lining. That makes it great for anyone dealing with digestive issues like leaky gut or IBS.
It also supports joint health due to the presence of glucosamine and chondroitin—two compounds commonly found in joint supplements. If you’re recovering from injury, surgery, or intense workouts, bone broth is a gentle way to give your body what it needs to heal from the inside out.
Ingredients You’ll Need
Essential Ingredients
To make a solid, flavorful beef bone broth, start with high-quality bones. Here’s your basic list:
- 3–4 lbs beef bones (mix of marrow bones, knuckle bones, oxtail, and short ribs)
- 2 tablespoons apple cider vinegar (helps draw minerals out of the bones)
- 1 large onion, quartered
- 2 carrots, chopped
- 2 celery stalks, chopped
- 3–4 garlic cloves, smashed
- 10–12 cups cold water
- 2 bay leaves
- 1 tablespoon whole peppercorns
- Salt to taste (optional; you can also salt later when using)
The apple cider vinegar is essential—it’s what helps pull all those minerals and nutrients from the bones into your broth. Don’t skip it!
Optional Additions for Flavor
Want to amp up the flavor? Toss in:
- Fresh herbs like thyme, rosemary, or parsley
- Ginger slices or turmeric for an anti-inflammatory kick
- A piece of kombu (dried seaweed) for a boost of iodine and umami
- Mushrooms for a rich, earthy taste
These ingredients are totally optional but can help create a more complex flavor profile.
Tools and Equipment
Must-Have Kitchen Tools
You don’t need a gourmet kitchen to make great broth, but a few essentials help:
- Large stockpot (at least 8 quarts)
- Roasting pan (for roasting the bones)
- Fine mesh strainer or cheesecloth
- Large bowl (for catching the strained broth)
- Ladle and skimmer
- Glass jars or freezer-safe containers for storage
Making bone broth is simple, but it does take time. Having the right tools on hand makes the process much smoother and less messy.
Slow Cooker vs Stockpot vs Instant Pot
You’ve got options when it comes to cooking your broth:
- Stockpot: Traditional method. Gives you full control over temperature and skimming, but it ties up your stove for hours.
- Slow Cooker: Set it and forget it. Perfect for overnight simmering with minimal babysitting.
- Instant Pot: Fast and efficient. You can get similar results in just 2–3 hours thanks to high pressure.
Each method works, so it comes down to convenience and time.
Step-by-Step Beef Bone Broth Recipe
Step 1: Roast the Bones
Roasting your bones isn’t just about flavor—it’s about unlocking the deep, umami-rich taste that makes beef bone broth so irresistible. Preheat your oven to 400°F (200°C). Spread your bones out in a single layer on a roasting pan. Roast for 30–45 minutes, flipping halfway through, until browned and fragrant.
This caramelization brings out a deeper flavor and gives your broth a beautiful dark color. Don’t skip this step unless you’re in a serious rush.
Step 2: Prepare the Vegetables
While your bones are roasting, go ahead and prep your veggies. You don’t need to peel them—just give them a quick wash. Chop the onion into quarters, slice the carrots and celery into chunks, and smash the garlic cloves with the flat side of a knife.
Why leave the peels on? Because they add extra flavor and nutrients to your broth. Plus, they’re getting strained out later anyway, so don’t worry about presentation here. This is all about utility and taste. If you’ve got herb stems, mushroom scraps, or even leftover veggie bits in your fridge, now’s a great time to toss them in too. Bone broth is the king of “waste not, want not.”
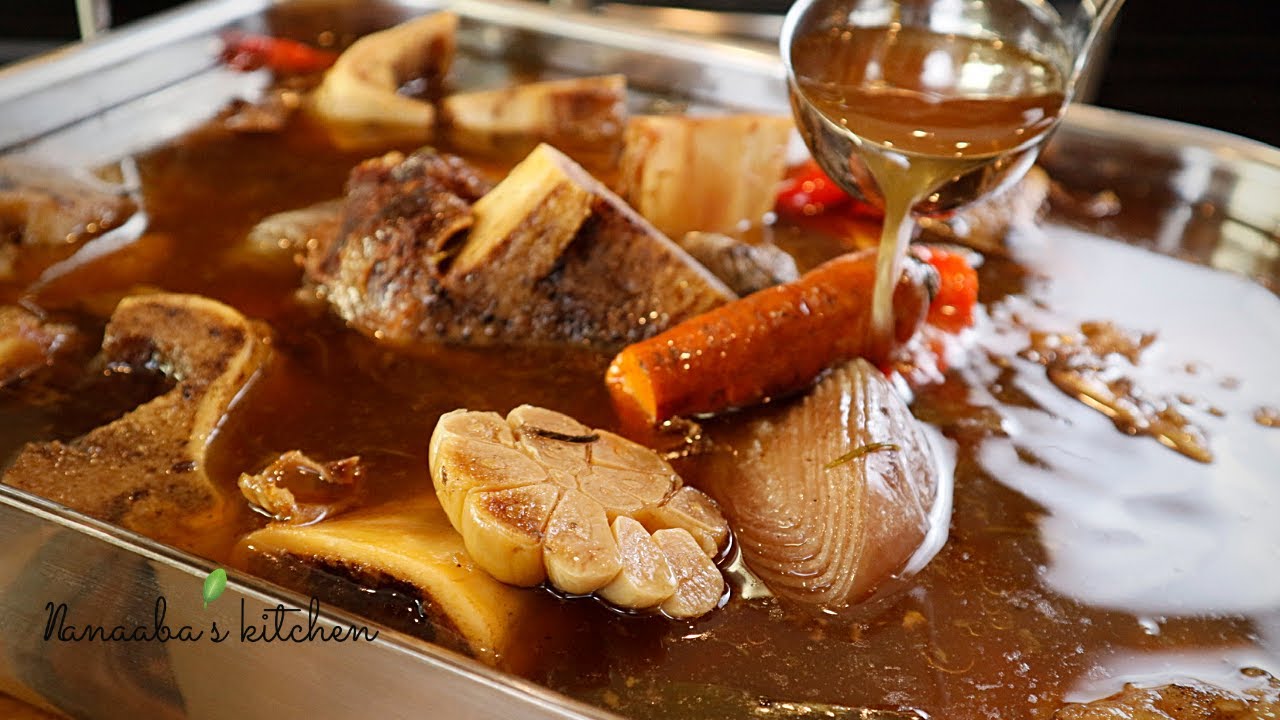
Step 3: Combine and Simmer
Once your bones are nicely roasted and your veggies are ready, it’s time to bring it all together. Place the bones and vegetables into your stockpot, slow cooker, or Instant Pot. Add the bay leaves, peppercorns, garlic, and apple cider vinegar. Pour in enough cold water to cover everything by about an inch or two.
Let it sit for 20–30 minutes before turning on the heat. This soaking time helps the vinegar begin its magic, drawing minerals out of the bones. Then, bring the pot to a gentle boil. Once it hits a boil, reduce it to a very low simmer. You’re aiming for just a few lazy bubbles here and there—not a rolling boil.
Simmer uncovered or partially covered for at least 12 hours, and up to 24. The longer, the better. The low-and-slow cooking helps extract every bit of goodness from the bones.
Step 4: Skim and Simmer Longer
As your broth begins to simmer, you’ll notice a grayish foam rising to the top. That’s totally normal—it’s just impurities and proteins from the bones. Use a ladle or skimmer to remove it gently. Do this a few times in the first hour of cooking, and your broth will come out clearer and cleaner tasting.
After that, just let it bubble away gently. Check on it now and then to make sure the water level stays above the bones. You can add a bit more hot water if too much evaporates, but try to avoid diluting the flavor too much.
If you’re using a slow cooker, you can even leave it overnight. Just make sure your pot is in a safe place and your water level is high enough. Don’t worry if the broth smells strong—that’s a good sign. You’re cooking up something powerful.
Step 5: Strain and Store
When your broth has simmered long enough and your kitchen smells like heaven, it’s time to strain. First, let it cool for 15–20 minutes so it’s easier to handle. Then, using a fine mesh strainer or cheesecloth, pour the broth through into a large bowl or pot. Discard the solids—those bones and veggies have given all they’ve got.
Now, let the strained broth sit for another hour so the fat rises to the top. You can either skim it off or leave it on for added richness (especially if you’re storing in the fridge—it acts like a seal). Store your broth in glass jars or BPA-free containers. It’ll last 5–7 days in the fridge and up to 6 months in the freezer.
Want to freeze in small portions? Use silicone ice cube trays or muffin tins for easy-to-use broth bombs later!
Tips for a Perfect Bone Broth
Key Do’s and Don’ts
Do:
- Use a mix of bones—marrow for richness, knuckles and joints for collagen.
- Add a splash of apple cider vinegar before cooking.
- Simmer low and slow—don’t rush it.
Don’t:
- Let it boil too hard (you’ll get cloudy broth).
- Skip roasting the bones (you’ll lose depth of flavor).
- Over-salt it early (wait until you use it in recipes).
These little rules make a huge difference in taste and nutrition. Remember, patience is the key.
How to Get the Best Gelatin Texture
That magical jiggly texture when your broth cools? That’s gelatin, and it’s a sign you did everything right. To maximize gelatin:
- Use joint-rich bones like knuckles, necks, and feet.
- Simmer long enough (at least 12 hours).
- Don’t over-dilute the water.
- Cool the broth quickly after straining.
A good gelatinous broth will look like beef Jell-O in the fridge—and melt into liquid gold when heated.
How to Store and Use Beef Bone Broth
Storage Tips
Proper storage is the secret to enjoying your bone broth anytime you need it. After straining and cooling, your broth can be stored in a few different ways depending on how you plan to use it.
In the fridge: Pour the broth into glass jars or airtight containers. It will keep for up to 7 days. Once cooled, you’ll notice a layer of fat solidifying on top—this is called tallow. It acts as a natural preservative, so don’t toss it! You can either mix it back in when reheating or use it as a cooking fat.
In the freezer: For long-term storage, freezing is best. Use freezer-safe containers, silicone ice cube trays, or even muffin tins to portion it out. Once frozen, pop the cubes into freezer bags. This makes it super easy to grab just what you need—no thawing an entire jar!
Pro tip: Always leave about an inch of headroom in jars before freezing to prevent cracking from expansion.
Creative Ways to Use It
Beef bone broth isn’t just for sipping—though that’s a cozy option on cold days. Here are some tasty ways to use it in everyday meals:
- Soup base: Upgrade any soup, from classic beef barley to hearty vegetable stews.
- Grains: Cook rice, quinoa, or couscous in broth instead of water for extra flavor and nutrition.
- Sauces and gravies: Use it to deglaze pans or as the base for rich sauces.
- Mashed potatoes: Swap in broth for milk or cream—it’s lighter but adds great depth.
- Ramen and pho: Add soy sauce, ginger, garlic, and scallions for a quick DIY noodle bowl.
It’s a flavor booster for nearly any savory recipe. Just swap it wherever you’d use stock or water for an instant upgrade.
Common Mistakes to Avoid
Overboiling or Undercooking
This is probably the most common issue. If your broth is cloudy or lacks flavor, chances are it either boiled too hard or wasn’t cooked long enough.
Boiling too hard causes the fat and proteins to emulsify into the liquid, giving you a murky, greasy broth. Always aim for a very gentle simmer—just a few tiny bubbles breaking the surface.
Undercooking won’t extract all the goodies from the bones, especially the gelatin and minerals. 12 hours is the absolute minimum for beef bones. Want a gelatin-rich broth? Try simmering for 18–24 hours for maximum extraction.
Not Skimming or Improper Storage
Skipping the skimming step may not seem like a big deal, but it really affects the final taste. The scum that floats to the top during the first hour is made up of impurities and denatured proteins. Leaving it in will result in a funky-tasting broth.
Also, improper storage—like leaving broth at room temperature for too long—can spoil it quickly. Always cool it down promptly and store it in clean, sealed containers.
Want clear broth? Strain it through cheesecloth. Want rich flavor? Don’t forget the vinegar soak and roasting.
FAQs about Beef Bone Broth Recipe
What bones are best for beef bone broth?
The best bones for a rich beef bone broth include marrow bones, knuckle bones, oxtail, and beef shanks. A mix of bones with meat and connective tissue gives the broth a deep flavor and rich gelatin content.
How long should I simmer beef bone broth?
For maximum flavor and nutrients, simmer your beef bone broth for 12 to 24 hours. This slow cooking helps extract collagen, minerals, and flavor from the bones.
Can I make beef bone broth in a slow cooker or Instant Pot?
Yes! Both are great options. Use the low setting on a slow cooker for 18–24 hours, or pressure cook it in an Instant Pot for about 2–3 hours for a quicker result.
Do I need to roast the bones first?
Roasting bones before simmering adds depth and a richer, more robust flavor. Bake them at 400°F (200°C) for about 30–45 minutes before starting your broth.
Should I skim the foam while simmering?
Yes, skimming off the foam that rises in the first hour helps keep the broth clear and removes impurities.
How do I store beef bone broth?
Store in airtight containers in the fridge for up to 5 days, or freeze in jars or ice cube trays for up to 6 months.
Can I add vegetables and herbs?
Absolutely! Common additions include onions, carrots, celery, garlic, bay leaves, and thyme to enhance flavor and nutrition.
Is beef bone broth healthy?
Yes. It’s rich in collagen, amino acids, and minerals, which support joint health, digestion, and skin health.
Why does my broth become jelly-like when cold?
That’s a good sign! The gelatin from collagen-rich bones causes the broth to gel, indicating a nutrient-dense, well-made broth.
Can I reuse the bones for another batch?
Yes, you can use the bones for a second, lighter batch of broth. However, the flavor and nutrient content will be less concentrated.
Conclusion
Making beef bone broth might take time, but it’s one of the most rewarding things you can do in your kitchen. It’s packed with flavor, overflowing with nutrients, and incredibly versatile. Whether you’re sipping it straight for a health boost or using it as the base for hearty meals, this golden liquid has earned its spot as a staple in kitchens around the world.
With the step-by-step guide above, you now have everything you need to create your own batch of nourishing, homemade beef bone broth. So grab some bones, set aside a day to let it simmer, and enjoy the deep, comforting taste of tradition in every sip.


