Baked Chicken Tenders Recipe: Looking for a healthier alternative to fried chicken tenders that still packs that crave-worthy crunch? This step-by-step guide for baked chicken tenders delivers juicy, flavorful results without the extra oil. Whether you’re cooking for a quick family dinner or prepping a meal everyone will love, this foolproof recipe has your back. Let’s dive right in!
Introduction
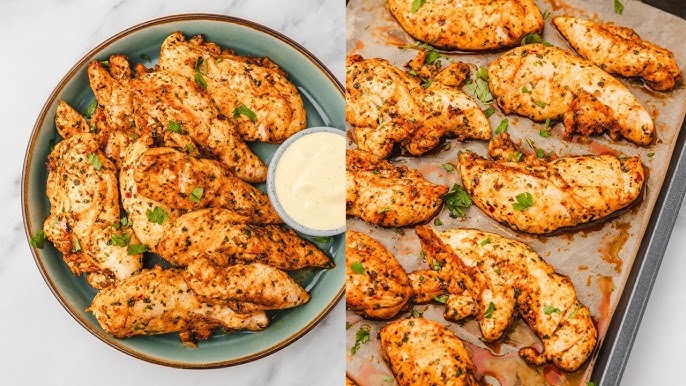
Baked chicken tenders are the unsung heroes of weeknight dinners. They’re crispy, golden, tender on the inside, and incredibly easy to whip up in under 30 minutes. But the best part? You don’t have to deal with hot oil, messy frying, or lingering grease smell in your kitchen.
What makes this recipe so great is that it’s not only healthier but also super customizable. You can tweak the seasoning, swap out breading options, or make them gluten-free—all without sacrificing flavor. Plus, they’re a huge hit with both kids and adults. Serve them with your favorite dipping sauce and a side of veggies, and you’ve got yourself a wholesome, satisfying meal.
These oven-baked chicken tenders offer a great balance between ease and taste. Whether you’re meal prepping or just need a fast dinner idea, this is one recipe you’ll want to save and repeat.
Ingredients You’ll Need
Getting the ingredients right is key to nailing that crunchy-on-the-outside, juicy-on-the-inside bite. Here’s a breakdown of everything you need:
Main Ingredients:
- Chicken tenders or boneless chicken breasts (about 1.5 lbs, cut into strips)
- All-purpose flour – ½ cup for dredging
- Eggs – 2 large, beaten
- Panko breadcrumbs – 1.5 cups (gives the best crunch)
- Grated Parmesan cheese – ¼ cup (optional but recommended for flavor)
- Garlic powder – 1 tsp
- Paprika – 1 tsp
- Salt and pepper – to taste
- Olive oil spray or cooking spray – for crisping in the oven
Optional Add-ins:
- Chili flakes or cayenne – for a spicy kick
- Italian seasoning – for an herby profile
- Lemon zest – adds brightness
If you want to go gluten-free, simply replace regular flour and breadcrumbs with gluten-free alternatives. You can even go keto by using almond flour and crushed pork rinds instead of breadcrumbs.
Having these ingredients on hand sets you up for a perfectly seasoned, crispy batch of chicken tenders that bake beautifully every time.
Kitchen Tools Required
Having the right tools can make the whole process smoother and faster. Here’s what you’ll need:
Essentials:
- Baking sheet – Large enough to spread the tenders out in a single layer
- Wire rack (optional) – Helps air circulate and keeps tenders crispy
- Shallow bowls – For the breading stations (flour, eggs, breadcrumbs)
- Tongs or fork – To dip and coat the chicken
- Meat thermometer – To check doneness (165°F internal temp)
- Cooking spray – For that golden finish
Handy but Optional:
- Parchment paper – For easier cleanup
- Silicone baking mat – Prevents sticking without needing oil
You don’t need any fancy equipment. This recipe is super beginner-friendly. But if you have a wire rack, definitely use it—it makes the tenders extra crispy on all sides by allowing airflow underneath during baking.
Preparing the Chicken Tenders
Alright, let’s get down to business. Starting with good-quality chicken is half the battle. If you can, opt for organic or free-range chicken tenders. If you’re using boneless breasts, just slice them lengthwise into 1-inch thick strips.
Steps to Prep:
- Rinse and pat dry your chicken strips. Removing moisture helps the breading stick better.
- Trim off any fat or tendons. Especially if you’re using whole breasts.
- If you have time, brine the chicken in buttermilk or saltwater for 30 minutes. It keeps the chicken juicy and flavorful.
Pro tip: Drying the chicken thoroughly with paper towels helps the flour stick better, which then helps the egg and breadcrumb coating adhere more effectively.
By prepping the chicken properly, you ensure even cooking and get that tender, juicy bite every time. And once the prep’s done, the rest is a breeze.
Creating the Perfect Breading Station
This step is where the magic happens. A solid breading station keeps things organized and efficient.
Set Up Like This:
- Bowl 1: Flour mixture – Add flour, a pinch of salt, and garlic powder.
- Bowl 2: Beaten eggs – Whisk until smooth.
- Bowl 3: Breadcrumb mix – Combine Panko, Parmesan, paprika, black pepper, and a drizzle of olive oil.
How to Bread:
- Dredge each chicken strip in flour (shake off the excess).
- Dip into the egg wash until fully coated.
- Roll in the breadcrumb mix, pressing lightly so it sticks.
Make sure you designate one hand for dry ingredients and one for wet to avoid turning your fingers into breaded chicken balls. That trick alone saves so much mess.
If you want extra crunch, double-dip: after the first breadcrumb layer, dip again in egg and re-coat in breadcrumbs.
Baking the Chicken Tenders
So, you’ve breaded your chicken tenders—nice! Now it’s time to let the oven do its thing and turn those coated beauties into crispy, golden bites of joy.
Prepping the Oven:
- Preheat your oven to 425°F (220°C). This high heat ensures the tenders get that nice golden crust without drying out inside.
- Line your baking sheet with parchment paper or use a silicone mat to prevent sticking. If you have a wire rack, place it on the baking sheet and spray it lightly with oil.
Arranging the Tenders:
- Place each tender on the rack or baking sheet, making sure they’re not touching. Crowding the pan causes steaming, and that’s the enemy of crispiness.
- Give the tops a light spray of cooking oil. This helps with browning and gives that “just fried” look and crunch.
Bake Time:
- Pop them in the oven for 20–25 minutes, flipping halfway through.
- Check the internal temperature with a meat thermometer. Once they hit 165°F (74°C), they’re good to go.
Tips for Crispier Tenders:
- If you want an even crispier finish, turn on the broiler for the last 1–2 minutes—just keep a close eye so they don’t burn.
- Don’t skip the oil spray! It really helps the coating crisp up without deep frying.
Once they’re out of the oven, let them rest for a couple of minutes. This helps lock in the juices and makes the coating stay crispier longer.
Flavor Variations to Try
Don’t be afraid to get creative with this recipe! Baked chicken tenders are a blank canvas for flavor. Here are some popular twists to level up your tenders:
Spicy Kick:
- Add cayenne pepper or chili powder to your flour or breadcrumb mix.
- Or toss the baked tenders in a little hot sauce right out of the oven for a buffalo-style treat.
Cheesy Goodness:
- Mix shredded cheddar or mozzarella into your breadcrumbs for a cheesy crunch.
- Or stick with Parmesan, which adds a nutty depth of flavor and crisps beautifully.
Herbed Vibes:
- Add a blend of dried basil, oregano, rosemary, and thyme to your coating for an Italian twist.
- For a Mediterranean flair, include lemon zest and chopped fresh parsley.
Kid-Friendly Options:
- Keep the seasoning mild—just salt, pepper, and a touch of garlic.
- Serve with their favorite sauce like ketchup, ranch, or honey mustard.
Adult-Only Upgrade:
- Use crushed seasoned nuts or seeds in your coating.
- Or try coconut flakes and curry powder for a tropical punch.
You can also make a combo batch—spicy on one half, herbed on the other. Everyone wins!
Dipping Sauces That Pair Perfectly
Let’s be honest: the dip can make or break the chicken tender experience. And while they’re great on their own, the right sauce takes them to another level.
Homemade Sauces:
- Honey Mustard: Mix equal parts mayo, Dijon mustard, and honey. Add a splash of lemon juice for zing.
- Garlic Aioli: Blend mayo with minced garlic, lemon juice, and a pinch of salt.
- Spicy Sriracha Mayo: Combine mayo, sriracha, a touch of lime juice, and garlic powder.
Store-Bought Go-Tos:
- Classic BBQ sauce
- Ranch dressing
- Sweet chili sauce
- Blue cheese dressing
Tips for Dipping Success:
- Serve sauces in small ramekins or bowls.
- Warm up sauces like BBQ or cheese dips slightly—they pair better with hot chicken.
- Offer a selection of dips if you’re feeding a group. Variety = happy tastebuds.
The beauty of baked chicken tenders is that they’re versatile enough to go with just about any dip, whether you’re in the mood for something tangy, sweet, creamy, or spicy.
Storing and Reheating Leftovers
Got leftovers? First off—lucky you! These tenders are just as amazing the next day if you store and reheat them right.
Storage Tips:
- Let the tenders cool completely before storing.
- Place them in an airtight container and keep in the fridge for up to 3–4 days.
- For longer storage, you can freeze them. Place on a tray to freeze individually, then transfer to a freezer-safe bag.
Reheating Tips:
- Oven method: Preheat to 375°F (190°C) and bake for 10–12 minutes. This keeps them crispy.
- Air fryer: Reheat at 375°F for 5–7 minutes.
- Microwave: Not recommended for crispiness, but it works in a pinch. Cover with a damp paper towel to keep them from drying out.
If you’re meal prepping, bake a double batch and store the extras. They make great quick lunches, snacks, or even salad toppers later in the week.
Serving Suggestions
Now that your baked chicken tenders are hot, crispy, and ready to devour, let’s talk about how to serve them up like a pro. These tenders can easily star in any meal—from game-day snacks to wholesome dinners. The beauty is in their versatility.
Meal Ideas:
- Classic Combo: Serve with fries or baked potato wedges and a dipping sauce trio.
- Light & Healthy: Plate them with a fresh garden salad or roasted veggies for a lighter meal.
- Kid-Friendly Feast: Pair with mac and cheese, carrot sticks, and apple slices.
- Chicken Tender Wrap: Wrap them in a tortilla with lettuce, tomatoes, cheese, and ranch for a killer lunch.
- Tender Salad Bowl: Top a mixed greens salad with sliced tenders, avocado, cherry tomatoes, and balsamic dressing.
Side Dish Pairings:
- Sweet Potato Fries – A healthier alternative to regular fries with a sweet-savory contrast.
- Coleslaw – Adds crunch and creaminess to the plate.
- Corn on the Cob – Especially great in the summer.
- Rice Pilaf or Quinoa – For a more filling option.
- Steamed Broccoli or Green Beans – Rounds out the meal with some greens.
Presentation Tips:
- Garnish your plate with lemon wedges for an extra zing.
- Sprinkle some chopped parsley or chives over the tenders before serving.
- Serve everything on a wooden board for a fun, family-style spread.
There are endless ways to turn these simple tenders into something spectacular. Just use what you have, get creative, and enjoy!
FAQs about Baked Chicken Tenders Recipe
Q1: How long do you bake chicken tenders in the oven?
Bake chicken tenders at 400°F (200°C) for about 18–20 minutes, flipping halfway through for even crispiness.
Q2: Should I use breadcrumbs or panko for baked chicken tenders?
Panko breadcrumbs are the GOAT—extra crispy and perfect for that golden crunch. Regular breadcrumbs work too, but they’re a bit softer.
Q3: Can I make baked chicken tenders ahead of time?
Yes! You can prep and bread them ahead, refrigerate for up to 24 hours, and bake when ready. Leftovers? Just reheat in the oven or air fryer.
Q4: Are baked chicken tenders healthier than fried?
Absolutely. Baked tenders use less oil, so they’re lighter on calories and fat—without sacrificing flavor.
Q5: What dipping sauces go well with chicken tenders?
Honey mustard, BBQ sauce, ranch, sriracha mayo… or go wild with garlic aioli. No rules—just vibes.
Q6: Can I use chicken thighs instead of tenders?
Yes, but slice them into strips for even cooking. Tenders are leaner, but thighs bring that juicy flavor.
Conclusion
They’re healthier than their fried cousins, just as crunchy, and super customizable. You can make them spicy, cheesy, herby, or keep them plain and simple for picky eaters. Add a few killer dipping sauces, pair with your favorite sides, and you’ve got a full meal that’s sure to impress.
Baking instead of frying doesn’t mean sacrificing flavor or texture—this recipe proves that. And the best part? You probably already have everything you need in your pantry and fridge.
So go ahead, bookmark this recipe, give it a try, and make it your own. Once you taste that golden crunch, you’ll never go back to fast food tenders again.


