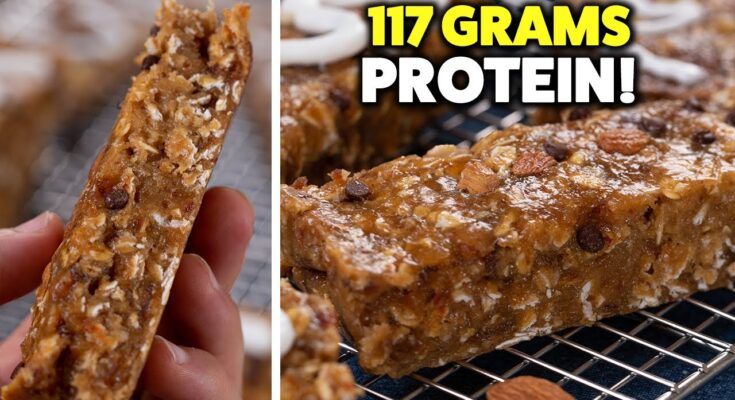
Protein Bar Recipe: Making your own protein bars at home might sound like a challenge, but trust me—it’s easier (and more rewarding) than you think. If you’ve ever grabbed a bar off the shelf and flipped it over only to find an ingredient list longer than your grocery list, you’re not alone. That’s exactly why more people are ditching store-bought snacks and rolling up their sleeves in the kitchen.
Homemade protein bars let you take full control over what you’re putting in your body. Whether you want to cut out processed sugars, boost the protein count, or just save money, DIY bars are the way to go. Plus, you can tweak the recipe every time based on what you’re craving—chocolate chip one week, peanut butter the next. Sounds pretty sweet, right?
And let’s not ignore the convenience factor. These bars are the perfect grab-and-go snack, post-workout recovery treat, or even a quick breakfast when you’re in a rush. The best part? They’re super customizable. No baking required unless you want to, and you can make a week’s worth in under 30 minutes.
Why Choose Homemade Over Store-Bought?
The biggest benefit of making your own protein bars? You’re the boss. Store-bought bars often pack in unnecessary additives, preservatives, and sugars to enhance shelf life and flavor. While that might be fine once in a while, it’s not ideal if you’re eating these bars regularly.
When you go the homemade route, you get to:
- Choose whole, nutrient-rich ingredients.
- Customize to fit dietary restrictions (vegan, keto, gluten-free, etc.).
- Avoid added sugars, artificial flavors, and fillers.
- Adjust macros based on your goals (more protein, less fat, etc.).
And let’s talk budget. A box of decent protein bars can run you $10 or more for just 5–6 bars. Meanwhile, with a few pantry staples, you can whip up 10–12 bars for a fraction of the cost. That’s a win for your wallet and your well-being.
Essential Ingredients for Protein Bars
The beauty of protein bars is that the ingredient list is flexible, but there are a few key players you’ll almost always want to include. Here’s what you’ll need:
Core Ingredients You’ll Need
- Protein Powder – This is the star of the show. Whey, plant-based, casein—use what fits your diet and taste preference.
- Nut Butter – Think almond, peanut, or cashew butter. It adds healthy fats and helps bind everything together.
- Oats – Rolled oats give the bars texture and fiber. You can use quick oats too, but rolled oats work best.
- Liquid Sweetener – Honey, maple syrup, or agave nectar are common choices. They sweeten and help with consistency.
- Milk or Dairy-Free Alternative – A splash helps moisten the mix and make it more workable.
Optional Add-ins for Flavor and Nutrition
- Dark Chocolate Chips – For that dessert-like flavor.
- Chia or Flax Seeds – Extra fiber and omega-3s.
- Dried Fruits – Like cranberries, dates, or apricots for natural sweetness.
- Coconut Flakes – Adds a tropical twist and great texture.
- Spices – Cinnamon, nutmeg, or vanilla extract can totally change the flavor profile.
These optional ingredients give you the chance to tailor the bars exactly how you like them. You want a peanut butter-chocolate combo? Go for it. Prefer a tropical coconut-date version? Easy.
Tools You’ll Need to Make Protein Bars
You don’t need fancy kitchen gear to make great protein bars. In fact, you likely already have everything you need.
Kitchen Tools Checklist
- Mixing Bowls – One for dry and one for wet ingredients.
- Measuring Cups and Spoons – Accuracy is key, especially with the wet ingredients.
- Rubber Spatula or Wooden Spoon – To mix everything together without making a mess.
- 8×8 Baking Pan – Perfect size for shaping the bars before cutting.
- Parchment Paper – Makes cleanup way easier and helps with removing the bars from the pan.
Substitutes If You Don’t Have All Tools
- No parchment paper? Use foil or lightly grease your pan with coconut oil.
- No 8×8 pan? Use any dish with flat edges; just adjust the thickness and cutting size.
Step-by-Step Guide to Making Protein Bars
Alright, let’s roll up those sleeves and get into the fun part: making the bars! This process is super simple, and once you’ve done it once, you’ll probably memorize it.
Step 1: Gather Your Ingredients
Start by pulling out everything you need. There’s nothing more annoying than starting to mix only to realize you’re out of oats or honey. Set up your station like a mini prep kitchen. Trust me, it makes things go smoother and faster.
Here’s a quick example list:
- 1 ½ cups rolled oats
- 1 cup protein powder
- ½ cup peanut butter
- ¼ cup honey
- ¼ cup almond milk
- Optional: ¼ cup chocolate chips, 2 tbsp flax seeds
Measure everything out and line your baking dish with parchment paper so it’s ready to go.
Step 2: Mix the Dry Ingredients
In a large bowl, mix your oats, protein powder, and any other dry add-ins like seeds, coconut flakes, or spices. Stir them until they’re evenly combined. This ensures that each bite of your bar will have a nice balance of flavors and textures.
Step 3: Add the Wet Ingredients
Now it’s time to add the magic—those wet ingredients that bind everything together. In a separate bowl, combine your peanut butter, honey, and almond milk. If your peanut butter is stiff, microwave it for 10–15 seconds to soften it up. This makes it easier to mix and helps evenly coat your dry ingredients.
Once smooth, pour the wet mixture into your dry bowl. Stir everything together with a spatula or your hands (yep, it gets a little messy, but it’s worth it). Mix until all the oats and powder are coated and you’re left with a sticky, thick dough. If the mix feels too dry, add a splash more milk. Too wet? Toss in a few extra oats or protein powder.
This is also the time to fold in your chocolate chips or dried fruits. Make sure they’re evenly spread so every bar gets a bit of the goodness.
Step 4: Press Into a Pan
Here’s where things start looking like actual bars. Scoop your mixture into the parchment-lined pan. Use a spatula or your hands to firmly press it down. The more you compact it, the better the bars will hold together later.
Make sure you spread the mix evenly from edge to edge. You don’t want one side to be thicker than the other—it’ll make cutting more difficult and uneven.
If you’re adding a topping, like an extra sprinkle of chocolate chips or coconut, press them into the surface now. Then, take a moment to admire your soon-to-be-snacks.
Step 5: Chill and Cut into Bars
Now, pop your pan into the fridge. Let it chill for at least 1 hour. This step is crucial because it helps the bars firm up and makes slicing clean and easy.
After chilling, lift the whole block out using the parchment paper and place it on a cutting board. Use a sharp knife to slice it into bars or squares—whatever size suits your snacking style.
Store them in an airtight container in the fridge, and boom—you’ve got homemade protein bars ready to go!
Tips for the Best Protein Bars
Once you’ve made your first batch, you’ll start learning what you like. Here are some handy tips to help you get it perfect every time.
How to Get the Texture Right
Texture is everything. Too crumbly? You probably didn’t add enough wet ingredients. Too sticky? Maybe you added a bit too much honey or milk.
Here are a few quick fixes:
- If your bars fall apart, mix in more nut butter or syrup.
- If they’re too gooey, add extra oats or protein powder a tablespoon at a time.
You want a dough that sticks together easily but doesn’t leave your hands a total mess.
Making Them Last Longer
Homemade bars won’t last as long as store-bought ones, but they’ll hold up just fine if stored properly.
Here’s how to extend their shelf life:
- Keep them in an airtight container in the fridge for up to 10 days.
- For longer storage, freeze them. Just wrap individually in parchment paper and store in a freezer bag. They’ll last up to 3 months.
Pro tip: Take a bar out of the freezer in the morning, and it’ll be perfect by snack time.
FAQs about Protein Bar Recipe
1. What basic ingredients do I need to make protein bars at home?
To whip up homemade protein bars, you generally need a protein source like whey or plant-based protein powder, a binder such as oats or nut butter, a sweetener like honey or agave syrup, and your choice of flavorings or add-ins such as nuts, seeds, or dried fruit. These essentials provide a solid foundation to experiment and tailor your bars to your taste and nutritional needs.
2. Are homemade protein bars healthier than store-bought?
Homemade protein bars often boast a healthier profile since you control the ingredients. This means you can avoid preservatives, excessive sugars, and artificial additives found in some commercial bars. By selecting whole and natural ingredients, you ensure your protein bars are not only nutritious but also catered to any dietary restrictions or preferences you might have.
3. How do I ensure my protein bars are high in protein?
The key to high-protein bars is the protein powder you choose. Use a high-quality protein powder as the base for your bars. Additionally, ingredients like nuts, seeds, and certain grains like quinoa can boost the protein content. Be mindful of the proportions to keep the flavor enjoyable and the texture palatable.
4. Can I make protein bars without nuts?
Absolutely! For those with nut allergies or preferences, seeds like sunflower or pumpkin seeds, or seed butters like sunflower butter, can be excellent substitutes. Grains and soy-based ingredients like tofu or soy protein powder are also great alternatives, providing similar nutritional benefits without the nut content.
5. How long do homemade protein bars last?
Homemade protein bars typically last about a week in the refrigerator. For longer storage, you can freeze them individually wrapped for up to three months. Always store them in an airtight container to maintain freshness and prevent them from drying out.
6. Are there any vegan options for protein bars?
Definitely! To make vegan protein bars, use plant-based protein powders like pea, hemp, or rice protein. Binders like agave syrup, maple syrup, or vegan nut butters can replace honey, and dairy-free alternatives like oat, almond, or soy milk can be used as needed. This makes it easy to create a vegan bar that’s just as tasty and nutritious.
Conclusion
Making protein bars at home is one of those small kitchen wins that pays off big. Not only are you saving money, but you’re also creating something healthier, tastier, and 100% tailored to your preferences. Once you get the hang of it, the variations are endless—peanut butter banana, coconut cacao, or even pumpkin spice if you’re feeling festive.
Whether you’re meal prepping for the week, trying to hit your macros, or just want a satisfying snack that won’t ruin your diet, these bars have your back. Give it a try—you might never go back to store-bought again.


