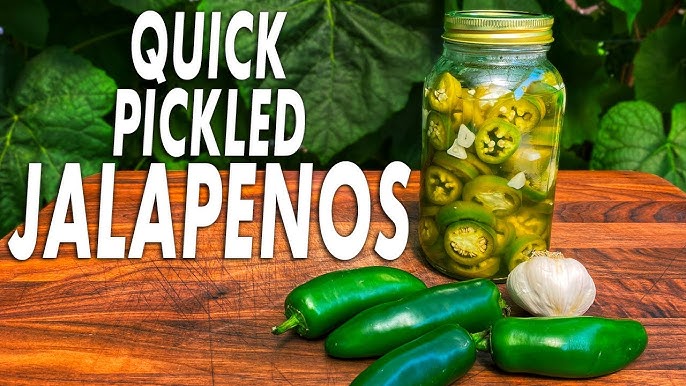
Pickled Jalapenos Recipe: There’s something magical about the bold crunch and fiery tang of pickled jalapeños. Whether you’re piling them onto nachos, tucking them into tacos, or snacking on them straight from the jar (guilty!), they add a perfect pop of flavor to practically anything.
This guide is all about showing you how to make restaurant-quality pickled jalapeños right in your own kitchen—easy, flavorful, and preservative-free.
So grab your peppers and let’s get pickling!
Why Pickled Jalapeños Are So Popular
Pickled jalapeños have long held a special spot in the hearts (and fridges) of spice lovers. Their popularity isn’t just about the heat—it’s about the balance. That vibrant zing of vinegar, the subtle sweetness, and of course, the kick of spice make them a must-have condiment. You’ll find them topping pizzas, scattered across burgers, layered into sandwiches, or even stirred into creamy dips for an extra edge.
One reason they’re so adored? Versatility. These spicy little rings of joy can elevate nearly any savory dish. And let’s not forget their shelf life—properly pickled jalapeños can last for months in the fridge, always ready to jazz up your meals. Making them at home is cost-effective and ensures you know exactly what’s in your jar (no mysterious preservatives or dyes here!).
The Perfect Blend of Spice and Tang
Pickled jalapeños hit that flavor sweet spot. Unlike fresh peppers that pack raw heat, the pickling process tames their fire just enough, replacing some of that sharp bite with complex, layered flavor. The vinegar gives them that addictive tang, while sugar balances the acidity, and garlic or spices add a savory depth.
When done right, homemade pickled jalapeños should be crunchy, vibrant, and perfectly spiced. You can even tweak the recipe to match your spice tolerance. Want them sweeter? Add more sugar. Craving more heat? Throw in some chili flakes or keep the seeds intact. It’s your jar, your rules.
Ingredients Needed for Pickled Jalapeños
Fresh Jalapeños and Why Quality Matters
The first—and most crucial—ingredient in this recipe is, of course, the jalapeños themselves. The quality of your peppers can make or break your pickles. Look for jalapeños that are:
- Firm to the touch
- Glossy and deep green (or red, if you like a slightly sweeter pepper)
- Free from soft spots or wrinkles
The fresher your peppers, the crisper your pickled slices will be. For an average-sized batch, you’ll need about 10–12 jalapeños, depending on how many jars you want to fill.
You can experiment too. Try mixing in a few slices of serrano peppers for more heat or banana peppers for a milder option.
Essential Pickling Ingredients
Besides the peppers, you’ll need a few pantry staples to whip up your pickling brine:
- White vinegar (1 cup) – for that classic, sharp pickled flavor
- Water (1 cup) – to dilute the vinegar and balance the taste
- Sugar (2 tablespoons) – to soften the acidity
- Salt (1 tablespoon, non-iodized) – helps preserve and flavor
- Garlic cloves (2–3, smashed) – adds that extra punch
- Black peppercorns (1 teaspoon) – optional, for depth
- Oregano or thyme (½ teaspoon) – adds a savory herbal note
- Bay leaf (1 or 2) – optional, but adds a nice aromatic quality
Want a smoky twist? Add a pinch of smoked paprika. Prefer them fiery? Toss in red pepper flakes or leave the jalapeño seeds in during slicing.
These ingredients come together to create a bold, tangy, slightly sweet brine that complements the natural heat of the peppers.
Equipment You’ll Need
Must-Have Tools for Pickling at Home
You don’t need a commercial kitchen setup to make pickled jalapeños, but a few basic tools will make the process smoother:
- Sharp knife or mandoline – for even, thin jalapeño slices
- Cutting board – ideally one reserved for veggies (not raw meat)
- Saucepan – for boiling your brine
- Measuring cups and spoons – accuracy is key for the perfect balance
- Glass jars with lids – mason jars work perfectly; sterilize them first
Make sure your jars are heat-safe and thoroughly cleaned. A quick boil or a run through the dishwasher on a hot cycle will do the trick.
Optional Equipment for Better Results
Want to up your pickling game? Here are a few extras that can help:
- Jar funnel – makes transferring hot liquid a mess-free job
- Tongs – for safely handling hot jars and lids
- Gloves – highly recommended when slicing spicy peppers (trust me on this!)
- Labels – so you don’t forget when you made your batch
Proper tools = easier process and better pickles.
How to Prepare Jalapeños for Pickling
Washing and Slicing Your Peppers
Cleanliness is crucial in pickling. Start by giving your jalapeños a good rinse under cool water. Scrub off any dirt and dry them thoroughly with a kitchen towel.
Next comes the slicing. Most people go for rings, about ¼-inch thick. This gives you that classic pickled jalapeño look and perfect crunch. You can slice them thicker for more bite or even pickle them whole—though that takes longer for the brine to penetrate.
Cut off the stem end and start slicing. You can remove the seeds if you want less heat, but they’re perfectly safe to eat and actually add to the flavor.
Don’t forget to keep the slices uniform—this helps them pickle evenly.
Tips for Handling Spicy Peppers Safely
Hot tip: wear gloves. Jalapeños may not be the hottest peppers out there, but the oils in their skin and seeds can stick around on your fingers long after you’re done chopping—and trust me, you don’t want to accidentally rub your eyes.
Other tips:
- Avoid touching your face while handling them.
- Wash your hands thoroughly with soap and warm water after slicing.
- If you go gloveless and feel the burn, soak your hands in milk or rub them with olive oil to cut the capsaicin.
Prepared and safe? Great. Let’s make some magic in a jar.
Step-by-Step Pickling Process
Making the Pickling Brine
This is where all the flavor magic begins. Your brine is the soul of the pickling process—infusing your jalapeños with tang, spice, and sweetness. Here’s how to make it just right.
Start by combining the following in a medium saucepan:
- 1 cup white vinegar
- 1 cup water
- 2 tablespoons sugar
- 1 tablespoon salt
- 2–3 smashed garlic cloves
- 1 teaspoon black peppercorns
- Optional: ½ teaspoon oregano or thyme, bay leaf, and chili flakes
Set your burner to medium heat and bring the mixture to a gentle boil. Stir occasionally to make sure the sugar and salt dissolve completely. Once it hits a rolling simmer and the garlic smells fragrant, your brine is ready.
Pro tip: Taste your brine before adding it to the jars. Want it a little sweeter? Add a teaspoon of sugar. Need more tang? Increase the vinegar slightly. This is your flavor playground.
Be careful not to let it boil too long—just enough to extract the aromatics and dissolve everything is perfect.
Filling and Sealing the Jars
Now for the fun part—packing your jars! You’ve got your sliced jalapeños ready, your brine bubbling on the stove, and your jars freshly sterilized.
- Fill the jars with jalapeño slices, layering in the garlic cloves and other aromatics from the brine if you like.
- Leave about ½ inch of space at the top to ensure proper sealing.
- Carefully pour the hot brine into the jar, covering the jalapeños completely.
- Use a spoon to press the peppers down and remove air bubbles.
- Seal tightly with a lid, and allow to cool at room temperature.
If you’re not canning, place the jar in the refrigerator once it’s cooled down. The pickles will be ready to enjoy in about 24 hours, but if you can wait 3–5 days, the flavor will be way better. Trust me.
Want to store them long-term? You can water-bath can the sealed jars for 10–15 minutes, then store them in a cool, dark pantry for up to a year.
Letting the Flavors Develop
Pickled jalapeños are technically “done” within 24 hours, but the real flavor explosion happens after a few days. This waiting period gives the brine time to penetrate the pepper flesh fully, mellowing the heat and boosting that tangy punch.
During this time:
- The peppers soften just a bit but stay crisp.
- The garlic and spices really infuse the liquid and peppers.
- The acidity evens out, blending the tang, sweetness, and heat into something magical.
Storage tips:
- Refrigerated jars last up to 2–3 months easily.
- Always use a clean fork or spoon to scoop them out (no fingers, please!) to avoid contamination.
- If the brine gets cloudy, smells off, or the peppers lose color dramatically, it’s time to toss the jar.
Creative Add-Ins for Unique Flavor Twists
If you’re ready to get a little wild in the kitchen, this is your section. Sure, classic pickled jalapeños are amazing on their own, but once you’ve nailed the basics, it’s time to experiment.
Here are some fun and tasty twists to try:
- Honey-Garlic Pickled Jalapeños: Swap sugar for honey and double the garlic. Sweet, spicy, and perfect for sandwiches.
- Mexican-Style: Add a few slices of carrots and onions, plus a pinch of cumin. Like taqueria-style pickles!
- Sweet Heat: Add pineapple juice to the brine for a tropical kick.
- Smoky Twist: Use smoked paprika and a splash of apple cider vinegar.
- Herb Infusion: Throw in fresh rosemary, thyme, or dill for an aromatic layer of flavor.
Each variation opens up new pairing possibilities. Want a burger topper with tropical vibes? Go pineapple. Looking to spice up a salad? Honey-garlic is your friend.
And remember—don’t be afraid to experiment. Your taste buds will thank you later.
How to Use Pickled Jalapeños in Your Cooking
Alright, you’ve got your beautiful jar of zesty pickled jalapeños. Now what? Here’s where the fun really begins—these spicy gems can jazz up just about anything.
Top Uses for Pickled Jalapeños:
- Tacos and Burritos – Instant flavor bomb. Enough said.
- Nachos – A classic pairing. Layer them over cheese and beans.
- Pizza – Add slices on top before baking for a spicy-sour kick.
- Egg Dishes – Scrambled eggs, omelets, frittatas—they all love jalapeños.
- Burgers and Sandwiches – Forget plain old pickles; this is the real flavor hero.
- Hot Dogs – Especially chili dogs. Total game-changer.
- Mac and Cheese – Yes, really. Slice ‘em up and stir into creamy pasta.
- Salads – A little heat in your greens is never a bad thing.
Got some leftover brine? Don’t toss it! It’s liquid gold. Use it in salad dressings, marinades, or even a tangy Bloody Mary.
Storing and Shelf Life of Pickled Jalapeños
How Long Do Pickled Jalapeños Last?
Once you’ve put the time into making your pickled jalapeños, you want to make sure they last. Fortunately, they’re not just delicious—they’re also pretty resilient. When stored properly, these zesty peppers can last 2 to 3 months in the refrigerator and up to a year if canned and sealed correctly.
Here’s the breakdown:
- Refrigerator Pickled Jalapeños: If you skipped the canning process and stored them in a clean, sealed jar, they’ll stay fresh in the fridge for up to 12 weeks. Just make sure they remain fully submerged in brine.
- Canned Jalapeños: If you processed your jars in a boiling water bath, they’re shelf-stable for up to a year. Store in a cool, dark place like a pantry or cupboard. Once opened, move them to the fridge and eat within a few weeks.
Signs they’ve gone bad:
- Cloudy brine or odd smells
- Mushy or discolored peppers
- Mold on the surface or inside the jar
If you notice any of the above, it’s best to discard them. Safety first.
Tips for Maximum Freshness
- Always use clean utensils when grabbing from the jar.
- Keep the jar tightly sealed.
- Don’t let the peppers poke above the brine—they can spoil faster.
Taking these steps will help you enjoy your jalapeños longer without sacrificing flavor or safety.
Common Mistakes to Avoid When Pickling Jalapeños
Pickling might seem foolproof, but even small errors can mess with your batch. Avoid these common mistakes to keep your jalapeños crunchy, spicy, and perfectly preserved:
1. Not Sterilizing Your Jars Properly
This step is often overlooked, but it’s crucial. Dirty jars can introduce bacteria, mold, and spoilage—plus your jalapeños won’t last as long. Run your jars through a hot dishwasher cycle or boil them for at least 10 minutes before use.
2. Overcooking the Jalapeños
Some folks boil the jalapeños with the brine. Don’t. That’ll make them mushy and overly soft. Always pour hot brine over raw, sliced jalapeños. This keeps the crunch alive.
3. Skipping the Sugar or Salt
Don’t think of these as “just flavor.” Sugar and salt also act as preservatives. Skimping on them can mess with the shelf life and safety of your pickles.
4. Improper Storage
Leaving jars at room temp when they should be refrigerated is a recipe for disaster—unless you’ve properly canned them. Always refrigerate if you didn’t use the water-bath method.
5. Not Waiting Long Enough Before Eating
Yes, it’s hard to wait. But letting your jalapeños marinate for at least 24–72 hours in the brine allows the flavors to develop. Jump in too soon and you’re missing out on the full magic.
Health Benefits of Pickled Jalapeños
Beyond their incredible flavor, pickled jalapeños come with a surprising number of health perks. So go ahead, grab that extra slice—your body might thank you.
1. Rich in Vitamins and Antioxidants
Jalapeños are packed with vitamin C and A, plus other antioxidants that help reduce inflammation and fight free radicals. Pickling doesn’t destroy these nutrients, so you’re still getting a solid health boost.
2. Gut Health Support
Thanks to the vinegar, pickled jalapeños can promote better digestion and gut health. While they’re not fermented (like kimchi or sauerkraut), the acidity still encourages a healthier microbiome.
3. Capsaicin Power
That spicy kick you feel? It’s called capsaicin—and it’s got some science-backed benefits. Studies suggest it may:
- Boost metabolism
- Reduce appetite
- Improve circulation
- Help relieve pain and headaches
4. Low in Calories
Pickled jalapeños are big on flavor, but low on guilt. One serving has just a handful of calories—perfect for anyone watching their intake but not wanting to skimp on taste.
Just a heads-up: if you’ve got a sensitive stomach or deal with heartburn, ease into eating spicy foods like these. Your gut will let you know if it’s too much.
Why Make Your Own Pickled Jalapeños?
Sure, you can buy pickled jalapeños from any grocery store shelf. But once you try homemade, you’ll wonder why you ever settled for store-bought. Here’s why making your own is totally worth it:
1. Total Flavor Control
Store-bought jars are often either too vinegary, too mushy, or just plain bland. When you make them yourself, you choose the spice level, the sweetness, and the extras. Want garlic? Add it. Prefer red jalapeños? Go for it.
2. No Preservatives or Mystery Ingredients
Check the label on a commercial jar and you might see things like sodium benzoate, artificial colors, and other additives. Homemade = clean, real ingredients you trust.
3. Cost-Effective
Jalapeños are cheap, especially if you buy them in bulk or grow them yourself. A big batch of homemade pickles costs just a few dollars—and makes multiple jars.
4. Customizable for Gifts or Storage
Homemade pickled jalapeños make amazing gifts. Add a cute label, a ribbon, and boom—instant homemade gift with heart and heat.
Plus, when you make multiple jars, you’ll always have your spicy sidekick ready to go.
FAQs about Pickled Jalapeños Recipe
1. What ingredients do I need for a basic pickled jalapeños recipe?
For a straightforward pickled jalapeños recipe, you’ll need fresh jalapeños, vinegar (white or apple cider), water, sugar, salt, and optional spices like garlic cloves, peppercorns, or cumin seeds to add extra flavor.
2. How long does it take to pickle jalapeños?
The actual pickling process is quite quick! Once you’ve prepared your jalapeños and brine, the jalapeños need to sit in the vinegar mixture for at least 24 hours to absorb the flavors. For optimal flavor, let them marinate in the fridge for a week.
3. Are pickled jalapeños spicy?
Yes, but the heat level can be adjusted. Pickling can mellow the peppers’ heat slightly, but they will still have a kick. You can remove the seeds and membranes to reduce spiciness, or leave them in if you prefer it hot.
4. How long can I store homemade pickled jalapeños?
Stored in an airtight container in the refrigerator, homemade pickled jalapeños can last up to 2 months. Make sure the jalapeños are fully submerged in the brine to keep them fresh and flavorful.
5. Can I use pickled jalapeños in recipes?
Absolutely! Pickled jalapeños are versatile and can be added to tacos, nachos, sandwiches, salads, and even burgers to provide a zesty spice and tang. They’re a great way to spice up any meal.
6. What’s the best way to slice jalapeños for pickling?
For even pickling and flavor distribution, slice the jalapeños into uniform rounds. If you prefer a milder flavor, you can slice them lengthwise and remove the seeds before pickling.
7. Do I need special equipment to pickle jalapeños?
No special equipment is needed. You’ll just require basic kitchen tools like a knife, cutting board, saucepan for the brine, and jars or containers for storing your pickled jalapeños.
Conclusion
There you have it—your complete, step-by-step guide to making the best pickled jalapeños you’ve ever tasted. Whether you’re a spice lover or just want to add a little zip to your meals, these tangy, crunchy, addictive peppers are about to become your new obsession.
From slicing your peppers to sealing your jars, every step brings you closer to that irresistible flavor combo of heat, tang, and crunch. And once you make your own, you’ll never want to go back to the store-bought kind.
Ready to impress your friends, upgrade your meals, and spice up your fridge? Go make a batch. Your taste buds will thank you.


