Olive Oil Cake Recipe: Have you ever tried a cake that’s incredibly moist, rich in flavor, and a little unexpected? That’s what you get with an olive oil cake. It’s the kind of dessert that surprises you—in a good way.
Unlike your usual buttery or frosted cakes, olive oil cake offers a unique texture that’s soft, tender, and dense in the most delightful way. Originating from the Mediterranean, this cake has made its way into bakeries and homes worldwide. It’s classy enough for a dinner party but simple enough for a casual weekend treat.
This cake isn’t just about substituting butter with oil; it brings its own identity to the table. The flavor profile can range from fruity and grassy to smooth and mellow, depending on the type of olive oil used. It’s one of those desserts that you can dress up or down—top it with whipped cream and berries for a showstopper or enjoy it plain with a cup of tea.
In this guide, I’ll walk you through everything you need to know, from ingredients to variations and pro tips to help you nail it every time.
Why Choose Olive Oil Over Butter?
First things first—why olive oil? It might sound odd if you’ve never baked with it before, but it’s a total game-changer. Let’s break it down.
For starters, olive oil is heart-healthy. It’s loaded with monounsaturated fats, which are great for your heart and cholesterol levels. Unlike butter, which contains saturated fats, olive oil supports a balanced diet without sacrificing flavor.
Then there’s the texture. Cakes made with olive oil tend to stay moist for longer. The oil coats the flour in a way that slows down gluten formation, resulting in a soft and tender crumb. Plus, it’s amazing at locking in moisture, which means your cake stays fresh for days without drying out.
And the flavor? Oh, the flavor. Olive oil gives the cake a subtle, fruity depth that’s not overpowering. It pairs beautifully with citrus, nuts, herbs, and even dark chocolate. You won’t taste anything greasy or weird—just a rich, elegant taste that makes you want to go in for another bite.
So yes, olive oil isn’t just a substitute—it’s a serious upgrade.
Key Ingredients You’ll Need
Let’s talk ingredients. Olive oil cake is surprisingly simple, but the quality of your ingredients makes a huge difference.
- Olive Oil: Go for extra virgin olive oil for the best flavor. If you’re worried it might be too strong, choose a lighter variety, like Arbequina or a blended EVOO.
- Flour: All-purpose flour works perfectly here. You can use cake flour for a lighter texture.
- Sugar: Granulated white sugar gives the cake structure and sweetness. You can reduce it slightly if you like.
- Eggs: These are essential for structure and richness.
- Milk or Yogurt: Adds creaminess and tang. Greek yogurt or buttermilk are great options.
- Baking Powder and Baking Soda: Helps the cake rise.
- Salt and Vanilla Extract: Don’t skip these—they boost flavor.
- Optional Add-ins: Lemon zest, orange zest, chopped nuts, or chocolate chips for extra personality.
That’s it. You probably have most of these in your kitchen already.
Kitchen Tools and Equipment
You don’t need anything fancy for this recipe, but having the right tools will make your baking experience smoother.
- Mixing Bowls: One for wet ingredients, one for dry.
- Whisk or Electric Mixer: Either will do—just don’t overmix the batter.
- Measuring Cups and Spoons: Accuracy is key.
- Spatula: For folding in ingredients and scraping the bowl clean.
- Cake Pan: A 9-inch round pan works perfectly. You can also use a loaf pan or bundt pan for different looks.
- Cooling Rack: Helps the cake cool evenly and prevents a soggy bottom.
If you’ve got these tools, you’re good to go.
Step-by-Step Olive Oil Cake Recipe
Now for the fun part—baking! Let’s break it down step by step so you know exactly what to do at each stage.
Step 1: Prepping Your Ingredients
First, gather everything. Preheat your oven to 350°F (175°C) and grease your cake pan with olive oil or line it with parchment paper. This simple step saves you the hassle of your cake sticking later.
Measure out your ingredients accurately. Sift your flour, baking powder, baking soda, and salt into a bowl. In another bowl, combine your olive oil, sugar, eggs, and vanilla. Whisk until the mixture is smooth and creamy. If you’re using citrus zest, add it here for that burst of fresh flavor.
Then, stir in your milk or yogurt slowly, alternating with the dry ingredients. You’re aiming for a silky, pourable batter. Be gentle—overmixing can make your cake dense.
Step 2: Mixing the Batter
Now that your ingredients are prepped, it’s time to bring them together. Slowly incorporate your dry mixture into the wet mixture in thirds. This gradual blending helps maintain a smooth, lump-free batter. Use a spatula or whisk to fold the ingredients together gently—this is not the time for heavy mixing. You’re looking for a silky, fluid consistency that easily pours but isn’t too runny.
If you’re adding in extras like lemon zest, orange zest, or chocolate chips, now’s the time. Gently fold them into the batter until evenly distributed. The aroma at this stage is already amazing—light, citrusy, and earthy from the olive oil.
One pro tip: Let your batter rest for 5–10 minutes before baking. This gives the flour time to hydrate fully, resulting in a softer crumb. It’s a small trick with a big payoff.
Once your batter is ready, pour it into your prepared pan. Use your spatula to level the top so it bakes evenly. Give the pan a couple of light taps on the counter to release any trapped air bubbles.
Step 3: Baking the Cake
Place your cake in the preheated oven and set your timer for 35–45 minutes. Baking times can vary depending on your oven and the type of pan you use. Loaf pans may take a bit longer, while thinner cakes bake faster.
You’ll know your cake is done when the top is golden brown and a toothpick inserted into the center comes out clean or with just a few moist crumbs. Avoid opening the oven door too often, especially in the first 20 minutes—this can cause the cake to sink in the middle.
Around the 30-minute mark, start checking for doneness every 5 minutes. Once it’s done, remove the pan from the oven and place it on a cooling rack.
Let the cake cool in the pan for 10–15 minutes. Then, run a knife around the edges to loosen it and gently turn it out onto the rack to cool completely. This part is key. The flavors develop even more as the cake rests, and slicing it too soon can ruin its structure.
Step 4: Cooling and Serving
Patience pays off here. Let the cake cool for at least 30 minutes before slicing. This gives it time to firm up and makes for cleaner slices. The olive oil continues to infuse the crumb as it cools, deepening the flavor.
When it’s finally time to serve, you’ve got options. You can keep it simple—just a light dusting of powdered sugar will do the trick. Or go for a drizzle of citrus glaze (lemon juice + powdered sugar) to amplify that zingy flavor. Another delicious option? Top it with whipped cream and fresh berries. Trust me, you’ll look like a baking genius with minimal effort.
This cake works wonderfully as a dessert, but it’s also great for breakfast or an afternoon snack. Try it with coffee, tea, or even a glass of sweet dessert wine—it plays well with all.
Tips for a Moist and Fluffy Olive Oil Cake
If you want your cake to come out perfect every time, these little secrets will help:
- Use good-quality olive oil. Don’t skimp here—it’s the star of the show. Look for a fruity, mild-flavored EVOO that complements rather than overpowers the cake.
- Don’t overmix. Once the dry ingredients are in, mix just until everything is combined. Overworking the batter can lead to a tough, dry cake.
- Room temperature ingredients. Eggs, milk, and yogurt mix better when not cold. This leads to a smoother batter and more even bake.
- Let it rest. As mentioned earlier, a short batter rest pre-bake helps hydrate the flour and improve texture.
- Cool completely before storing. Warm cake wrapped in plastic or foil will trap steam and make the crust soggy.
Want that soft, spongy texture every single time? Stick with these tips, and you’re golden.
Flavor Variations and Add-ins
One of the best things about olive oil cake is how versatile it is. The base recipe is simple and solid, making it a blank canvas for creativity. You can take it in so many different directions, depending on what you’re in the mood for.
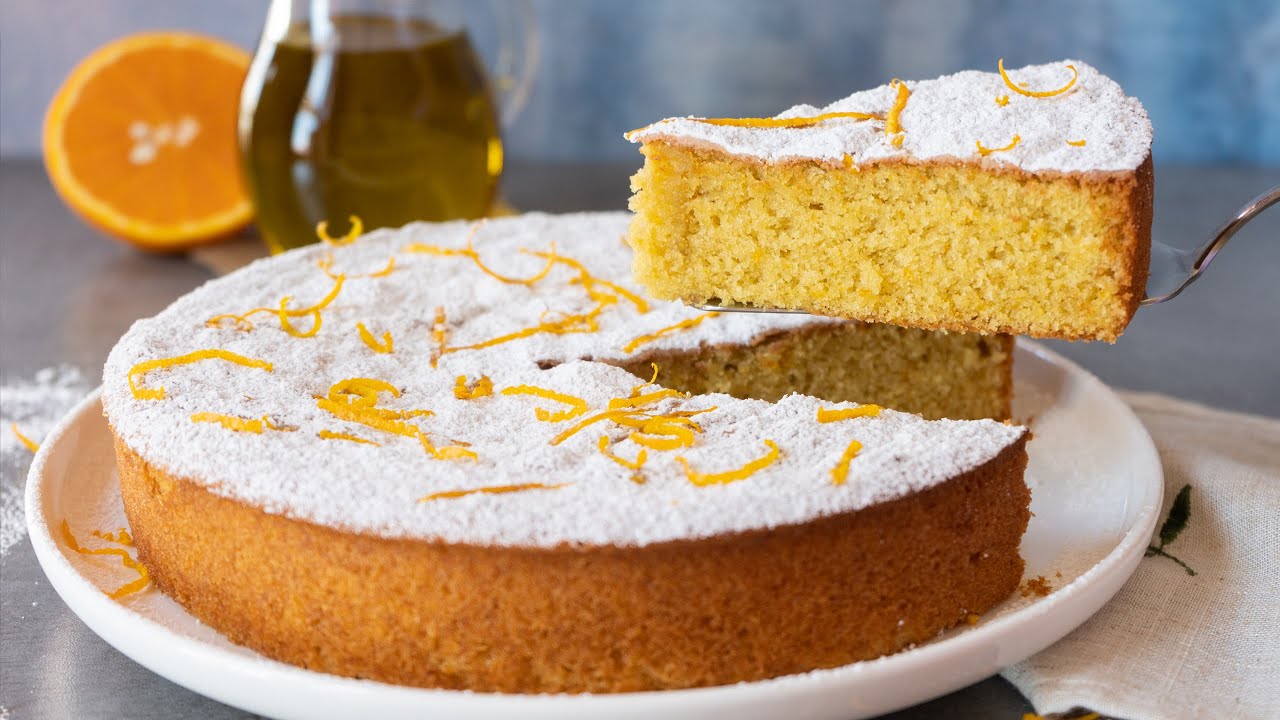
1. Citrus Olive Oil Cake
This one is a classic. Add the zest of one lemon, orange, or even a grapefruit to the batter for a refreshing burst of citrus. You can also replace a portion of the milk or yogurt with fresh juice for extra zing. A lemon glaze on top takes it to another level.
2. Chocolate-Chip Olive Oil Cake
Want something a little more indulgent? Toss in a cup of mini chocolate chips. The richness of the chocolate complements the fruity notes of the olive oil beautifully. A sprinkle of sea salt on top before baking adds a gourmet touch.
3. Almond or Hazelnut Version
Mix in a half cup of finely ground almonds or hazelnuts to the flour for a nutty, slightly crunchy texture. You can also use almond extract instead of vanilla for a different flavor profile.
4. Herb-Infused Options
Feeling adventurous? Try infusing your olive oil with fresh rosemary or thyme. Warm the olive oil with a sprig of your chosen herb, let it steep for about 10 minutes, then strain it before using in the recipe. This pairs beautifully with citrus or a subtle honey glaze.
5. Spiced Olive Oil Cake
Perfect for cooler weather. Add ground cinnamon, nutmeg, or even cardamom to your dry ingredients. These warm spices work wonders with the richness of olive oil.
Whether you’re craving something bright and citrusy, warm and spiced, or rich and chocolaty, there’s a version of olive oil cake for every palate.
Perfect Toppings and Frostings
You’ve baked a beautiful olive oil cake—now let’s dress it up. While this cake stands strong on its own, toppings and frostings can add visual appeal and elevate the flavors.
1. Simple Powdered Sugar Dusting
The easiest and most elegant finishing touch. Once the cake has cooled, use a sifter to dust a thin layer of powdered sugar over the top. It’s minimalist but classy.
2. Citrus Glaze
Mix powdered sugar with fresh lemon or orange juice until you get a thick but pourable glaze. Drizzle it over the cooled cake and let it drip down the sides. It adds flavor, sweetness, and a beautiful glossy finish.
3. Whipped Cream & Berries
This combo is light and refreshing. Add a scoop of whipped cream (homemade is best!) and a handful of fresh berries—strawberries, blueberries, or raspberries all work well.
4. Greek Yogurt Frosting
For a tangy, creamy finish, mix Greek yogurt with a little honey or powdered sugar. It’s a healthier option that pairs beautifully with citrusy or spiced cakes.
5. Caramel Drizzle or Chocolate Ganache
If you want to take it over the top, go rich. Drizzle homemade caramel or a silky chocolate ganache over the top. This turns a simple olive oil cake into a gourmet dessert.
Your topping really depends on the occasion. Want something light for brunch? Go with citrus glaze or fruit. Hosting a dinner party? Bring on the ganache!
How to Store Olive Oil Cake
Olive oil cakes are known for their longevity, but there’s still a right way to store them to keep the texture and flavor at their best.
At Room Temperature
You can store the cake covered on the counter for up to 3–4 days. Use a cake dome, airtight container, or wrap it loosely in foil. Don’t use plastic wrap directly on the cake—it can trap moisture and ruin the texture.
In the Fridge
If your kitchen is warm or humid, refrigeration might be a better option. Wrap the cake in parchment or wax paper, then foil, and place it in an airtight container. It can last up to a week this way. Let it come to room temperature before serving.
Freezing Tips
Yes, olive oil cake freezes beautifully! Wrap individual slices in parchment paper, then foil, and place them in a freezer-safe zip-top bag. It’ll keep for up to 3 months. Thaw in the fridge or at room temp. To refresh it, pop it in a low oven (300°F) for 5–10 minutes.
A well-stored olive oil cake is like fine wine—it just gets better the next day.
Serving Suggestions
Olive oil cake is the kind of dessert that fits into any moment—morning, afternoon, or night. Here are a few ideas to serve it up like a pro:
1. Coffee or Tea Pairing
There’s something magical about a slice of olive oil cake with a hot beverage. The slightly fruity, moist crumb complements espresso, cappuccino, or a bold black tea perfectly. Try pairing citrus versions with Earl Grey or herbal teas for a light treat.
2. Brunch Favorite
Hosting brunch? Skip the store-bought pastries and serve olive oil cake instead. It feels fancy but comes together with minimal effort. Add a side of yogurt and fruit, or top it with a citrus glaze for an elegant finish.
3. Dinner Party Dessert
Serve it with a dollop of whipped cream, a scoop of gelato, or a drizzle of honey. Add a sprig of mint and a few fresh berries for a restaurant-style presentation. Bonus: It’s light enough to end a big meal without overwhelming your guests.
4. Holiday and Seasonal Events
Olive oil cake makes a great addition to Easter, Christmas, or even Thanksgiving tables. Add seasonal flavors like orange, cinnamon, or cranberry to match the vibe.
5. Wine Pairing
Yes, you can totally serve this with wine. A sweet Moscato or even a light Prosecco complements the fruity notes. For a more indulgent twist, go with a dessert wine like Vin Santo or a late-harvest Riesling.
It’s not just cake—it’s a moment. The versatility of olive oil cake lets it shine on any occasion.
Olive Oil Cake for Special Diets
What if you’re baking for someone with dietary restrictions? Don’t worry, olive oil cake is flexible.
1. Dairy-Free
This cake is naturally dairy-free if you use non-dairy milk like almond, oat, or soy. Instead of yogurt, use coconut yogurt or a plant-based alternative. The result is still incredibly moist and flavorful.
2. Gluten-Free Version
Swap the all-purpose flour for a gluten-free blend. Look for 1-to-1 baking mixes that include xanthan gum for structure. Almond flour or oat flour can also work, though the texture may be a little more delicate.
3. Vegan Olive Oil Cake
No eggs? No problem. Use flax eggs (1 tbsp ground flax + 3 tbsp water = 1 egg) or unsweetened applesauce as an egg replacer. Combine that with non-dairy milk, and you’ve got a fully vegan version that still delivers on flavor and texture.
Olive oil cake is one of those rare treats that doesn’t require a lot of tweaks to accommodate different diets. Just a few swaps and you’re good to go.
FAQs about Olive Oil Cake Recipe
What type of olive oil is best for baking a cake?
For baking, it’s ideal to use a light or mild olive oil. These types have a softer flavor profile that won’t overpower the other ingredients in your cake. Extra virgin olive oil can also be used for a more pronounced flavor, especially in recipes that call for citrus or herbal notes.
Can I substitute olive oil for butter in cake recipes?
Yes, you can substitute olive oil for butter in most cake recipes. A general rule of thumb is to use three-quarters the amount of olive oil as you would butter. So, if your recipe calls for 1 cup of butter, use ¾ cup of olive oil.
Is olive oil cake healthier than regular cake?
Olive oil cake can be considered healthier than cakes made with saturated fats like butter or margarine. Olive oil is rich in monounsaturated fats, which are known to be heart-healthy. However, it’s still important to enjoy olive oil cake in moderation as it is dense in calories.
How do I ensure my olive oil cake is moist and fluffy?
To keep your olive oil cake moist and fluffy, make sure not to over-mix the batter. Over-mixing can develop the gluten in the flour, leading to a dense texture. Also, ensure your leavening agents like baking powder are fresh to help the cake rise properly.
Can olive oil cake be made vegan?
Absolutely! To make a vegan olive oil cake, substitute the eggs with a plant-based alternative like applesauce, mashed bananas, or a commercial egg replacer. Also, ensure that the other ingredients like sugar are vegan-friendly.
How long can I store an olive oil cake?
An olive oil cake can be stored at room temperature, covered, for up to three days. For longer storage, you can keep it in the refrigerator for up to a week or freeze it for up to three months. Make sure to wrap it well to maintain its moisture and flavor.
Conclusion
Olive oil cake might just be your new favorite go-to dessert. It’s rich yet light, simple yet sophisticated, and endlessly customizable. Whether you want something to serve with tea, bring to a brunch, or impress dinner guests, this cake checks every box. With a short ingredient list, easy steps, and incredible results, it’s the kind of recipe that feels both homey and elegant.
So go ahead—grab that bottle of olive oil and get baking. Once you try it, there’s no going back.


