Madeleine Recipe: There’s something magical about that first bite of a freshly baked madeleine—crispy on the outside, soft and buttery on the inside. These shell-shaped French treats are not only delicious but also surprisingly easy to make at home.
If you’ve ever wanted to try baking madeleines from scratch, this step-by-step guide will walk you through the process in detail. Let’s get baking!
What Are Madeleines?
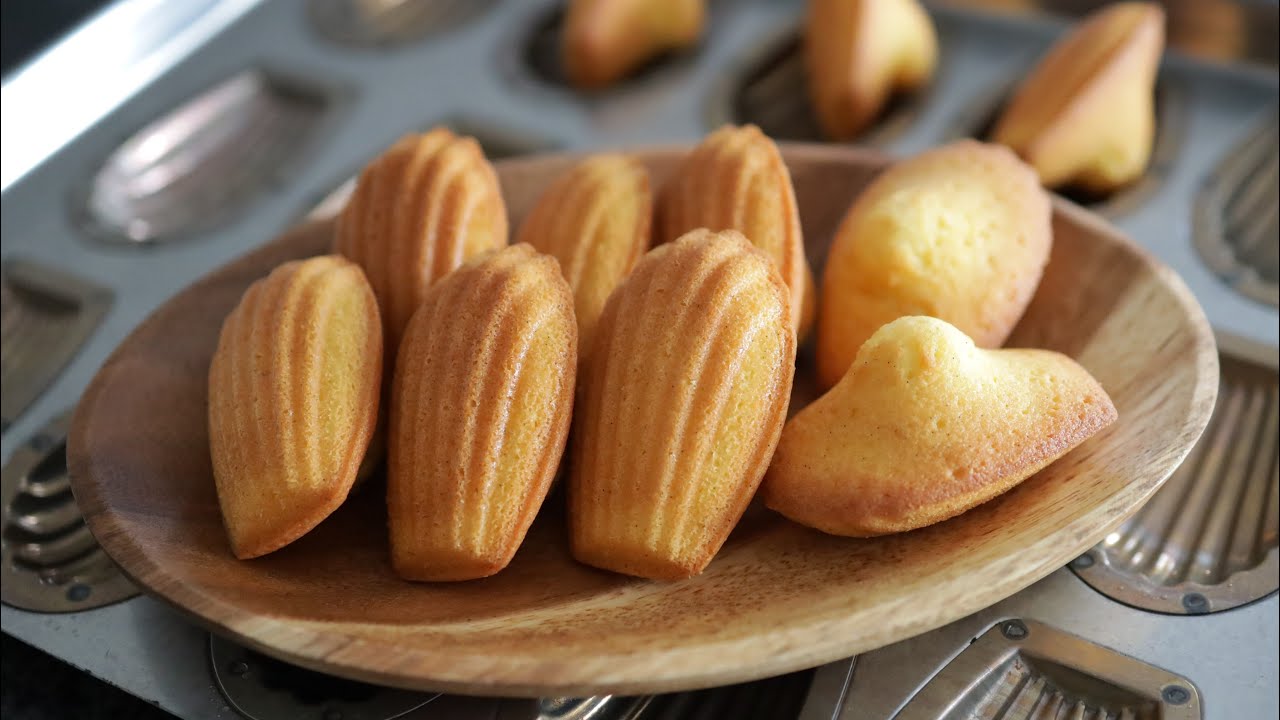
Madeleines are small, shell-shaped sponge cakes that originated in France. Often mistaken for cookies because of their size and shape, these dainty desserts are light, airy, and infused with a subtle buttery flavor. They’re typically made with simple ingredients—eggs, sugar, flour, and butter—and often enhanced with a splash of vanilla or lemon zest.
What makes madeleines so special is their unique texture: soft and pillowy on the inside with a golden, slightly crisp exterior. When made correctly, each madeleine forms a signature hump on its back—a sign of perfect technique and proper chilling of the batter.
Madeleines are often served with a dusting of powdered sugar and enjoyed alongside a cup of tea or coffee. Whether you’re looking to impress guests or treat yourself to a French delicacy, madeleines are an elegant yet approachable choice for home bakers.
Brief History of Madeleines
The origin of madeleines is shrouded in mystery, but most agree that they date back to the 18th century in the Lorraine region of northeastern France. One popular story credits a young servant named Madeleine Paulmier, who baked these treats for the Duke of Lorraine, inspiring the name. Since then, madeleines have become a staple in French patisserie, famously adored by writer Marcel Proust, who immortalized them in his novel “In Search of Lost Time.”
Ingredients Needed for Classic Madeleines
Essential Pantry Ingredients
One of the best things about madeleines is how few ingredients they require—most of which are probably already in your kitchen. Here’s what you’ll need for a traditional recipe:
- 3 large eggs (at room temperature)
- 2/3 cup granulated sugar
- 1 cup all-purpose flour
- 1/2 tsp baking powder
- 1/2 cup unsalted butter (melted and slightly cooled)
- 1 tsp pure vanilla extract
- Zest of 1 lemon (optional, for a citrusy note)
- A pinch of salt
- Powdered sugar (for dusting, optional)
Each ingredient plays a key role. The eggs and sugar create the base structure, while the butter adds richness. The baking powder helps develop the characteristic hump, and the lemon zest brings brightness that balances the buttery flavor.
Optional Flavor Variations
Once you’ve mastered the classic madeleine, you can get creative with flavor twists. Here are a few ideas:
- Chocolate Madeleines: Add 2 tablespoons of unsweetened cocoa powder and a handful of mini chocolate chips.
- Almond Madeleines: Substitute part of the flour with finely ground almonds for a nutty richness.
- Lavender or Earl Grey: Infuse your melted butter with dried lavender buds or Earl Grey tea leaves before mixing into the batter.
These variations let you put your own spin on the recipe while keeping the essence of the madeleine intact.
Tools and Equipment Required
Must-Have Baking Tools
Even though madeleines feel fancy, you don’t need a professional bakery setup to make them. Here’s a quick list of must-have tools:
- Mixing bowls (one for dry, one for wet ingredients)
- Electric hand mixer or stand mixer
- Whisk
- Rubber spatula
- Zester (if using lemon)
- Measuring cups and spoons
Having your tools prepped and ingredients measured before you start helps everything go smoothly.
Madeleine Pan: Why It’s Crucial
The one piece of equipment you can’t skip? A madeleine pan. This is what gives madeleines their iconic shell shape. These pans are typically made of metal, with shallow shell-like indentations. You can find them in non-stick or traditional steel varieties, and both work well as long as they’re properly greased and floured.
Using a different type of pan, like muffin tins, won’t yield the same results. The shell pattern isn’t just for aesthetics—it helps cook the batter evenly and contributes to the perfect texture.
Preparing the Madeleine Batter
Step 1: Mixing the Dry Ingredients
Start by whisking together your dry ingredients: flour, baking powder, and salt. This ensures the leavening agent is evenly distributed throughout the batter, which helps with even rising during baking.
You can sift the flour mixture if you want an extra-light texture, but it’s not absolutely necessary. Just be sure there are no lumps.
Step 2: Beating the Eggs and Sugar
In a separate large mixing bowl, add the eggs and sugar. This step is crucial: beat the mixture for about 5–7 minutes until it becomes pale, thick, and almost tripled in volume. This incorporates air into the batter, helping the madeleines rise and giving them their signature fluffiness.
You can use a hand mixer or stand mixer for this part. You’ll know you’ve reached the right consistency when the mixture falls from the beaters in thick ribbons.
Step 3: Incorporating Butter and Flavorings
Once your eggs and sugar are whipped to perfection, gently fold in your flavorings—vanilla extract and lemon zest. Then, slowly add in the dry ingredients, folding them in with a rubber spatula.
Finally, pour in the melted butter. This should be slightly cooled to avoid cooking the eggs. Fold it in gently until fully incorporated. The result will be a silky, rich batter ready for chilling.
Chilling the Batter for the Best Results
Why Chilling Matters
Here’s the secret weapon to madeleines with that iconic hump: chilling the batter. Resting the batter in the fridge for at least one hour (preferably overnight) allows the gluten to relax and the flavors to meld. More importantly, it helps the cold batter hit the hot oven, creating steam that lifts the center and forms the hump.
Skipping this step can lead to flat madeleines that still taste good—but don’t have that wow factor.
How Long Should You Chill?
The ideal chilling time is overnight, but if you’re in a hurry, chill for at least 1 hour. Cover the bowl tightly with plastic wrap before refrigerating. You can even keep it chilled for up to 2 days if needed—just give it a gentle stir before scooping into the pan.
Baking the Madeleines
Preheating the Oven
Before you even think about pouring that chilled batter into the pan, make sure your oven is fully preheated to 375°F (190°C). This is crucial. Madeleines rely on a blast of heat at the beginning to create their classic hump. If your oven is under-heated, you’ll end up with flat, uninspired cakes.
Also, position your oven rack in the center to ensure even heat distribution.
Greasing and Filling the Pan
Whether you’re using a non-stick madeleine pan or a traditional one, it’s essential to grease and flour each cavity thoroughly. Even non-stick pans can betray you if you skip this step.
Here’s a quick way to do it:
- Melt a small amount of butter and brush it into the molds.
- Lightly dust with flour, then tap out the excess.
Now, take your chilled batter and use a small spoon or piping bag to fill each shell cavity about ¾ full. Don’t spread it flat—just scoop and let it sit. The batter will spread as it bakes.
Baking Time and Tips
Place the pan in your preheated oven and bake for 10 to 12 minutes. You’ll know they’re done when the edges are golden brown and the centers have risen into a beautiful hump.
Resist the urge to open the oven too early, as it could affect the rise. Once baked, remove them immediately from the pan and cool on a wire rack. If you wait too long, they might stick, even if you greased the pan.
Finishing Touches and Serving Suggestions
Dusting and Dipping
Once your madeleines have cooled slightly, it’s time to add the final touch. A light dusting of powdered sugar is traditional and adds just the right amount of sweetness.
Want to jazz it up? Try dipping one end of the madeleine into melted dark chocolate or drizzle them with a citrus glaze made from powdered sugar and lemon juice.
When and How to Serve
Madeleines are best enjoyed freshly baked, still slightly warm. That’s when the outside is crisp and the inside is soft and tender. If you’re hosting, they make an elegant addition to a dessert table or afternoon tea.
They also pair beautifully with:
- Espresso or coffee
- Herbal teas
- Fruit compotes or jams
These little cakes elevate any moment into something special.
Storing and Freezing Madeleines
Storing for Freshness
Madeleines are best the day they’re baked, but you can still enjoy them for a few days. Keep them in an airtight container at room temperature for up to 3 days. To preserve their texture, don’t refrigerate them—they’ll dry out quickly.
If they start to go a bit soft, a few minutes in a low oven (around 300°F or 150°C) will revive them nicely.
Freezing for Later
Want to make a batch ahead of time? Madeleines freeze surprisingly well. Let them cool completely, then wrap each one individually in plastic wrap and place in a freezer-safe bag or container.
They’ll keep for up to 2 months in the freezer. To enjoy, just thaw at room temperature or warm gently in the oven before serving.
Common Mistakes to Avoid
Even though madeleines are relatively simple, a few common pitfalls can mess up your bake. Here are some of the most frequent mistakes and how to avoid them:
1. Overfilling the Pan
If you fill the molds too much, your madeleines will overflow and lose their elegant shape. Stick to ¾ full for the perfect size and rise.
2. Not Chilling the Batter
We mentioned it earlier, but it bears repeating—chilling is essential. Without it, your madeleines won’t form the iconic hump and the texture will be off.
3. Skipping the Butter & Flour on the Pan
This is not the time to rely solely on non-stick pans. Always brush with melted butter and dust with flour to ensure your madeleines pop out effortlessly.
4. Overmixing the Batter
Once you start folding in the flour and butter, be gentle. Overmixing can deflate the air you whipped into the eggs, resulting in dense cakes.
5. Baking Too Long
They may be small, but they bake quickly. Set a timer, and watch them closely from the 9-minute mark onward. Overbaked madeleines will be dry and crumbly.
Tips and Tricks for Perfect Madeleines Every Time
Use Room Temperature Ingredients
This might sound minor, but using room temperature eggs and butter helps everything blend more smoothly and evenly. Cold eggs won’t whip up with as much volume, which means less fluff and less rise.
Take your eggs out of the fridge at least 30 minutes before starting. If you forget, a quick hack is to place them in a bowl of warm (not hot) water for 5–10 minutes.
Use High-Quality Butter and Vanilla
With such a short ingredient list, quality matters. Use real unsalted butter—not margarine—and go for pure vanilla extract over imitation. These two ingredients define the flavor profile of madeleines, and better quality equals better taste.
Let the Batter Rest Overnight
Yes, we’ve said it before—but it’s worth repeating: letting the batter rest overnight is one of the top secrets to creating bakery-level madeleines. It improves texture, flavor, and helps form that signature hump.
Try Flavor Infusions
Get creative with your butter! Before melting, try infusing it with:
- Crushed cardamom pods
- Earl Grey tea leaves
- Fresh herbs like rosemary or basil (just a small amount)
Strain before adding to the batter for a subtle, sophisticated twist.
Madeleine Flavor Variations to Explore
Once you’ve got the classic version down, it’s time to have fun. Here are some tasty variations that go beyond lemon zest.
Chocolate Madeleines
Replace 2 tablespoons of flour with cocoa powder and add chocolate chips or dip the finished product in melted dark chocolate. These are rich, indulgent, and perfect for dessert lovers.
Orange and Honey
Add the zest of an orange and 2 tablespoons of honey to the batter. The result? Bright, fragrant madeleines with a floral sweetness.
Matcha Madeleines
Sift in 1–2 teaspoons of matcha green tea powder for a gorgeous green hue and earthy flavor. Matcha pairs beautifully with white chocolate or a dusting of powdered sugar.
Coconut-Lime
Add shredded coconut and lime zest for a tropical vibe. A drizzle of coconut glaze will take it over the top.
Don’t be afraid to experiment—madeleines are wonderfully versatile.
Why Your Madeleines Didn’t Turn Out (and How to Fix Them)
Sometimes, despite our best efforts, things go sideways. Here’s how to troubleshoot the most common issues:
Flat Madeleines (No Hump)
Likely cause: Batter wasn’t chilled long enough or oven wasn’t hot enough.
Fix: Chill for at least 1 hour (preferably overnight) and preheat your oven properly.
Sticking to the Pan
Likely cause: Insufficient greasing or using too much butter without flour.
Fix: Always brush the pan with butter and lightly dust with flour—or use baking spray with flour.
Rubbery Texture
Likely cause: Overmixing the batter or overbaking.
Fix: Gently fold ingredients and set a timer to avoid overbaking.
Collapsed Madeleines
Likely cause: Opening the oven door too early.
Fix: Avoid opening the oven during the first 8–9 minutes. Let them bake undisturbed.
Madeleines vs. Cookies – What’s the Difference?
Madeleines are often mistaken for cookies, but they’re actually miniature sponge cakes. Here’s a quick comparison:
| Feature | Madeleines | Cookies |
|---|---|---|
| Texture | Light, fluffy, spongy | Chewy or crunchy |
| Ingredients | Similar to cake batter | Higher in fat/sugar |
| Method | Whipped eggs, folded batter | Creamed butter and sugar |
| Shape | Shell-shaped | Various (round, bars, etc.) |
| Origin | France | Globally varied |
If you’re looking for something that’s both elegant and simple, madeleines give you the best of both worlds: the refinement of French pastry with the comfort of a homemade treat.
FAQs about Madeleine Recipe
1. What are the key ingredients in a traditional Madeleine recipe?
Traditional Madeleines require simple ingredients: flour, sugar, butter, eggs, and usually a hint of lemon zest for a subtle citrus flavor. Baking powder is also commonly used to help them rise.
2. How do you achieve the classic Madeleine “bump”?
The characteristic bump in Madeleines, often referred to as the “belly”, can be achieved by chilling the batter before baking. This causes the butter to solidify, which then rapidly expands in a hot oven, creating that distinct bump.
3. Can Madeleines be flavored differently?
Absolutely! While lemon zest is traditional, you can add various flavors to your Madeleines such as almond extract, orange zest, or even incorporate spices like cinnamon or vanilla into the batter.
4. How long do Madeleines stay fresh?
Madeleines are best enjoyed fresh, ideally within 24 hours of baking. However, they can be kept for up to two days in an airtight container at room temperature.
5. Are there any tips for perfect Madeleines?
Ensure your ingredients are at room temperature before starting, and be careful not to overmix the batter to keep the Madeleines light and fluffy. Also, greasing and flouring your Madeleine pan will help achieve a perfect shell shape without sticking.
6. Can you make Madeleines without a Madeleine pan?
While a Madeleine pan is recommended for the traditional shell shape, you can use a mini muffin pan as an alternative. The texture and flavor will be similar, though the iconic shape will be different.
Conclusion
So there you have it—a complete, step-by-step guide to making classic French madeleines right in your own kitchen. Whether you’re new to baking or a seasoned pro, this recipe offers the perfect blend of elegance, simplicity, and delicious results. By following the tips, tools, and techniques shared in this guide, you’ll be on your way to mastering the art of madeleine baking. Get ready to impress your friends, family, or just treat yourself to a little taste of France!


