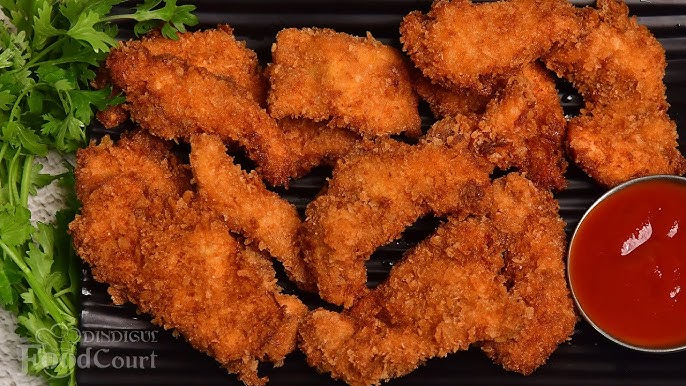
Chicken Strips Recipe: Chicken strips are a beloved snack and meal option worldwide. They’re crispy on the outside, juicy on the inside, and versatile enough to pair with countless dips and sides.
Whether you’re hosting a party, preparing a quick dinner, or satisfying a craving, chicken strips are always a hit.
In this guide, I’ll walk you through a foolproof, step-by-step process to make delicious, perfectly crispy chicken strips right in your kitchen.
Ingredients Needed for Chicken Strips
Before you start, gather all the ingredients. Fresh, high-quality ingredients will make a big difference in both flavor and texture. Here’s what you’ll need:
- Chicken breast (or thighs) – 2 lbs
- All-purpose flour – 1 cup
- Breadcrumbs or panko – 1 cup
- Eggs – 2 large
- Milk – 2 tablespoons
- Salt and pepper – to taste
- Garlic powder – 1 teaspoon
- Paprika – 1 teaspoon
- Oil (for frying) – Vegetable or canola oil
- Optional spices – Cayenne pepper, onion powder, Italian seasoning
Feel free to adjust the spices according to your taste preferences!
Kitchen Tools and Equipment
You don’t need fancy gadgets, but a few basic tools will make the process easier:
- Cutting board
- Sharp knife
- Mixing bowls (for marinating and coating)
- Tongs or a slotted spoon (for handling the strips)
- Deep fryer or large frying pan (for frying)
- Baking sheet (if you choose to bake)
- Wire rack (to drain excess oil after frying)
Optional but helpful:
- An air fryer for healthier strips
- A thermometer to check the oil temperature
Preparing the Chicken
Start by prepping the chicken properly. You can use either chicken breast or thighs, but most people prefer breasts since they’re leaner and easier to cut into strips.
- Wash and pat dry the chicken with paper towels.
- Slice the chicken into even strips, about 1 inch wide and 4–5 inches long.
- Try to keep the strips uniform in size so they cook evenly.
This step is crucial for achieving tender, evenly cooked chicken strips. Smaller pieces will cook faster but can dry out if you’re not careful.
Marinating the Chicken
Marinating infuses the chicken with flavor and helps keep it juicy. Here’s a simple but effective marinade:
- In a bowl, mix 2 beaten eggs with 2 tablespoons of milk.
- Add salt, pepper, garlic powder, paprika, and any other seasonings you prefer.
- Place the chicken strips in the bowl, ensuring they are fully coated.
- Cover and refrigerate for at least 30 minutes. For more flavor, marinate for up to 4 hours.
Marinating not only enhances the taste but also tenderizes the chicken, making each bite flavorful and juicy.
Preparing the Coating
For that signature crunch, you’ll need a good coating mixture. You can choose between flour, breadcrumbs, or panko, depending on your preference:
In a shallow dish, combine:
- 1 cup of all-purpose flour
- 1 cup of breadcrumbs or panko (for extra crunch)
- Spices: garlic powder, paprika, and a pinch of salt
Set up a coating station with three bowls:
- One for flour
- One for the egg mixture
- One for breadcrumbs
The secret to super-crispy chicken strips is double-coating. I’ll explain this in more detail below.
Breading Techniques
Breading might seem simple, but if you skip steps or get sloppy, your chicken won’t be as crispy. Here’s how to do it right:
- Dredge the chicken: Dip each strip in the flour to coat lightly. Shake off the excess.
- Dip in the egg: Submerge the floured strip in the egg mixture.
- Coat with breadcrumbs: Roll the strip in the breadcrumbs until fully coated. Press gently to help the crumbs stick.
For extra crunch, repeat the process by dipping the strips back in the egg and breadcrumbs.
Frying vs. Baking – Cooking Methods
You can fry or bake your chicken strips depending on your preference. Both methods have their advantages:
- Frying gives you that restaurant-quality golden crust but requires more oil.
- Baking is healthier and less messy but may not be as crispy unless you follow special techniques.
In the next sections, I’ll cover both methods in detail.
Step-by-Step Instructions for Frying Chicken Strips
Frying is the traditional method for cooking chicken strips. If done correctly, you’ll get golden, crispy strips with juicy centers. Here’s how to fry like a pro:
- Preheat the oil: Pour enough oil into a deep fryer or large pan to cover the strips. Heat to 350°F (175°C). Use a thermometer to monitor the temperature.
- Test the oil: To check if the oil is ready, drop a small piece of bread or breadcrumb into the oil. If it sizzles and turns golden in about 30 seconds, you’re good to go.
- Fry in batches: Gently lower the coated chicken strips into the oil. Don’t overcrowd the pan—this will lower the temperature and result in greasy, soggy strips.
- Cook until golden: Fry the strips for 4–5 minutes per side or until the internal temperature reaches 165°F (74°C).
- Drain on a wire rack: Remove the strips from the oil with tongs or a slotted spoon and place them on a wire rack to drain excess oil. This keeps them crispy.
For best results, maintain consistent oil temperature and avoid turning the strips too often.
Step-by-Step Instructions for Baking Chicken Strips
If you prefer a healthier option, baking is a great alternative. While it takes longer than frying, you can still achieve a deliciously crispy result with these steps:
- Preheat the oven: Set the oven to 425°F (220°C). Line a baking sheet with parchment paper or lightly grease it with oil.
- Prepare the chicken: Coat the strips as described earlier. To enhance crispiness, spray or brush the breaded chicken with a little oil.
- Bake the strips: Arrange the chicken strips on the baking sheet, leaving space between each one. Bake for 20–25 minutes, flipping halfway through.
- Check doneness: The strips should be golden brown and have an internal temperature of 165°F (74°C).
For even crispier results, you can broil the strips for 1–2 minutes at the end.
Alternative Cooking Methods (Air Fryer, Grill)
Looking for more options? Try these methods for cooking chicken strips:
Air Fryer Method
- Preheat the air fryer to 400°F (200°C).
- Arrange the strips in a single layer. Spray with oil for extra crispiness.
- Cook for 12–15 minutes, flipping halfway through.
The air fryer method uses minimal oil and gives you a crispy result with fewer calories.
Grill Method
- Preheat the grill to medium-high heat.
- Lightly oil the grates to prevent sticking.
- Grill the strips for 4–6 minutes per side until fully cooked.
Grilled chicken strips have a smoky flavor and pair well with barbecue sauces.
Tips for Ensuring Maximum Crispiness
Want chicken strips that stay crispy even after they cool down? Here are some expert tips:
- Double coating: A second layer of breading ensures extra crunch.
- Use panko breadcrumbs: These create a crispier texture than regular breadcrumbs.
- Avoid overcrowding: Whether frying or baking, too many strips in the pan or on the tray will trap steam, making the strips soggy.
- Keep the oil hot: Low oil temperatures cause the breading to absorb oil, resulting in greasy strips.
Serving Suggestions
Chicken strips are incredibly versatile and go well with various sides and sauces. Here are some ideas to complete your meal:
Sides:
- French fries
- Coleslaw
- Mashed potatoes
- Roasted vegetables
Dips and Sauces:
- Ranch dressing
- Barbecue sauce
- Honey mustard
- Buffalo sauce
Want to switch things up? Serve the strips in wraps, tacos, or over salads for a quick, satisfying meal.
Storing and Reheating Leftover Chicken Strips
If you have leftovers (unlikely, but possible!), proper storage and reheating will keep them delicious:
Storage: Place cooled chicken strips in an airtight container. Store in the refrigerator for up to 3 days.
Reheating options:
- Oven: Reheat at 375°F (190°C) for 10–12 minutes to restore crispiness.
- Air Fryer: Reheat at 400°F (200°C) for 5–7 minutes.
- Microwave: Use only if you’re in a hurry—microwaving can make the strips soggy.
Common Mistakes to Avoid
Even seasoned cooks can slip up. Avoid these common mistakes to ensure perfect chicken strips every time:
- Skipping the marination: Without marination, your chicken may lack flavor and tenderness.
- Overcrowding the pan: This lowers the oil temperature, resulting in greasy and undercooked strips.
- Inconsistent coating: Uneven breading leads to soggy or patchy strips. Always coat evenly and thoroughly.
- Ignoring oil temperature: Hot oil is key to crispy strips. Use a thermometer to maintain the right temperature.
Nutritional Information
Here’s a general breakdown of the nutritional content per serving (about 3–4 strips), assuming you fry the chicken:
| Nutrient | Amount |
|---|---|
| Calories | 320–400 kcal |
| Protein | 25g |
| Carbohydrates | 30g |
| Fat | 12–18g |
| Fiber | 2g |
For a lighter option, bake or air-fry your chicken strips and reduce the amount of oil used.
FAQs about Chicken Strips Recipe
1. What are the best cuts of chicken to use for chicken strips?
The best cuts for making chicken strips are boneless, skinless chicken breasts or thighs. Chicken breasts are leaner and tend to be the most popular choice due to their uniform shape, making them easy to slice into even strips.
2. How can I make my chicken strips crispy without deep frying them?
To achieve crispy chicken strips without deep frying, you can bake them in the oven. Coat your chicken strips in a mixture of breadcrumbs, parmesan cheese, and spices, then lay them on a wire rack over a baking sheet. Bake at a high temperature, such as 400 degrees Fahrenheit, until they are golden and crispy.
3. What are some healthy dipping sauces for chicken strips?
For healthier dipping options, consider Greek yogurt-based dips, homemade salsa, guacamole, or a honey mustard sauce made with Greek yogurt instead of mayonnaise. These options provide flavor without too many additional calories.
4. Can chicken strips be made gluten-free?
Absolutely! To make gluten-free chicken strips, use almond flour or coconut flour instead of regular flour and opt for gluten-free breadcrumbs or crushed gluten-free cereal for the coating.
5. Are there any tips for making chicken strips in an air fryer?
Using an air fryer can help make chicken strips that are crispy on the outside and tender on the inside. Preheat your air fryer, lightly oil the chicken strips, and cook them in batches at 360 degrees Fahrenheit for about 10-15 minutes, flipping halfway through. Ensure they are spaced out in the air fryer to allow air circulation for maximum crispiness.
6. How long do cooked chicken strips last in the fridge?
Cooked chicken strips can be stored in the refrigerator in an airtight container for up to three days. Make sure they are cooled to room temperature before refrigerating to maintain the best quality.
7. Can I freeze cooked chicken strips?
Yes, cooked chicken strips freeze well. Place them in a single layer on a baking sheet to freeze individually, then transfer to a freezer-safe bag or container. They can be stored for up to three months. Reheat in the oven or microwave until heated through.
Conclusion
Congratulations—you now have all the tools and tips to make the perfect chicken strips! Whether you fry, bake, or air-fry them, these golden, crispy delights are sure to be a hit. Don’t be afraid to experiment with different seasonings and dipping sauces to create your own signature version. Happy cooking!