Burger Bun Recipe: There’s something magical about biting into a juicy burger with a freshly baked bun. Homemade burger buns elevate your burgers to a whole new level with their fluffy texture and rich, buttery flavor. While store-bought buns might be convenient, they often lack the freshness, taste, and quality that homemade ones offer. Plus, making your own allows you to control the ingredients, ensuring they are free of preservatives and artificial flavors.
In this guide, I’ll walk you through a simple, step-by-step recipe to make soft, flavorful burger buns from scratch. Whether you’re a beginner or an experienced baker, this recipe is easy to follow and guarantees amazing results.
Ingredients Required for Burger Buns
Before we get started, let’s go over the ingredients you’ll need. Here’s the list:
Main Ingredients:
- All-purpose flour – 4 cups
- Active dry yeast – 2 ¼ teaspoons
- Sugar – 2 tablespoons
- Salt – 1 teaspoon
- Butter (melted) – 3 tablespoons
- Warm milk – 1 cup
- Egg – 1 (for the dough)
- Egg (for egg wash) – 1 (beaten)
- Sesame seeds (optional for topping)
Each ingredient serves a purpose. Flour gives structure, yeast helps the dough rise, and butter adds richness. The warm milk creates a soft texture, and the egg enhances flavor and tenderness.
Equipment Needed
To make perfect burger buns, having the right equipment makes the process easier, but you can also work with basic kitchen tools.
Essential Tools:
- Mixing bowls
- Measuring cups and spoons
- Dough scraper or spatula
- Stand mixer (optional)
- Baking tray
- Parchment paper
- Oven
Don’t have a stand mixer? No worries! You can knead the dough by hand—just be prepared to work those arms a bit!
Preparation Steps
Before diving into the recipe, take a moment to prepare your workspace. A clutter-free kitchen makes baking more enjoyable and efficient. Start by:
- Measuring out all your ingredients. This ensures you don’t forget anything midway.
- Lining a baking tray with parchment paper to save time later.
- Preheating the oven when the time comes, so it’s at the perfect temperature.
Now that you’re prepped and ready, let’s begin!
Step 1: Activate the Yeast
To create fluffy burger buns, you need to activate the yeast properly. Here’s how:
- In a small bowl, combine ¼ cup of warm milk (around 110°F) with the sugar and yeast. Stir gently to dissolve.
- Let the mixture sit for 5–10 minutes until it becomes foamy. This means the yeast is alive and ready to do its job.
If your yeast doesn’t foam up, the water might have been too hot (which kills the yeast) or too cold (which doesn’t activate it). Try again with the right temperature.
Step 2: Mix Dry and Wet Ingredients
Now that the yeast is activated, it’s time to combine everything.
- In a large mixing bowl, whisk together the flour and salt.
- In another bowl, mix the remaining warm milk, melted butter, and one beaten egg.
- Slowly add the wet ingredients and activated yeast to the dry ingredients. Stir until a dough starts to form.
If the dough feels too sticky, add a little more flour, but be careful not to overdo it—too much flour can make the buns dense.
Step 3: Knead the Dough
Kneading helps develop gluten, which gives your buns structure and elasticity.
- Transfer the dough to a floured surface and knead for about 8–10 minutes. If using a stand mixer, knead on medium speed for 5 minutes.
- The dough should be smooth, elastic, and slightly tacky to the touch.
To check if the dough is ready, press a finger into it. If it springs back slowly, you’re good to go!
Step 4: First Rise (Proofing)
This step allows the dough to double in size and develop flavor.
- Place the dough in a lightly oiled bowl, cover it with a clean kitchen towel, and let it rise in a warm spot for 1 to 2 hours.
- The dough is ready when it has doubled in size.
If your kitchen is cold, you can proof the dough in a turned-off oven with the light on to create a warm environment.
Step 5: Shape the Buns
Once the dough has risen, it’s time to shape your buns.
- Punch down the dough to release excess air.
- Divide it into 8–10 equal portions. Shape each portion into a ball by tucking the edges underneath and rolling it between your palms.
- Place the shaped buns on a parchment-lined baking tray, leaving space for them to expand.
Step 6: Second Proofing
Shaping the dough is just the beginning. To achieve the perfect texture, a second proofing is crucial.
- Cover the tray with a clean towel or plastic wrap to prevent the buns from drying out.
- Allow the buns to rise again for about 30–45 minutes until they’ve puffed up.
During this stage, the buns will expand and become light and airy. Avoid over-proofing, as this can cause the buns to collapse in the oven.
Step 7: Prepare for Baking
Now it’s time to get those buns ready for the oven!
- Preheat your oven to 375°F (190°C).
- Beat an egg and lightly brush it over the top of each bun. This egg wash gives the buns a shiny, golden crust.
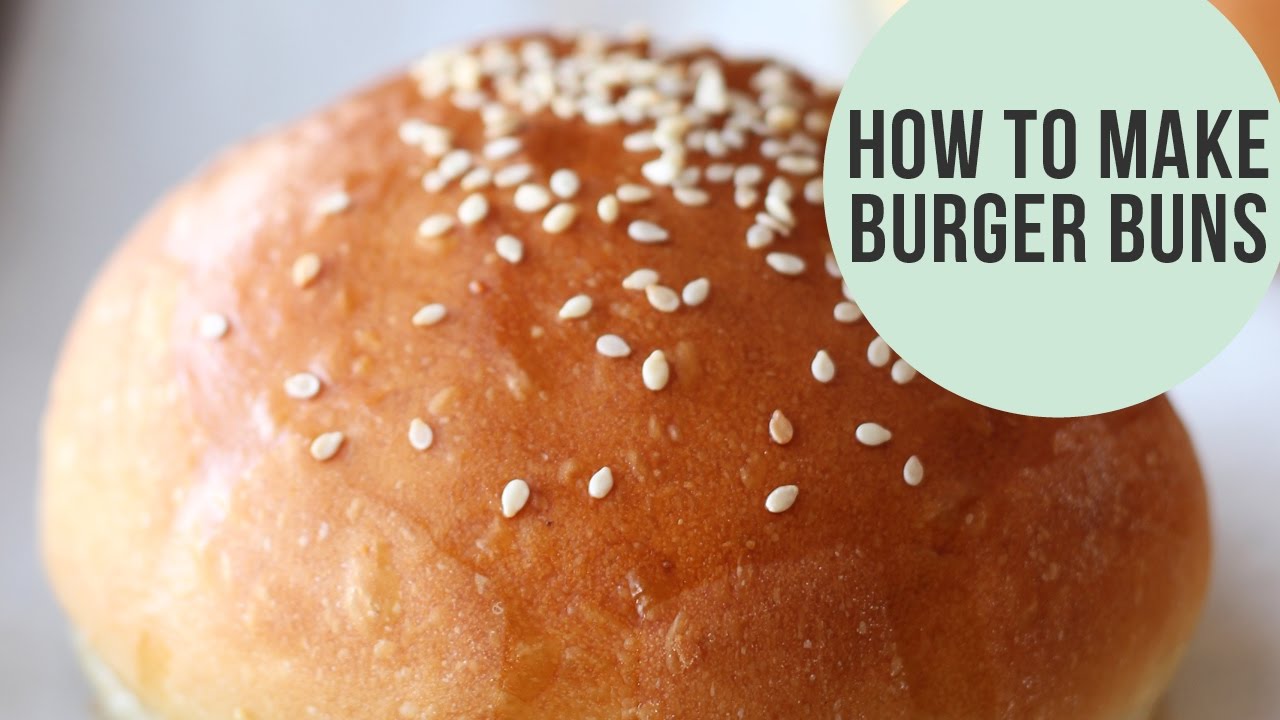
- If desired, sprinkle sesame seeds on top for added flavor and texture.
The egg wash not only makes the buns visually appealing but also helps hold any toppings like sesame or poppy seeds in place.
Step 8: Bake the Buns
Baking is where all your hard work pays off.
- Place the tray in the preheated oven and bake for 15–18 minutes, or until the buns are golden brown.
- Keep an eye on them to avoid overbaking. You can tap the top of a bun—if it sounds hollow, they’re done.
For even baking, rotate the tray halfway through if your oven has uneven heat distribution.
Step 9: Cool the Buns
Resist the urge to dig in immediately! Cooling is essential for perfect texture.
- Remove the buns from the oven and transfer them to a wire rack.
- Let them cool for at least 10–15 minutes.
Cooling allows the interior of the buns to set, preventing them from becoming overly dense when sliced.
Tips for Perfect Burger Buns
Want to take your burger buns to the next level? Here are a few extra tips:
- Don’t rush the process: Allowing sufficient time for both rises is crucial for fluffy buns.
- Use bread flour: While all-purpose flour works well, bread flour can give buns a chewier texture due to its higher protein content.
- Avoid too much flour: Adding excessive flour can make the dough tough and dry. The dough should be slightly sticky but manageable.
- Create steam in the oven: Placing a small dish of water in the oven during baking can help keep the buns soft.
Serving Suggestions
Now that your buns are ready, it’s time to put them to good use!
Here are some serving ideas:
- Classic cheeseburger: Add a beef patty, cheddar cheese, lettuce, tomato, onions, and your favorite condiments.
- Chicken sandwich: Pair with grilled or fried chicken, pickles, and a slather of mayo.
- Veggie burger: Load up your buns with a plant-based patty, avocado, and roasted veggies.
These buns can also be used for breakfast sandwiches, pulled pork sliders, or even as dinner rolls!
Storing and Reheating Homemade Buns
If you have leftover buns, don’t worry—they store and reheat well!
Storing:
- Place buns in an airtight container or plastic bag.
- Store at room temperature for up to 3 days.
Freezing:
- Wrap each bun tightly in plastic wrap and place them in a freezer bag.
- Freeze for up to 3 months.
Reheating:
- To reheat, lightly toast the buns in an oven at 350°F (175°C) for 5–7 minutes or microwave them for 20–30 seconds.
FAQs about Burger Bun Recipe
1. What ingredients do I need for homemade burger buns?
To make your own burger buns, you’ll typically need basic ingredients such as all-purpose flour, yeast, sugar, salt, water, milk, and butter. Some recipes might also call for eggs for richness and a golden color.
2. How long does it take to make burger buns?
The total time to make homemade burger buns is about 2 to 3 hours, which includes the time for the dough to rise. The actual hands-on preparation time is around 15 to 20 minutes.
3. Can I make burger buns without yeast?
Yes, you can make yeast-free burger buns using baking powder as a leavening agent. The texture will be slightly different but still delicious and suitable for burgers.
4. How can I ensure my burger buns are soft and fluffy?
To achieve soft and fluffy burger buns, make sure to knead the dough adequately to develop the gluten. Additionally, keeping the dough in a warm, draft-free environment to rise properly is crucial.
5. Are there any variations to the basic burger bun recipe?
Absolutely! You can add herbs, cheeses, or seeds like sesame or poppy to the dough or on top before baking to add extra flavor and texture.
6. How do I store homemade burger buns?
Homemade burger buns can be stored in an airtight container at room temperature for up to 3 days. For longer storage, you can freeze them for up to 3 months.
7. Can burger buns be made vegan?
Yes, to make vegan burger buns, substitute the milk with a plant-based alternative like almond or soy milk, and use oil instead of butter. Ensure any added ingredients like sugar are vegan-friendly.
8. What’s the best way to reheat burger buns?
Burger buns can be reheated in an oven preheated to 350°F for about 5-10 minutes or in a toaster for a quick warm-up.
Conclusion
Making homemade burger buns may seem intimidating at first, but with this step-by-step guide, you’ll be a pro in no time. The result is well worth the effort: soft, fluffy buns that are far superior to store-bought versions. Your burgers will taste fresher, your sandwiches more satisfying, and your family and friends will be impressed.
So, what are you waiting for? Give this recipe a try and transform your next burger night!


