Beef Gravy Recipe: Beef gravy is the ultimate comfort food addition. It can elevate any meal with its rich, savory flavor, especially when served over mashed potatoes, roasted meats, or even biscuits.
Whether you’re cooking for a family dinner or a holiday feast, mastering beef gravy can take your cooking skills to the next level.
This step-by-step guide will walk you through creating a perfect, velvety gravy every time.
Ingredients Required for Beef Gravy
To make delicious beef gravy, you’ll need high-quality ingredients. The right balance of flavors will make all the difference!
Here’s what you’ll need:
- Beef stock or broth (2 to 3 cups) – Homemade or store-bought
- Butter (4 tablespoons) – Adds richness
- All-purpose flour (4 tablespoons) – For thickening
- Salt and pepper – To taste
- Garlic powder (optional)
- Onion powder (optional)
- Worcestershire sauce (1 teaspoon) – Optional but adds depth
- Fresh herbs (like thyme or parsley) – Optional for garnishing
Having high-quality stock and fresh ingredients will result in better taste and texture.
Tools and Utensils Needed
Before starting, gather all your tools to ensure a smooth cooking process.
Essential tools:
- Medium-sized saucepan
- Whisk – For stirring and blending the roux and stock
- Wooden spoon – For stirring during simmering
- Ladle – For serving the gravy
Optional tools:
- Fine-mesh strainer – For a smooth, lump-free finish
- Measuring cups and spoons
Preparing the Ingredients
Preparation is key to stress-free cooking. Here’s how to prepare everything before starting:
- Beef Stock: If you’re using store-bought stock, taste it beforehand to check the saltiness. If you prefer homemade stock, simmer beef bones, carrots, celery, onions, and herbs for several hours to extract deep flavors.
- Butter and Flour: Have equal portions of butter and flour ready for making the roux.
- Spices and Seasonings: Measure your salt, pepper, and any optional herbs or spices in advance.
How to Make Beef Gravy – Step by Step Guide
Step 1: Making Beef Stock (Optional but Recommended)
Making your own beef stock from scratch will give your gravy a more robust flavor.
To make stock:
- Add beef bones, carrots, celery, onions, and herbs to a large pot.
- Cover with water and bring to a boil.
- Reduce the heat to a simmer and cook for 4–6 hours.
- Strain the stock and discard the solids. Let the stock cool.
This step is optional, but it’s worth it for a richer, more complex flavor.
Step 2: Creating the Roux (Thickening Base)
A roux is the foundation of any great gravy. It’s made by cooking flour and fat together to create a thickening agent.
Here’s how to make the perfect roux:
- Melt 4 tablespoons of butter in a saucepan over medium heat.
- Gradually whisk in 4 tablespoons of all-purpose flour.
- Stir continuously until the mixture turns a golden-brown color (3–5 minutes). This will give your gravy a deep, nutty flavor.
Be careful not to burn the roux! If it gets too dark, start over to avoid a bitter taste.
Step 3: Adding the Beef Stock to the Roux
Once your roux is ready, it’s time to combine it with beef stock to build the base of your gravy.
Follow these steps:
- Gradually pour the beef stock into the roux while whisking constantly.
- Continue whisking until the mixture is smooth and free of lumps.
- Increase the heat to medium-high and bring the gravy to a gentle boil.
The key to a silky texture is to keep stirring as you add the stock. This prevents clumping and ensures even thickening.
Step 4: Seasoning the Gravy
Now that your gravy is coming together, it’s time to enhance the flavor with seasonings.
Here’s what to do:
- Add salt and pepper to taste. Start with small amounts and build up.
- Sprinkle in garlic powder and onion powder, if desired.
- For extra depth, add a splash of Worcestershire sauce.
- Simmer the gravy for 5–10 minutes to let the flavors meld.
Taste your gravy as you go and adjust the seasonings as needed. Every batch can vary depending on the stock you’re using!
Step 5: Cooking and Simmering the Gravy
Letting the gravy simmer is crucial for both flavor development and texture.
Steps to follow:
- Once the gravy is seasoned, lower the heat to a gentle simmer.
- Stir occasionally to prevent the bottom from burning.
- Simmer for about 10–15 minutes until the gravy thickens to your desired consistency.
If your gravy is too thin, continue simmering. If it’s too thick, add a splash of stock or water.
Step 6: Straining the Gravy (Optional)
If you prefer a perfectly smooth and refined gravy, straining can remove any lumps or pieces of seasoning that didn’t dissolve.
Here’s how to strain your gravy:
- Place a fine-mesh strainer over a bowl or another pot.
- Carefully pour the gravy through the strainer.
- Use a spoon to press any remaining liquid through the mesh.
Straining is optional, especially if you enjoy a slightly rustic texture. However, for special occasions or presentations, this step can enhance the visual appeal of your gravy.
Step 7: Taste Test and Final Adjustments
Before serving, always taste your gravy and adjust the flavors if necessary. This step ensures that your gravy is balanced and seasoned to perfection.
Tips for final adjustments:
- Salt and Pepper: Add a pinch at a time if it needs more seasoning.
- Acidity: If your gravy tastes too rich or heavy, add a dash of Worcestershire sauce or lemon juice to brighten the flavors.
- Thickness: If the gravy is too thick, stir in a small amount of beef stock or water. If too thin, simmer it longer.
Don’t skip this step—everyone’s palate is different, and a quick taste test can make all the difference.
Tips for Perfect Beef Gravy Every Time
Even experienced cooks can run into trouble with gravy. Use these tips to ensure success every time:
- Don’t rush the roux: Cooking the roux slowly is key to achieving deep flavor and smooth consistency.
- Whisk constantly: When adding stock to the roux, whisking prevents lumps from forming.
- Simmer for flavor: Allow time for the gravy to simmer and develop richer taste.
- Avoid over-seasoning: It’s easier to add more salt than to fix an overly salty gravy, so add seasonings gradually.
- Use homemade stock if possible: It’s the best way to create a truly savory, restaurant-quality gravy.
Serving Suggestions for Beef Gravy
Beef gravy pairs wonderfully with a variety of hearty dishes. Here are some serving ideas:
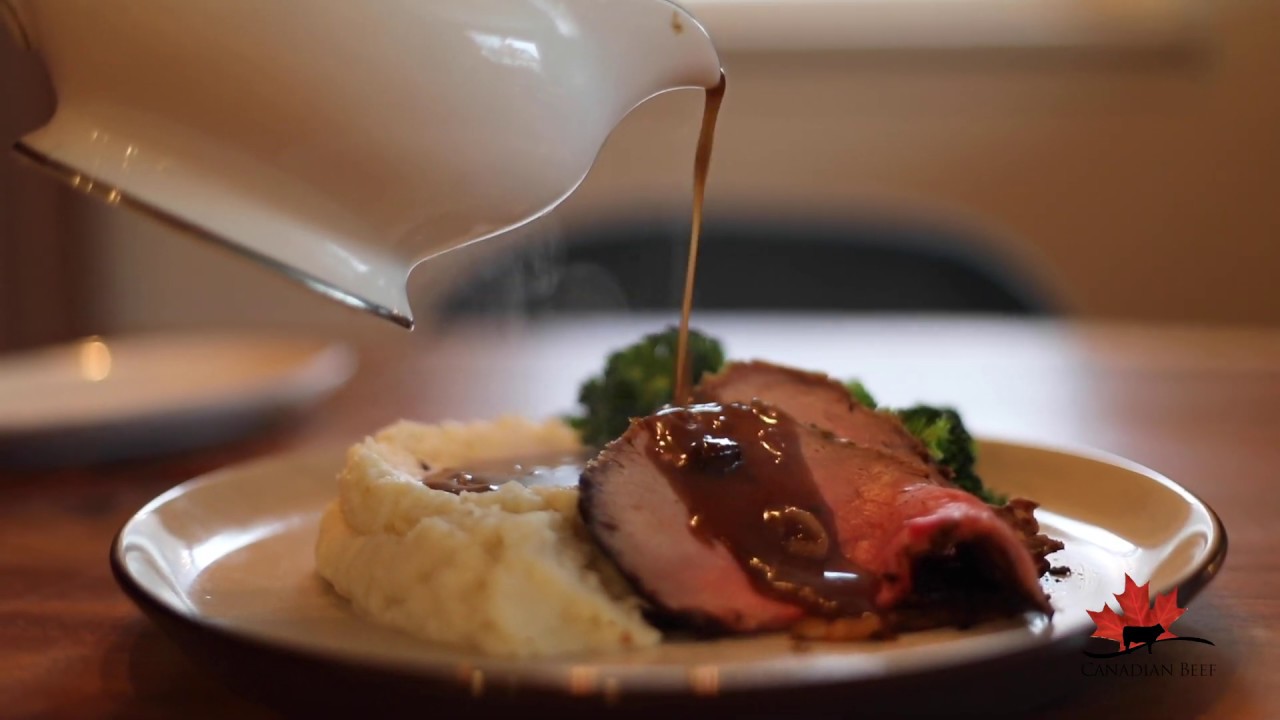
- Mashed Potatoes: A classic combination—pour the gravy generously over creamy mashed potatoes for ultimate comfort food.
- Roast Beef: Gravy enhances the flavor of roasted beef or steak and adds moisture to every bite.
- Meatloaf: Elevate a simple meatloaf by serving it with rich beef gravy.
- Biscuits: Southern-style biscuits and gravy get a delicious twist with beef gravy.
- Yorkshire Pudding: This traditional British side dish soaks up gravy beautifully, making it a perfect match for a roast dinner.
You can also get creative by drizzling gravy over rice, pasta, or even fries for a poutine-inspired meal!
Storing and Reheating Leftover Gravy
Gravy is easy to store and reheat, but following the proper methods ensures it maintains its flavor and texture.
Storage Tips:
- Let the gravy cool completely before transferring it to an airtight container.
- Store in the refrigerator for up to 3–4 days. For longer storage, freeze the gravy in portions for up to 3 months.
Reheating Instructions:
- Reheat the gravy on the stovetop over medium-low heat.
- Stir constantly to prevent the gravy from sticking or separating.
- If the gravy is too thick after refrigeration, add a little beef stock or water to thin it out.
Avoid microwaving if possible, as it can cause uneven heating and separation.
FAQs about Beef Gravy Recipe
1. What are the basic ingredients needed for beef gravy?
The essential ingredients for beef gravy typically include beef drippings, flour, and broth. You may also add salt, pepper, and other seasonings like garlic powder or onion powder for enhanced flavor.
2. Can I make beef gravy without beef drippings?
Yes, you can make beef gravy without drippings by using butter or oil as a substitute. Beef broth or stock will also help maintain a rich flavor.
3. How do I thicken beef gravy?
To thicken beef gravy, use a mixture of flour or cornstarch with a little cold water to make a slurry. Gradually stir this into your simmering gravy until it reaches the desired thickness.
4. Is beef gravy gluten-free?
Traditional beef gravy is not gluten-free as it uses flour as a thickener. However, you can make it gluten-free by substituting the flour with cornstarch or another gluten-free flour.
5. How long can I store homemade beef gravy?
Homemade beef gravy can be stored in the refrigerator for up to four days. Ensure it is cooled properly and stored in an airtight container. It can also be frozen for up to three months.
6. Can beef gravy be reheated?
Yes, beef gravy can be reheated. Gently reheat it on the stove over low heat, stirring frequently to prevent burning. If the gravy has thickened too much, you can thin it by adding a little bit of broth or water.
7. What are some tips for making the best beef gravy?
For the best beef gravy, use fresh broth and season it well. Simmer the gravy to develop the flavors and remember to strain it if you prefer a smoother texture. Adjust the thickness according to your preference with a flour or cornstarch slurry.
Conclusion
Making beef gravy from scratch is simpler than you might think, and the results are well worth the effort. By following this step-by-step guide, you’ll be able to create rich, flavorful gravy that takes any meal to the next level. Whether served over mashed potatoes, roast beef, or biscuits, your homemade beef gravy is sure to impress!


